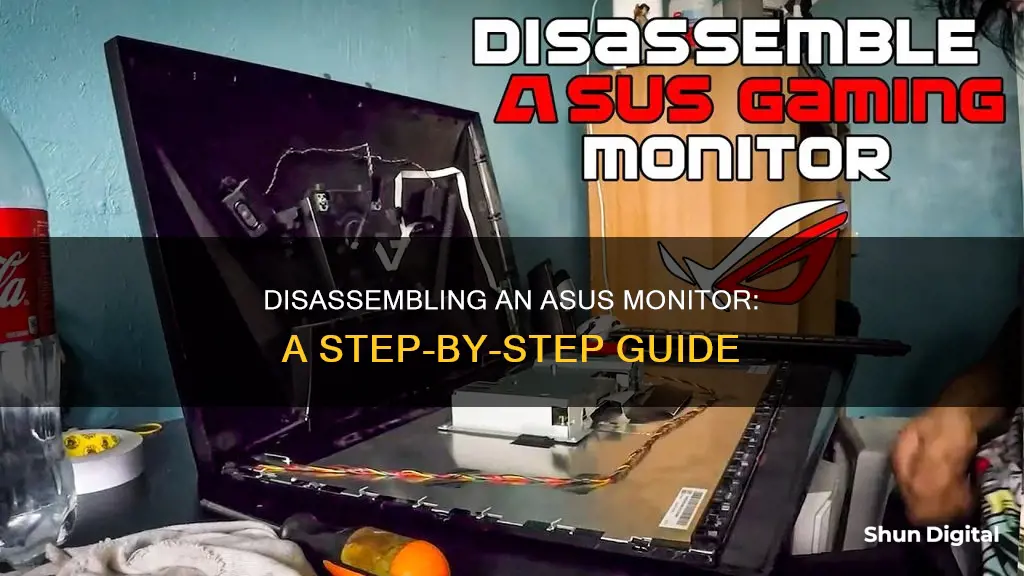
If you need to disassemble your Asus monitor, it's important to proceed with caution. Before you begin, lay your monitor face down on a smooth, clean surface. Depending on your monitor model, you may need to remove rubber covers to access the screws holding the monitor stand in place. Be sure to keep track of all screws and follow any available guides or videos specific to your model.
| Characteristics | Values |
|---|---|
| Monitor model | ASUS VZ series |
| Stand assembly | Place the monitor flat on a soft cloth, attach rubber pads, connect the base to the stand, and fasten with screws |
| Stand disassembly | Remove the stand cover, loosen the screws, remove the stand |
| Display disassembly | Pry out plastic covers with a stiff pointed tool, remove screws securing the monitor stand, pull up on the bezel, lift the LCD out of the rear case |
| Faceplate removal | Use a spudger to slowly pry up on the faceplate, starting at a corner and working around the outside edge |
| Main board removal | Remove screws holding the main power board, use a spudger to gently pry up the board, lift up on grey tape holding wires, disconnect wire harness if necessary |
What You'll Learn

Removing the monitor stand
To remove the monitor stand from an ASUS monitor, you will need to follow a few careful steps to ensure you do not damage the device. Firstly, lay the monitor face down on a smooth, clean, and preferably soft surface, such as a cloth. This will protect the screen from scratches or other damage during the disassembly process.
Next, you will need to remove the rubber covers that hide the screws securing the monitor stand in place. Use a stiff, pointed tool, like a metal spudger, to carefully pry out these covers. Once they are removed, you can then unscrew the screws holding the stand in place. There should be four 13.4 mm Philips #1 screws, but this may vary depending on the model.
With the screws removed, you can now carefully remove the stand from the display. Be gentle and take care not to force it, as there may be additional plastic clips or tabs holding the stand in place. Once you have detached the stand, you can then proceed with further disassembly, or you can stop here if your task is complete.
If you wish to continue, the next step is to remove the display bezel, which is typically held in place by plastic clips. Again, be very careful not to use any tools that could damage the LCD display. It is recommended to use your fingers and a thin cloth to protect your fingertips and the screen. Grip the bezel through the cloth and lift straight up, working your way around the display. Each side should pop free, and then you can gently twist the bezel to free the corners. With the bezel removed, you will now have access to the internal components of the monitor.
Monitoring Electricity Usage: Room-by-Room Power Insights
You may want to see also

Detaching the faceplate
To detach the faceplate of your Asus monitor, you will need to proceed with caution to avoid damaging the display or the plastic clips holding the faceplate in place. First, lay the monitor face down on a smooth, clean surface. This will prevent any scratches or damage to the screen during the disassembly process.
Next, identify the plastic covers that are hiding the screws at the rear of the monitor. Use a stiff, pointed tool, such as a metal spudger, to carefully pry out these plastic covers. Once removed, you can then unscrew the screws securing the monitor stand. After unscrewing, remove the stand from the display.
Now, you can begin to detach the faceplate. The display bezel is held to the rear case by plastic clips. Instead of using prying tools that could damage the LCD, it is recommended to use your fingers for this step. Cover your fingertips with a thin cloth to protect the screen and prevent smudging. Grip the side of the bezel through the cloth and lift straight up. A few clips in the centre will pop free. Be careful to pull straight up and not at an angle, as pushing down on the display could cause damage. Repeat this process for the remaining sides of the bezel, moving in a clockwise or anticlockwise direction.
Once you have freed the centres of all four sides, you will need to move on to the corners. Each corner is secured by two large clips that cannot be released by simply pulling straight up. Using a thin, stiff prying device, such as a Jimmy, press against the bottom clip in the lower-left corner (usually located beneath the HDMI logo). While pressing the clip in, pull up on the lower edge of the bezel. The entire corner should pop free. Repeat this process for the remaining corners if needed.
Finally, gently twist the bezel to free any remaining corners. Now, you can carefully lift the LCD out of the rear case. Be cautious, as the row of adjustment buttons will come out with the display and are attached by a thin ribbon cable. Ensure you do not damage this cable during the removal process.
Understanding Power Usage: Monitor Your Energy Consumption
You may want to see also

Unclipping the bezel
Firstly, lay the monitor face down on a smooth, clean surface. This will give you access to the rear of the monitor, where the bezel is attached. Cover the monitor with a thin cloth to protect the screen from any damage or smudges.
Next, you will need to remove the monitor stand. This is usually done by unscrewing a few screws. Be sure to keep track of the screws and any other small parts as you work. With the stand removed, you may also need to unscrew an additional screw at the bottom of the monitor, which may be covered by a warranty sticker.
Now, you can begin the process of unclipping the bezel. The bezel is typically held in place by plastic clips that can be released by gently pulling straight up on the bezel. It is important to use your fingers for this step, as using a prying tool could damage the LCD. Start by gripping the centre of one of the long edges of the bezel through the cloth and lifting straight up. You should hear a few clips pop free. Repeat this process for the other long edge, and then move on to the shorter sides.
Once you have freed the centres of all four sides, it's time to tackle the corners. The corners are usually secured by larger clips that cannot be released by simply pulling straight up. Using a thin, stiff prying device, press against the bottom clip in the lower left corner (usually found beneath the HDMI logo) while simultaneously pulling up on the lower edge of the bezel. The entire corner should pop free with a gentle motion. Repeat this process for the remaining corners if needed.
With all the clips released, you should now be able to gently twist and lift the bezel away from the LCD, taking care not to touch any other components.
Monitoring Bandwidth Usage: PRTG's Per-IP Address Insights
You may want to see also

Lifting the LCD
- Place a thin cloth over one of the long edges of the display. This will protect your screen from smudges and scratches.
- Grip the side of the bezel through the cloth and lift it straight up. You should hear the sound of plastic clips popping free. Be careful to only pull straight up and not to push down on the display, as this could damage the LCD.
- Repeat this procedure on the opposite side, then move to the final side and grip the centre of the bezel, lifting it away from the rear case.
- Each corner is secured by two large clips that cannot be freed by simply pulling straight up. Using a thin, stiff prying device, like a Jimmy, press in against the bottom clip in the lower-left corner (beneath the HDMI logo).
- While pressing the clip in, pull up on the lower edge of the bezel. The entire corner should pop free.
- Once one corner is freed, gently twist the bezel to free the remaining corners. If any corners are stubborn, repeat the previous step.
- Now you can lift the LCD out of the rear case. Be careful not to damage the thin ribbon cable attached to the row of adjustment buttons.
Monitoring Marijuana Usage Across America
You may want to see also

Disassembling the stand/base
To disassemble the stand/base of your ASUS monitor, you will need to follow a few careful steps. Start by placing the monitor face down on a smooth, clean, and preferably soft surface, such as a cloth on a desk or table. This will protect the screen from scratches or other damage during the disassembly process.
Next, you will need to remove the stand cover. This will expose the screws that secure the stand to the monitor. Depending on your model, there may be rubber covers or pads hiding these screws, so be sure to remove or adjust those as needed. Once the screws are visible, use a suitable tool to loosen and remove them.
With the screws removed, you can now detach the stand from the display. Be careful not to force or pry the stand off, as this could damage the display or its housing. Gently pull or wiggle the stand until it comes free.
Now that the stand is removed, you have completed the disassembly process for the stand/base of your ASUS monitor. If you are preparing the monitor for wall-mounting, ensure you have the appropriate VESA wall-mount kit and brackets to proceed with the installation.
Monitoring NVIDIA GPU Memory Usage: A Comprehensive Guide
You may want to see also


