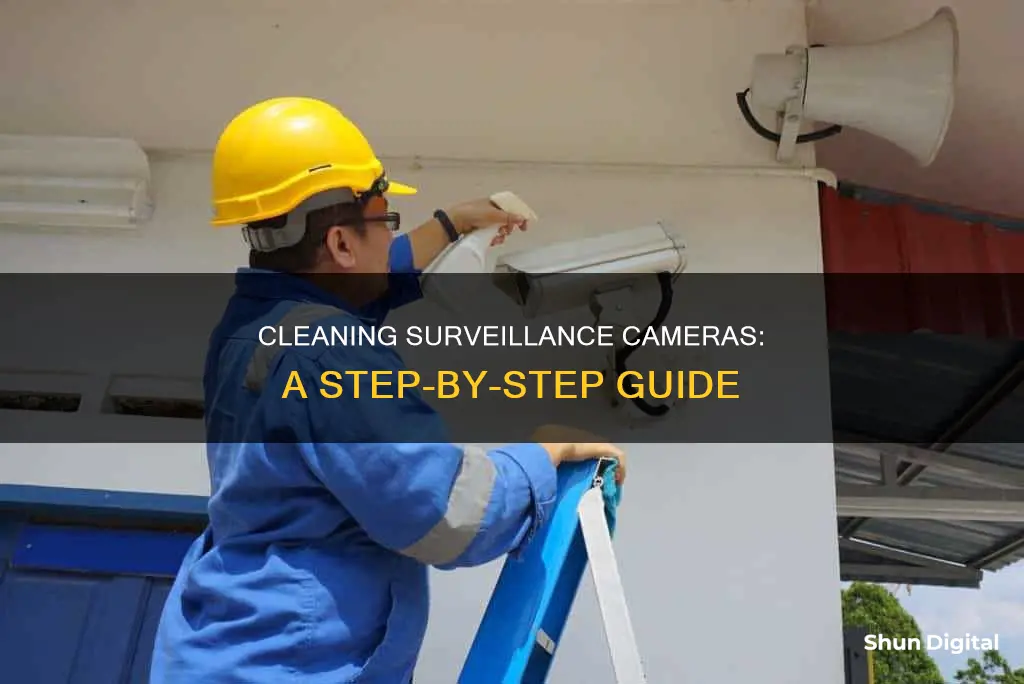
Keeping your surveillance cameras clean is essential for maintaining optimal video quality and ensuring the effectiveness of your security system. Over time, dirt, dust, bird droppings, and other grime can accumulate on camera lenses and domes, making it difficult to see through them. This can result in blurry or grainy footage, impaired motion detection, and even lens flares that white out the video. To prevent this, it is recommended to clean your surveillance cameras at least once a year, if not more frequently depending on the environment and weather conditions.
The process of cleaning a surveillance camera involves carefully removing any loose dirt or debris with a soft brush or compressed air, followed by gently wiping the lens with a microfiber cloth and a specialised lens cleaning solution. It is important to avoid using harsh chemicals, abrasive materials, or paper towels as these can damage the lens coatings and leave scratches. Additionally, it is advised to unplug corded cameras and turn off wireless cameras before cleaning to avoid any damage.
| Characteristics | Values |
|---|---|
| Frequency of cleaning | Every three to four months, or at least once a year |
| Tools | Microfiber cloth, water, dish soap, air puffer, ladder, lens cleaning solution, soft brush, compressed air, blower brush, security camera cleaning pole |
| Process | Unplug the camera, clean the lens and surrounding areas with a microfiber cloth, dry the lens, check the cable for damage |
What You'll Learn

Use a microfiber cloth
When it comes to cleaning a surveillance camera, a microfiber cloth is an essential tool. This type of cloth is designed to effectively remove dust, dirt, and debris from the camera's lens and housing without causing any scratches or damage. The soft and gentle material of the microfiber cloth makes it ideal for this task.
To use a microfiber cloth for cleaning your surveillance camera, follow these steps:
- Choose a clean, lint-free microfiber cloth. Ensure that it is free from any dust, debris, or lint that could potentially scratch the lens.
- If your camera has a dome or bullet design, gently remove any loose dirt or debris from the outside using a soft brush. This step is especially important if there is a significant build-up of dirt or debris.
- Apply a small amount of lens cleaning solution to the microfiber cloth. The solution is specifically designed to clean camera lenses without causing any damage to the lens or its coatings.
- Gently wipe the lens with the cloth using a circular motion, starting from the center and working your way outwards. Be careful not to apply too much pressure, as this can scratch the lens.
- Use another dry microfiber cloth to dry off any remaining moisture from the lens surface. Again, be gentle and avoid rubbing too hard to prevent scratches.
It is important to note that before starting the cleaning process, you should turn off the camera and unplug it from the power source to avoid any accidental damage. Additionally, if your camera is mounted high up, you may need to use a security camera cleaning pole or an extension wand to safely reach the lens.
By following these steps and using a microfiber cloth, you can effectively clean your surveillance camera, ensuring clear and high-quality images while maintaining the longevity of your equipment.
The Lasting Legacy of the Pd16 Plenax Folding Camera
You may want to see also

Avoid harsh chemicals
When cleaning your surveillance camera, it is important to avoid using harsh chemicals. These can damage the lens coating and leave streaks on the lens. Instead, use a lens cleaning solution specifically designed for optical surfaces. This will effectively remove dust, dirt, and debris without causing any damage to the camera.
It is also recommended to use a microfiber cloth when cleaning the camera lens. Microfiber cloths are gentle and effective, reducing the risk of scratches on the lens. They are also washable and can be used multiple times. Ensure that the cloth is clean and free from lint or debris before using it to clean the camera.
In addition, compressed air can be useful for removing loose dust and particles from the camera lens and surrounding areas. Hold the can upright and blow away the dust, starting from the center and working outwards. This method avoids direct contact with the camera's surfaces while effectively removing debris.
If your camera is mounted high up, consider using a security camera cleaning pole or an extension wand to safely reach the lens. Alternatively, you can attach a CameraWand tool-head to any threaded extension pole or broom handle to clean the camera safely from the ground.
By following these tips and using the appropriate tools and cleaning solutions, you can effectively clean your surveillance camera while avoiding harsh chemicals. This will help maintain the camera's performance and ensure clear and reliable footage.
Lithium Batteries: Kodak EasyShare Camera Power Source
You may want to see also

Don't use abrasive materials
When cleaning a surveillance camera, it is important to avoid using abrasive materials. Abrasive materials are characterised by high hardness, sharp edges, and good cutting ability. They can scratch the lens and damage the camera's coatings.
Surveillance cameras are delicate equipment and require careful handling. The use of abrasive materials can cause permanent damage to the lens surface and impair the camera's functionality. Scratches on the lens can obstruct the camera's view and degrade the quality of the footage.
Instead of abrasive materials, it is recommended to use soft brushes, microfiber cloths, and specialised lens cleaning solutions. These tools effectively remove dust, dirt, and debris without causing any harm to the camera. The lens cleaning solution helps to clean and maintain the surface of the camera lens, while the microfiber cloth gently wipes away any residue without leaving scratches or streaks.
By avoiding abrasive materials and adopting gentle cleaning methods, you can ensure the longevity and optimal performance of your surveillance camera.
Shipping Camera Batteries: USPS Guidelines and Tips
You may want to see also

Compressed air for dust
Using compressed air to clean a surveillance camera is not recommended, as it can cause more harm than good. The air in these cans comes out at great force and may damage the camera's sensor. The propellant liquids used in compressed air can also settle on the sensor, making the problem worse.
If you do decide to use compressed air to clean your surveillance camera, there are some things you should keep in mind to minimize the risk of damage. Firstly, always hold the can of compressed air upright with the nozzle at the top. Blow enough air to clear the nozzle and tube, and then, without tilting the can, gently blow air onto the camera. Even then, there is still a risk of propellant escaping and finding its way onto the sensor.
A safer alternative to compressed air is to use a bulb syringe or a manual air blower to remove dust and dirt from the camera. These tools allow you to blow air onto the camera without the risk of leaving an oily residue. It is important to hold the blower above the camera and not to put the tip inside the camera to avoid touching the sensor.
Night Mode Camera Traps: Keeping Sensors Alert After Dark
You may want to see also

Clean at least annually
Surveillance cameras should be cleaned at least once a year. This is to prevent a build-up of dust, pollen, spider webs, bird droppings, and other grime that can obstruct the view and compromise image quality.
Step-by-step Guide to Cleaning a Dome Camera
- Prepare the tools: You will need a microfiber cloth, a lens cleaning solution, compressed air (or a vacuum cleaner), and a blower brush (optional). It is also useful to have a security camera cleaning pole if the camera is mounted high up.
- Turn off the camera: Ensure the camera is unplugged from its power source.
- Clean the camera and lens: Use a soft brush to gently sweep away any dirt or debris from the outside of the camera. Then, use canned air to blow away any dust or debris from the lens and surrounding areas.
- Apply the microfiber cloth: Put a few drops of lens cleaning solution onto the microfiber cloth and gently wipe the lens using a circular motion, starting from the center and working outwards.
- Dry the lens: Use another dry microfiber cloth to remove any remaining moisture from the lens surface.
- Reconnect the camera: Securely connect the cables and turn the power source back on.
Tips
- Do not use harsh chemicals or abrasive materials, as these can damage the lens coating or scratch the lens surface.
- Avoid touching the lens with your fingers, as this can leave oil, fingerprints, or smudges.
- Do not apply too much pressure when cleaning the lens, as this can cause scratches.
- Do not clean the camera in extreme weather conditions, as this can damage the camera or put you at risk of injury.
- Do not use paper towels, as these can act like sandpaper and scratch the lens.
Surveillance Cameras in Massachusetts: What's the Law?
You may want to see also
Frequently asked questions
It is recommended to clean your security camera lens at least once every three to four months. However, if your camera is exposed to harsh weather conditions or you notice a lot of dirt or debris, you may need to clean it more frequently.
You will need a soft brush, compressed air, and a microfiber cloth. You can also use a small amount of lens cleaning solution or water on the cloth to remove stubborn dirt.
First, turn off the camera and unplug it from the power source. Use a soft brush to gently remove any loose dirt or debris from the lens and camera housing. Then, apply a few drops of lens cleaning solution to a microfiber cloth and gently wipe the lens in a circular motion, starting from the centre and working outwards. Finally, dry the lens with a dry microfiber cloth.
Yes, avoid using harsh chemicals or abrasive materials such as paper towels or tissues, as these can damage the lens coating and scratch the surface. Do not blow directly onto the lens, as this can cause dust particles to become lodged inside the camera.
Yes, you can clean the camera lens while it's still mounted, but it is not recommended as it is more difficult to clean all areas of the lens. If you do so, use special tools such as a lens cleaning pole or extension wand to reach the lens properly, and always turn off the camera before cleaning.


