Adobe Camera Raw is a photo editing software that lets you import and enhance raw images. It is a self-contained Adobe plug-in built for professional photo editing and retouching. It is compatible with Photoshop, Lightroom Classic, Lightroom, Photoshop Elements, After Effects, and Bridge. Adobe Camera Raw offers sharpening effects, a robust healing brush, and basic and advanced colour correction. It is non-destructive, meaning that any adjustments made to the photo are saved as a sidecar XMP file, leaving the original image unmarred.
| Characteristics | Values |
|---|---|
| Release date | 2003 |
| Supported applications | Photoshop, Lightroom Classic, Lightroom, Photoshop Elements, After Effects, Bridge |
| Supported camera models | Canon, Casio, Contax, DJI, DxO, Epson, Fujifilm, Google, GoPro, Hasselblad, Huawei, Kodak, Konica Minolta, Leaf, Leica, LG, Mamiya, Motorola, Nikon, Nokia, OM Digital Solutions (formerly Olympus), OnePlus, Olympus, Panasonic, Parrot, Pentax, PhaseOne, Pixii, Ricoh, Samsung, Sigma, Skydio, Sony, Xiaomi, Yuneec, Zeiss |
| File types | Raw, JPEG, TIFF, DNG |
| Features | Sharpening effects, healing brush, colour correction, spot removal, presets, masking, red-eye removal |
| System requirements | GPU system requirements: see Considerations for GPU-accelerated features |
What You'll Learn
![]()
How to open images in Adobe Camera Raw
Adobe Camera Raw is a powerful image editing plugin that can be used to open and edit images in various formats, including raw files, JPEGs, and TIFFs. Here's a detailed guide on how to open images in Adobe Camera Raw:
Opening Images in Adobe Camera Raw:
There are several ways to open images in Adobe Camera Raw, depending on whether you're using Photoshop or Adobe Bridge:
Using Photoshop:
- Opening a RAW File: If you have RAW image files saved on your computer, open Photoshop and go to "File > Open". Select the RAW file you want to edit, and Adobe Camera Raw will automatically open as a new window. Here, you can adjust various aspects of your photo, such as exposure and tone. Once you're done, click "Open" to save the edits and open the image in Photoshop.
- Using the Camera Raw Filter: If you want to edit a JPEG or another type of image file in Camera Raw, open the image in Photoshop as a layer. Then, go to "Filter > Camera Raw Filter" to access the Camera Raw adjustments for that layer.
- Using Smart Objects: You can also use Camera Raw with Smart Objects in Photoshop. Duplicate the layer you want to work on and convert it into a Smart Object. Then, go to "Filter > Camera Raw Filter" to apply the Camera Raw adjustments. This method helps reduce the number of layers and file size.
Using Adobe Bridge:
Adobe Bridge is another way to open and edit images in Camera Raw:
- Double-Click Method: In Adobe Bridge, navigate to the folder containing your images. For RAW files, simply double-click on the thumbnail of the image you want to edit, and it will open in Camera Raw. For JPEG and TIFF files, double-clicking might open the image directly in Photoshop. In that case, close the image in Photoshop and return to Adobe Bridge. Then, click on the image thumbnail, go to the File menu, and choose "Open in Camera Raw."
- Keyboard Shortcut: In Adobe Bridge, click on the thumbnail of the image you want to edit (RAW, JPEG, or TIFF). Then, use the keyboard shortcut "Ctrl + R" (Windows) or "Cmd + R" (Mac) to open the image in Camera Raw.
- Open in Camera Raw Icon: Another quick way to open an image in Camera Raw from Adobe Bridge is by clicking the "Open in Camera Raw" icon at the top of the Bridge interface. This works for all three file types (RAW, JPEG, and TIFF).
- Right-Click Method: You can also right-click (Windows) or Control-click (Mac) on the thumbnail of the image and choose "Open in Camera Raw" from the menu.
Opening Multiple Files in Camera Raw:
You can open and edit multiple images simultaneously in Camera Raw using Adobe Bridge:
- In Bridge, open the folder containing the photos you want to edit.
- Hold down the "Shift" key and click on all the images you want to edit.
- Go to "File > Open in Camera Raw" to open the selected images in Camera Raw. You will see a film strip of thumbnail images along the bottom.
- To edit multiple images at once, select the photos by clicking on their thumbnails. Then, apply the same adjustments, and the changes will be reflected in all selected images.
Remember that Camera Raw was designed specifically for photographers and offers a simple and intuitive workflow. All edits are non-destructive, meaning you can always go back and edit or re-edit your images without permanently altering the original photograph.
Charging the Olympus SZ-14 Camera: A Step-by-Step Guide
You may want to see also
![]()
How to crop a photo with Camera Raw
To crop a photo with Camera Raw, follow these steps:
- Open the Camera Raw dialog box.
- Select the "Crop Tool" from the toolbar or press "C" on your keyboard.
- To constrain the initial crop area to a specific aspect ratio, hold down the mouse button while selecting the Crop Tool and choose the desired option from the menu.
- Drag in the preview image to draw the crop area box.
- Move, scale, or rotate the crop area by dragging the box or its handles.
- If you need to cancel the crop, press Esc with the Crop Tool active, or click and hold the Crop Tool button and choose "Clear Crop" from the menu.
- Once you are satisfied with the crop, press Enter (Windows) or Return (Mac OS) to apply the changes.
The cropped image will now fill the preview area, and the workflow options link under the preview will display the updated image size and dimensions.
Charging Cameras While Streaming: A Guide to Power Sources
You may want to see also
![]()
How to use spot removal in Camera Raw
The Spot Removal tool in Adobe Camera Raw has been renamed to Remove. The tool lets you repair a selected area of an image by either using generative AI or sampling from a different area of the same image.
To remove blemishes or spots, choose the Spot Removal tool (B) and zoom in on the area to be repaired. You can then press [ or ] to size the brush cursor. Do one of the following:
- Ctrl-Alt-drag/Cmd-Option-drag outward from the centre of a blemish to create and scale a target circle
- Click on a blemish; or if you want to control which area Camera Raw uses as the source, Cmd-drag/Ctrl-drag from the target area to the desired source area. When you release the mouse, a red dashed circle surrounds the target region and a green dashed circle surrounds a source area.
- Drag across a blemish to create a target region. When you release the mouse, a red pin and dashed border surround the target region and a green pin and dashed border surround a source region.
From the Type menu, choose Heal to blend source pixels into the texture and luminosity values of the target pixels, or Clone to copy the source pixels exactly without any healing.
You can also use the Visualize Spots feature to search for imperfections that may not be immediately visible. When you select the Visualize Spots checkbox, the image is inverted, and the outlines of the image's elements are visible. You can then use the Remove tool features (Remove, Heal, or Clone) to clean up the image further.
Mastering Camera Raw: Adjusting Clarity for Stunning Photos
You may want to see also
![]()
How to use presets in Camera Raw
Adobe Camera Raw (ACR) is a powerful photo editor that allows you to create and use presets to automate photo adjustments with a single click. This is especially useful if you need to process a lot of images.
To use presets in ACR, you will first need to install them. After downloading and unzipping the presets, follow these steps:
For Windows:
- Navigate to the following location: "C:\Users\UserName\AppData\Roaming\Adobe\CameraRaw\Settings".
- Go to the unzipped presets folder, usually named 'Photoshop - Adobe Camera Raw (ACR) Presets'.
- Select the desired preset folder(s) containing the XMP file(s) and copy them.
- Go back to the 'Settings' folder and paste the copied folder(s) inside.
For Mac:
- Open a new Finder window and go to "UserName > Library > Application Support > Adobe > Camera Raw > Settings".
- If the 'Library' folder is not visible, follow the steps in this Adobe article to access it: https://support.adobe.com/en_US/article/reveal-hidden-user-library-files-mac-os-10.html.
- Go to the unzipped presets folder and open the ACR presets folder.
- Select the desired preset folder(s) containing the XMP file(s) and copy them.
- Go back to the 'Settings' folder and paste the copied folder(s) inside.
Once the presets are installed, you can start using them in ACR. Open an image in ACR and follow these steps:
- Click on the "Presets" tab at the top of the interface.
- Choose the preset you want to use from the list of available options.
- Adjust any other settings as needed.
- Click "Save" to apply the preset to your image.
You can also apply presets to multiple photos at once in ACR. Simply select the images you want to edit, click on the "Presets" tab, and choose the desired preset.
Additionally, if you have presets created in Lightroom that you want to use in ACR, you can follow these steps:
- Open an image in the Develop module in Lightroom and apply the preset you want to use.
- Export the image as a DNG file to preserve the changes.
- Locate the image on your disk and open it with Photoshop.
- In ACR, click on the "Presets" tab and select "Create New Preset".
- Name your preset and select the options you want to include.
- The preset is now available in the Presets panel in ACR and can be applied to any image.
By utilising the power of presets in ACR, you can streamline your photo editing workflow and achieve consistent results with just a few clicks.
Charging Camera Battery Packs: A Step-by-Step Guide
You may want to see also
![]()
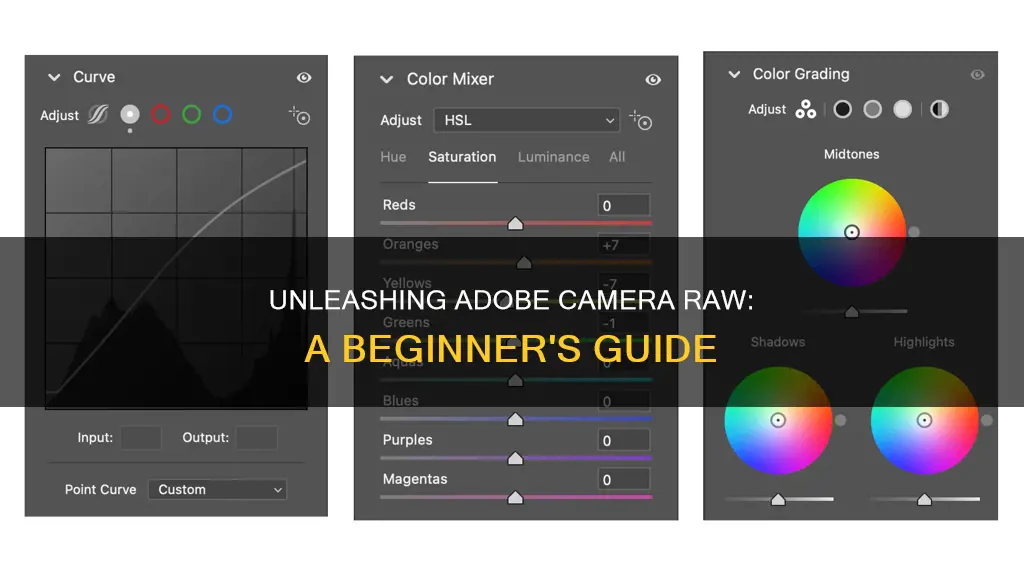
How to mask a photo in Camera Raw
Adobe Camera Raw's masking features allow you to make precise adjustments to specific areas of your photo, giving you maximum creative control. Here's a step-by-step guide on how to mask a photo using Camera Raw:
Accessing the Masking Tools:
- Open your photo in Adobe Camera Raw.
- In the right-hand toolbar, select "Masking" to access the Masking panel.
- Choose the desired Masking tool, such as the Brush tool, Graduated Filter tool, or Radial Filter tool.
Creating and Adjusting Masks:
- With the Brush tool, you can "paint" adjustments onto specific areas of your photo. Specify the brush size, feather (for soft edges), flow (application rate), and density (transparency).
- The Graduated Filter tool allows you to apply adjustments gradually across a region of the photo, with customizable width and direction.
- The Radial Filter tool lets you draw an elliptical area around your subject, applying adjustments either outside or inside the selected area.
- You can also use the Range Masking options (Color, Luminance, and Depth) to create precise masking areas based on colors, brightness values, or depth information in your photo.
- To create multiple masks, combine different mask techniques, or easily make selections, use the Adobe Sensei AI engine.
- To refine your mask, use the Add or Subtract options to include or exclude areas from the selection.
- You can also rename, duplicate, hide, or delete masks using the three-dot icon next to each mask in the Masking panel.
Applying Adjustments:
- With your mask(s) in place, use the editing sliders in the right panel to make local adjustments to your photo. These adjustments include exposure, contrast, highlights, shadows, texture, clarity, and more.
- You can also use the Amount slider to adjust the intensity of the mask adjustments.
- To apply adjustments to multiple images, synchronize local adjustment settings across selected photos.
- Additionally, you can create and save local adjustment presets for quick application to other images.
Additional Tips:
- When using the Brush tool, the Auto Mask option can help confine brush strokes to areas of similar color.
- To change the default red color of the mask overlay, click the color swatch next to the "Show Mask" option and choose your desired color.
- To temporarily hide all masks, long-press the eye icon next to "Create New Mask."
- To remove a mask, click on the mask and press the "Delete" key.
Battery Chargers: Are They Included With Cameras?
You may want to see also
Frequently asked questions
Adobe Camera Raw is a self-contained Adobe plugin used for professional photo editing and retouching. It is particularly useful for processing large batches of raw photos, and it also allows you to edit JPEG and TIFF images.
First, make sure you are shooting in raw. You can check this in your camera's settings. Then, open Photoshop and select "Open" from the start menu to find and select your raw image files. Camera Raw should then activate automatically.
Click on the ellipses at the bottom of your list of tabs to reveal more image options. From there, you can choose to save your image as a DNG or a JPEG, or continue on to Camera Raw's Save Options menu, where you can customise your image's format, colour space, and naming convention.