Focusing a medium format 6x9 camera can be done in a variety of ways, depending on the photographer's experience and the type of camera. The most common methods involve visual assessments, using a metric scale, or focusing on the midsection of the foreground and background. Visual assessments are done by looking at the ground glass and adjusting the tilt/swing until the image is sharp. This method can be more approximate but offers repeatability. Using a metric scale, one can measure the distance between the nearest and farthest points of focus to determine the best area of focus. The third method, the law of median, focuses the camera on the midsection of the foreground and background, ensuring both are equally sharp. Regardless of the method, understanding the Scheimpflug rule and the relationship between the film plane, lens plane, and subject plane is crucial for achieving the desired focus.
What You'll Learn
![]()
The Scheimpflug rule
In simple terms, the Scheimpflug Principle involves the rotation of a lens about either its vertical (swings) or horizontal (tilts) axis to adjust the plane of focus. This rotation of the lens allows photographers to adjust the plane of focus while maintaining a desirable aperture. This is particularly useful when a photographer wants to achieve sharp focus across the entire image, but stopping down the lens is impractical due to exposure or sharpness issues.
When using the Scheimpflug rule, it's important to note that the geometric relationship between the film plane and the lens plane can be adjusted in a view camera, allowing photographers to focus on virtually any plane, whether it's receding or slanted. This flexibility enables photographers to capture a wide range of subjects with precision and creativity.
Charging the Kitmesh Camera: A Quick Guide
You may want to see also
![]()
Focusing with the knob
Understanding the Basics:
The focusing knob is used to adjust the distance between the lens and the film plane, allowing you to focus on your chosen subject. The image formed by the lens is three-dimensional, just like your subject. Therefore, when you focus, you are essentially selecting the part of the scene that will appear sharp in your photograph.
Visual Focusing Methods:
There are two visual methods commonly used for focusing a medium format camera:
- Procedure I (Focus on Far, Tilt on Near): This method is 100% visual and does not require any accessories. You adjust the focus by looking at the ground glass and estimating the best plane of focus. While this method involves some guesswork, it is widely used by photographers and can be effective for flat or planar subjects.
- Procedure II (Measure and Adjust): This method requires a metric scale attached to your camera rail or bed. Instead of guessing the focus area, you use measurements to determine the best area of focus. This method is more precise but requires additional equipment and slightly more complex adjustments.
The Scheimpflug Rule:
The Scheimpflug rule states that the film plane, the subject plane (plane of sharp focus), and the lens plane must converge along a single line. In simple terms, this means that to achieve the best focus, you need to tilt the lens or the film plane towards you, depending on the position of your subject. If you want to focus on a subject that is closer to you, you would tilt the top of the lens or film plane towards you. This technique is especially useful for achieving sharp focus from infinity at the top of the frame to the foreground at the bottom.
Tilt and Swing Adjustments:
When focusing with the knob, you may also need to make tilt and swing adjustments. The tilt movement refers to rotating the front or rear standard of the camera up or down, while the swing movement involves rotating them around a vertical axis. These adjustments are often necessary when dealing with subjects that are not at the same perpendicular distance from the film plane, such as a tall building or a mountain range.
Practical Focusing Steps:
- Choose a near point (top of the ground glass) and a far point (middle/bottom of the ground glass) within your scene.
- Focus the camera on the far point using the focusing knob.
- Make the near point sharp by adjusting the tilt. You may need to increase the tilt to bring the near point into focus.
- Re-evaluate the focus on the far point. If it needs refocusing, repeat step 2. Usually, a couple of iterations are sufficient to achieve sharp focus.
Variations and Tips:
Some photographers prefer to focus on the near point first and then use the tilt to focus on the far point. This variation may work better with axial tilts, while the previous method is more suitable for base tilts. Additionally, when focusing with the knob, pay attention to the composition and lighting. Adjusting the tilt can affect the image composition, and you may need to make slight adjustments to regain the desired composition.
Evolution of Camaro: 1964 to Present
You may want to see also
![]()
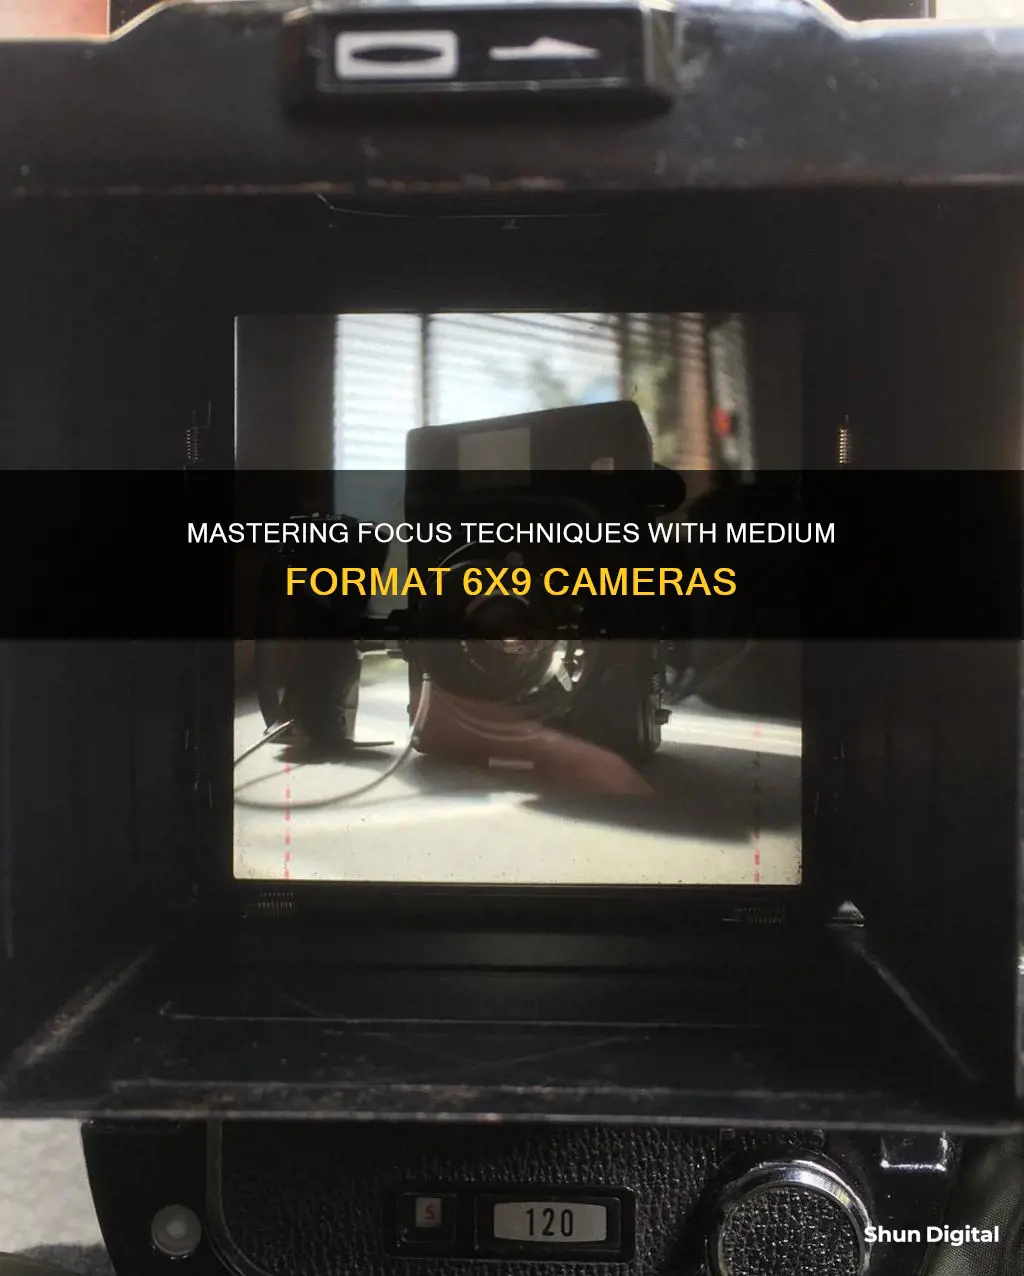
The ground glass
Focusing a medium format 6x9 camera involves several considerations and techniques related to the ground glass, which plays a crucial role in achieving the desired results. Here is an in-depth guide to help you understand and master the process:
The first method of focusing a view camera is a visual process that relies solely on your eyes and the ground glass. This technique is widely used and does not require any additional accessories. You adjust the focus by looking at the image on the ground glass and making adjustments until everything appears sharp and in the desired focus plane. This method may involve some guesswork and iterations to refine the focus.
The Scheimpflug Rule:
When focusing with the ground glass, it's important to understand the Scheimpflug rule. This rule states that the film plane, the subject plane (plane of sharp focus), and the lens plane must converge along a single line. In other words, the plane of the film, the plane of the lens, and the plane of the subject you want to be in focus should intersect at a single point. This rule helps you determine the necessary camera movements to achieve the desired focus.
Tilt and Swing Adjustments:
To achieve the Scheimpflug principle, you will often need to make tilt and swing adjustments to your camera. Tilt refers to rotating the front or rear standard (lens or film plane) around a horizontal axis, while swing involves rotating them around a vertical axis. These adjustments allow you to change the orientation of the lens and film planes relative to the subject, enabling you to achieve focus on different planes.
Focusing Procedure:
When focusing with the ground glass, follow these steps:
- Choose a near point (top of the ground glass) and a far point (middle/bottom of the ground glass) within the plane of focus.
- Focus on the far point using the focusing knob.
- Adjust the tilt to make the near point sharp. This may involve increasing the tilt and making minor compositional adjustments.
- Re-evaluate the focus on the far point. If necessary, repeat steps 2 and 3 until both the near and far points are in focus.
Metric Scale Method:
Another focusing method involves using a metric scale attached to your camera rail or bed. This method provides a more precise way to determine the best focus area. You measure the distances between the nearest and farthest points of the subject on the ground glass and then make adjustments to the tilt and focus accordingly. This method may require more complex calculations but can yield more accurate results.
In conclusion, focusing a medium format 6x9 camera with the ground glass involves a combination of visual assessment, camera adjustments, and an understanding of the Scheimpflug rule. Practice and experimentation will help you master the techniques and achieve consistently sharp and well-composed images.
Troubleshooting Guide: Camera Battery Not Charging
You may want to see also
![]()
The image formed by a lens is 3D
Focusing a medium format 6x9 camera involves adjusting the lens to achieve the desired image sharpness and composition. This can be done through various methods, such as using a metric scale or relying on visual estimation. The Scheimpflug rule, for instance, states that the film plane, subject plane, and lens plane must converge along a single line to maximise sharpness.
Now, onto the topic of 3D images. The image formed by a lens is indeed 3D, and this three-dimensionality is a fundamental aspect of both our perception of reality and the physical world itself.
Human Eyes and Depth Perception
Human eyes have 3D perception, or depth perception, which allows us to see the world in all three spatial dimensions: width, height, and depth. This depth perception is made possible by stereoscopic vision; that is, our two eyes see slightly different images, and our brain compares these images to ascertain depth information.
2D vs 3D
While many flat images like films and photographs appear two-dimensional to the human brain, nothing can physically exist without all three dimensions. This is because everything in the physical world, no matter how flat it seems, is ultimately composed of atoms, which have height, width, and depth.
3D in Computing
In computing, 3D images are computer-generated graphics that simulate depth in a way that resembles real-world objects. This technology is commonly used in movies, video games, virtual reality, and various industries like real estate, architecture, and healthcare.
Creating 3D Images
The process of creating 3D images typically involves two steps: modelling and rendering. Modelling involves creating a computer-generated 3D model of a physical object, which serves as a blueprint. Rendering is then applied to create a realistic image by adding effects like lighting, shadows, reflections, textures, and other details.
3D Printing
3D printing, or additive manufacturing, is another transformative application of 3D technology. It allows for the creation of high-quality three-dimensional objects, from prosthetic legs to entire cars and even human organs.
History of 3D Technology
The development of 3D film, computer graphics, and printing has a long history. Here are some key milestones:
- 1922: The first 3D film, "The Power of Love," is released, requiring viewers to wear anaglyphic eyewear.
- 1936: The first use of polarized light is demonstrated using photographs printed with Polaroid filters.
- 1952: "Bwana Devil," the first colour 3D film, premieres, popularising the now-outdated red-and-blue 3D anaglyphic glasses.
- 1981: Hideo Kodama develops the first version of 3D printing using a layer-by-layer additive manufacturing process.
- 1986: Charles Hull patents the first 3D printing stereolithography (SLA) technology.
- 2009: James Cameron's "Avatar" establishes 3D filmmaking in mainstream entertainment.
Charging Camera Without a Charger: Alternative Methods
You may want to see also
![]()
Focusing methods
Focusing a medium format 6x9 camera can be a complex process, but there are several methods to achieve sharp results. Here are the key focusing techniques and considerations for this type of camera:
- Visual Estimation: This method relies on the photographer's experience and involves visually evaluating the subject through the ground glass. It is approximate but offers repeatability in adjusting tilt and swing.
- Metric Scale Measurement: This approach uses a metric scale attached to the camera rail or bed to measure and determine the best focus area, eliminating the need for guesswork.
- Median Law: This technique focuses the camera on the midsection of the foreground and background of the subject, ensuring both are equally sharp.
- Scheimpflug Rule: This rule states that the film plane, the subject plane (plane of sharp focus), and the lens plane must converge along a single line. By tilting the lens or adjusting the camera angle, you can achieve sharp focus from infinity at the top of the frame to the foreground at the bottom.
- Tilt and Swing: These adjustments are made to the front and rear standards of the camera. Tilt refers to rotating the standards around a horizontal or vertical axis, while swing involves rotating them around the vertical axis. These movements help control the plane of focus and are particularly useful for architectural photography.
- Focusing Distance: For close-up work, focusing with the rear standard maintains magnification. For landscape photography, focusing with the front standard is preferred as it keeps the dark cloth from moving.
- Aperture and Depth of Field: Using a small aperture increases depth of field but can introduce issues like diffraction. Setting the camera lens at a hyperfocal distance can maximise depth of field.
Additional Considerations:
- Bellows and Struts: Ensure the bellows are light-tight and that the struts for propping up the lens are strong and straight.
- Rangefinder: Use a built-in or external rangefinder to set the correct distance.
- Film Plane Parallelism: The front standard or lens board should be parallel to the film plane to ensure accurate focusing.
- Light Leaks: Check for light leaks in the bellows, as this can affect exposure and image quality.
- Film Flatness: The camera's pressure plate should keep the film flat across the entire 6x9 frame to avoid uneven focus.
- Shutter and Speeds: Ensure the shutter is cocked, and the shutter speeds are within the specified range.
- Film Advance: Advance the film correctly, either through the red window or via an automatic stop, to avoid double exposures.
Ohio Speedsters: Evading the Ticket Camera
You may want to see also
Frequently asked questions
There are three methods to focus a 6x9 camera:
- The first method is visual and depends on the experience of the photographer. It is performed with most view cameras and does not require special accessories.
- The second method requires a metric scale installed on the camera rail or base. This method measures the best focus area instead of guessing it.
- The third method is the law of the median, where the camera focuses on the midsection of the foreground and background of the subject.
The Scheimpflug rule states that the film plane, the subject plane (plane of sharp focus), and the lens plane must converge along a single line. This rule helps identify the external figure camera movement. For example, if you adjust your camera back vertically and want to focus on the ground, you must tilt the lens forward.
Axial tilt occurs when the front and rear standards rotate around a vertical axis. Base tilt occurs when the front and rear standards rotate around a horizontal axis or near the bottom, or about one-third of the optical axis of the lens.
Some tips for focusing a 6x9 camera include:
- The lens is collimated correctly.
- The distance is set correctly using a built-in or external rangefinder.
- The struts for propping up the lens are strong and straight.
- The front standard or lens board is parallel to the film plane.
- There are no light leaks in the bellows.
- The camera pressure plate can keep the film flat across the entire 6x9 frame.
- You can hold the camera steadily or on a tripod.
- The shutter is cocked, and the speeds are within the specified range.
- The film is advanced either through the red window or via an automatic stop, and not double exposed.