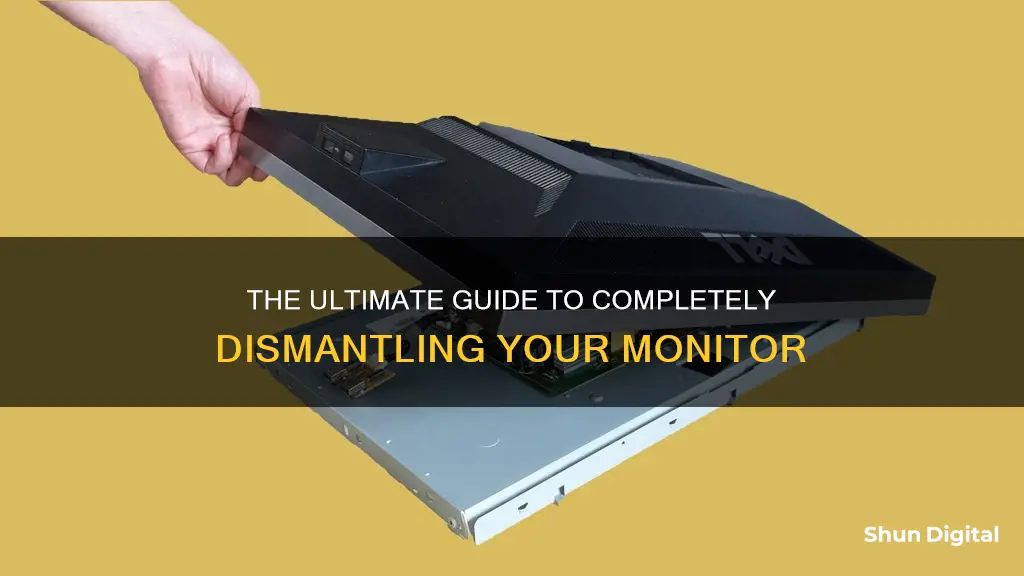
Removing a monitor can be done in a few steps. First, you must delete any drivers that were installed with the monitor. Then, shut down the computer and remove the monitor's plug from the back of your computer. The exact location of the plug will differ depending on your computer, so follow the wire from the back of the monitor to find it. Finally, unplug the monitor from the electrical outlet and remove it from your desk. If you are removing a laptop screen, you will need to take a few extra steps, including removing the front bezel and disconnecting the inverter.
Characteristics of Monitor Removal
| Characteristics | Values |
|---|---|
| Software | Delete drivers |
| Hardware | Unplug the monitor from the electrical outlet and the computer |
| Operating System | Windows 10, Windows Vista |
What You'll Learn

Uninstalling drivers
Drivers are pieces of software that act as an intermediary between your computer's hardware and its operating system. Although they are usually installed with ease, they can sometimes cause issues, and you may need to uninstall them.
Using the Device Manager
- Open the Start menu.
- Search for "Device Manager" and open it.
- Find and double-click the category of the device with the problematic driver (e.g., a graphics card would be listed under "Display Adapters").
- Right-click on the specific device.
- Click "Uninstall."
- Confirm the removal by clicking "OK."
- Reboot your computer.
Using the Uninstall Program
- Open the Start menu.
- Search for "Uninstall Program" and open it.
- Find your device or drivers in the list.
- Double-click the entry to begin the uninstallation process.
- Follow the on-screen instructions to complete the uninstallation.
- Reboot your computer.
Using the Display Adapter's Uninstall Tool
- Open the Settings app by pressing Windows+i on your keyboard.
- Select "Apps."
- On the "Apps & Features" screen, search for the name of your display adapter's manufacturer (e.g., Nvidia).
- Select your drivers from the list.
- Choose "Uninstall."
- Confirm the uninstallation by clicking "Uninstall" in the prompt.
- Reboot your computer.
Using the Windows Registry
Warning: Editing the Windows Registry can be risky, and it is recommended to create a backup before making any changes.
- Open the Windows Registry Editor by searching for "regedit" in the Start menu.
- Navigate to the key associated with the driver you want to uninstall. This could be under keys such as "HKEY_LOCAL_MACHINE\SYSTEM\CurrentControlSet\Control\Class" or "HKEY_LOCAL_MACHINE\SOFTWARE\Microsoft\Windows\CurrentVersion\Uninstall."
- Find and delete the subkey or values associated with the driver you want to uninstall.
- Reboot your computer.
It is important to note that after uninstalling a driver, you may need to install a new driver or roll back to a previous version to ensure your hardware functions correctly. Additionally, always make sure to download drivers from trusted sources to avoid potential issues.
Ornate Monitor Growth: Full Size, How Fast?
You may want to see also

Removing the plug
To remove the plug of a monitor, you must first delete any drivers that were installed with the monitor. On a Windows device, click the "Start" button, then "Control Panel", followed by "System and Security" and "Device Manager". Click the plus sign next to "Monitors" and if your monitor installed any drivers, they will appear as the device name. Right-click the device name and select "Uninstall" to remove the drivers. Repeat the steps for any other hardware devices you wish to remove.
Now, shut down the computer and you can safely remove the monitor's plug from the back of your computer. The exact location of the plug will differ depending on your computer, but you can easily find it by following the wire from the back of the monitor to the computer.
Connecting Monitors to Home Security Cameras: A Step-by-Step Guide
You may want to see also

Unplugging from the electrical outlet
Unplugging your monitor from the electrical outlet is a straightforward task, but it is important to follow the correct steps to ensure safety and avoid any damage to your equipment. Here is a detailed guide on how to do it:
Locate the Power Source: Begin by locating the power source for your monitor. This is usually a power cord that connects the monitor to an electrical outlet on the wall or power strip.
Turn Off the Monitor: Before unplugging, make sure to turn off the monitor. This is an important step to prevent any potential damage to the hardware. Press the power button on your monitor to turn it off completely.
Unplug the Power Cord: Once the monitor is turned off, you can now safely unplug the power cord from the electrical outlet. Gently grip the power cord's plug and remove it from the outlet. If the outlet is difficult to reach, be careful not to drop the plug or cord, as this could damage the connection.
Handle the Cord Properly: When unplugging, avoid pulling the cord itself. Always grip the plug and gently pull it straight out of the outlet to avoid any strain or damage to the cord. Additionally, ensure that you don't trip over the cord or create any hazards while unplugging.
Disconnect from the Monitor: Now, locate the connection point of the power cord to the monitor. This is usually at the back of the monitor. Disconnect the power cord from the monitor by gently pulling it straight out of the connection port. Again, avoid pulling the cord itself and always grip the plug.
Proper Cord Management: After unplugging, properly manage the power cord. Coil the cord neatly and securely to avoid any tangles or knots. Store the cord in a safe place where it won't be damaged or pose a tripping hazard.
By following these steps, you can safely and effectively unplug your monitor from the electrical outlet. Remember to handle the power cord with care and ensure that all connections are secure when plugging the monitor back in.
Monitoring Employee Internet Usage: Security or Surveillance?
You may want to see also

Removing the front bezel
To remove the front bezel, you will need a hobby knife or box cutter, and a Phillips screwdriver. The front bezel is the protective material around the edges of your laptop's screen, usually made of plastic.
First, find the screw covers and remove them with your knife or cutter. These are the rubber covers along the front bezel of the screen assembly. Be careful, as sometimes these rubber covers do not have any screws under them, so only partially remove them to check for screws.
Once you have located the screws, unscrew them all with your Phillips screwdriver. Place the rubber covers and screws somewhere safe, so they are not lost.
Now, gently pry out the front bezel. Hold the edge of one side of the bezel with your forefinger, and apply pressure down onto the screen with your thumbs. Do this all along the sides of the screen assembly until you can remove the bezel completely.
Hooking Up Multiple Monitors to Your GeForce Graphics Card
You may want to see also

Disconnecting the inverter
Firstly, before performing any work on the inverter, it is crucial to disconnect it from all voltage sources. This should always be done in a prescribed sequence to avoid the risk of electric shock. Start by disconnecting the AC miniature circuit breaker and securing it against reconnection. Then, switch off the battery or the load-break switch of the battery, following the manufacturer's instructions. It is important to wait for at least 5 minutes after switching off the power source to ensure that the capacitors are fully discharged before proceeding.
The next step is to carefully remove the enclosure lid of the Connection Unit. There are typically 6 screws that need to be unscrewed. When removing the lid, be cautious as the LED assembly in the enclosure lid and the communication assembly in the inverter are connected by a ribbon cable. Once the lid is removed, gently pull out the ribbon cable connecting the LED assembly to the communication assembly.
To ensure safety, it is essential to verify that no voltage is present on the AC-out terminal block. This can be done using a suitable measuring device. Check for voltage between L and N, and then between L and PE, by inserting the test probe into the rectangular openings of the terminal.
By following these steps, you can safely disconnect the inverter from its voltage sources. However, always refer to the specific instructions provided by the manufacturer of your inverter for the most accurate and up-to-date information.
Connecting Your Xbox to an Acer Monitor: A Simple Guide
You may want to see also


