Unity is a game engine that provides a platform for developers to create games and other interactive experiences. One of the key features of Unity is the ability to work with UI elements and cameras to create immersive and engaging scenes. In Unity, the Canvas serves as the abstract space where UI elements are laid out and rendered. The Camera, on the other hand, is the device through which the player views the game world, including UI elements. The relationship between the Camera and the Canvas is defined by the Render Modes of the Canvas, which include Screen Space - Overlay, Screen Space - Camera, and World Space. These modes determine how the UI elements on the Canvas are displayed in relation to the Camera's viewpoint.
| Characteristics | Values |
|---|---|
| Canvas | The area that all UI elements should be inside |
| Camera | A device through which the player views the world |
| Issue | Camera view blocked by canvas |
| Solution 1 | Select 3D model from the Hierarchy tab, move the mouse into the Scene View and press F |
| Solution 2 | Hold the Alt key, position the mouse in the Scene View, hold down the left mouse button and move the mouse |
| Solution 3 | Use the mouse scroll-wheel to move the camera in/out of the UI in the Scene View |
What You'll Learn

Camera rotation
- Using Scripts: You can use C# scripts to rotate the camera in Unity. The `Transform.rotation` property allows you to modify the camera's orientation. For example, `transform.Rotate(0, 10, 0)` will rotate the camera 10 degrees around the y-axis. You can also use `Quaternion.Euler` to set the rotation directly, like `transform.rotation = Quaternion.Euler(new Vector3(0, 90, 0))` to rotate the camera 90 degrees on the y-axis.
- Using the Editor Tools: In the Unity Editor, you can manually rotate the camera by selecting it in the Hierarchy and using the transform tools. The "Rotate Tool" (keyboard shortcut: E) allows you to adjust the camera's orientation by dragging the handles in the Scene View. You can also use the "Move Tool" (keyboard shortcut: W) to reposition the camera.
- Using Input: You can rotate the camera based on player input. For example, you can use the mouse or touch input to rotate the camera. The `Input.GetAxis` function can be used to get the input value, and then you can apply that to the camera's rotation.
Best Practices and Tips
- Camera Game Object: Ensure that your camera is set up as a Game Object in the Hierarchy. This will allow you to easily manipulate its transform, including rotation.
- Camera Tags: It's a good practice to tag your camera Game Object as "MainCamera" or "Camera" for easy identification and access in scripts.
- Camera Colliders: If you want to trigger events or interactions based on camera rotation, consider adding colliders to your camera. This will enable collision detection and allow you to use methods like `OnTriggerEnter`.
- Canvas and Camera Relationship: Understand the relationship between the Canvas and the Camera in Unity. The Canvas represents the space where UI elements are rendered, and the Camera is what the player uses to view the scene. The "Render Mode" property of the Canvas determines how the UI is rendered in relation to the camera.
- Screen Space - Overlay: In this mode, the Canvas is scaled to fit the screen and rendered directly, regardless of the camera. UI elements will always be on top of the scene.
- Screen Space - Camera: Here, the Canvas is rendered as if it were a plane in front of the camera. UI elements will be obscured by 3D objects closer to the camera.
- World Space: In this mode, the Canvas is treated as an object in the scene, and its size and position are relative to the camera's viewing angle and distance.
By understanding camera rotation techniques and following these best practices, you can effectively manipulate the camera in Unity to create engaging and interactive experiences for your players.
Ft. Worth's Stance on Red-Light Camera Tickets
You may want to see also

Camera view
Unity is a game engine that provides a platform for developers to create games and other interactive experiences. One of the key features of Unity is the ability to work with UI elements and cameras to create immersive game scenes.
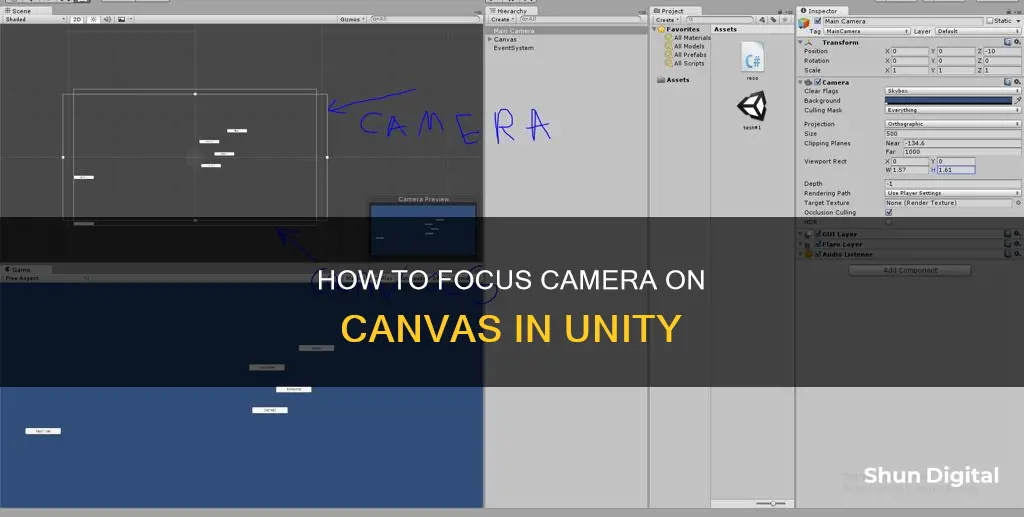
The Camera View in Unity is an essential aspect of game development, as it allows developers to see the game world through the lens of the camera, enabling them to compose and frame the game's visuals. However, in certain scenarios, users have reported issues where the camera view is blocked or hidden behind a canvas, making it challenging to edit the scene.
This issue typically arises when the camera is inadvertently rotated or positioned incorrectly within the scene. To resolve this, users can attempt the following solutions:
- Select the 3D model from the Hierarchy tab and press "F" while moving the mouse in the Scene View. This action will refocus the camera onto the 3D model, ensuring it is no longer blocked by the canvas.
- If the first solution does not work, hold the "Alt" key while positioning the mouse in the Scene View. Then, hold down the left mouse button and move the mouse to rotate the camera to a different angle that does not block the screen.
- Utilize the mouse scroll wheel to zoom the camera in or out of the UI in the Scene View. This can help adjust the camera's position relative to the canvas.
By following these steps, users can adjust the camera view and resolve the issue of the camera being hidden behind the canvas. It is important to note that the camera's position and rotation play a crucial role in ensuring the desired framing and composition of the game scene.
Additionally, understanding the relationship between the camera and the canvas is vital in Unity. The canvas serves as the area where all UI elements, such as buttons, panels, and text, are placed. On the other hand, the camera is the device through which the player views the game world, including the UI elements on the canvas. The render modes of the canvas, such as screen space-overlay, screen space-camera, or world space, determine how the UI is presented to the player.
Lumix GX85: Does It Have a Macro Mode?
You may want to see also

Canvas render mode
The Canvas Render Mode defines how the canvas and the UI will behave in a scene. There are three modes: Screen Space – Overlay, Screen Space – Camera, and World Space.
Screen Space – Overlay
In this mode, the canvas is scaled to fit the screen and is rendered without reference to the scene or a camera. The UI will be drawn over any other graphics, and it will automatically rescale to fit if the screen size or resolution changes. This mode is typically the default choice.
Screen Space – Camera
This mode is similar to Screen Space – Overlay, but the canvas is placed a specified distance in front of a chosen camera. The UI elements are rendered by this camera, so the camera settings affect the appearance of the UI. The canvas will automatically change size if the screen size, resolution, or camera frustum changes. In this mode, the canvas will behave like any other object in the scene.
World Space
In this mode, the canvas will behave as any other object in the scene. The size of the canvas can be set manually, and UI elements will render in front of or behind other objects in the scene based on 3D placement. This mode is useful for UIs that are meant to be part of the world and is also known as a "diegetic interface".
Charging Reolink Cameras: A Step-by-Step Guide
You may want to see also

Canvas size
The Canvas Scaler component in Unity is used to control the scale and pixel density of UI elements in the Canvas. The size of a canvas is determined by the game's screen size. The canvas covers the entire screen.
To change the screen size, go to the Game window (Window -> General -> Game). At the top of the window, there will be a screen size menu that displays a list of screen sizes that will be emulated. It is also possible to zoom into a screen using the "Scale" slider. The list of screen sizes and resolutions shown are related to the current build target.
For a Canvas set to 'Screen Space - Overlay' or 'Screen Space - Camera', the Canvas Scaler UI Scale Mode can be set to Constant Pixel Size, Scale With Screen Size, or Constant Physical Size.
Using the Constant Pixel Size mode, the positions and sizes of UI elements are specified in pixels on the screen. With the Scale Factor setting in the Canvas Scaler, a constant scaling can be applied to all UI elements in the Canvas.
Scale With Screen Size mode allows positions and sizes to be specified according to the pixels of a specified reference resolution. If the current screen resolution is larger than the reference resolution, the Canvas will be scaled up, and if it's smaller, the Canvas will be scaled down.
Constant Physical Size mode is used to specify the positions and sizes of UI elements in physical units such as millimetres, points, or picas. This mode relies on the device reporting its screen DPI correctly.
Eufy Camera Origins: Where Are They Manufactured?
You may want to see also

UI elements
Unity is a game engine that provides a host of tools for game development, including UI design. The Canvas is a crucial Game Object in Unity's UI system, serving as the container for all UI elements. These UI elements are children of the Canvas and are positioned within its rectangular area, known as the Scene View. This arrangement simplifies UI design by allowing developers to position UI elements without needing the Game View.
The Canvas Render Mode is a key setting that determines how UI elements are rendered in relation to the camera and the game scene. The "Screen Space - Overlay" render mode renders UI elements on top of the game scene, ensuring they remain visible regardless of screen size or resolution changes. In this mode, the Canvas automatically adjusts its size to match any changes in screen dimensions or resolution.
Another render mode is the "Screen Space - Camera" option, which positions the Canvas a set distance in front of a specified camera. This mode allows camera settings to influence the appearance of UI elements, including perspective distortion controlled by the Camera Field of View. Similar to the previous mode, the Canvas size dynamically adjusts to match changes in screen size, resolution, or camera frustum.
The "Screen Space - Camera" render mode also enables the Canvas to behave like any other object within the game scene. Developers can manually adjust the Canvas size using its Rect Transform, and UI elements will render in front of or behind other objects based on their 3D placement. This functionality is particularly useful for creating UIs that are intended to be part of the game world, often referred to as a "diegetic interface".
In summary, the Canvas and its render modes provide Unity developers with a flexible system for incorporating UI elements into their game scenes. By choosing the appropriate render mode, developers can ensure that UI elements are correctly positioned and rendered relative to the camera and other game objects, creating a seamless and immersive user experience.
Analog Cameras: Still Relevant, Still Made?
You may want to see also
Frequently asked questions
You can try the following:
- Select your 3D model from the Hierarchy tab, move the mouse to the Scene View and press F.
- Hold the Alt key, position the mouse in the Scene View, hold the left mouse button and try to move the mouse.
- Use the mouse scroll wheel to move the camera in/out of the UI in the Scene View.
If none of the above work, check your camera render mode and projection mode.
The Canvas is the area that all UI elements (buttons, panels, text, etc.) should be inside. A Camera is a device through which the player views the world (player, enemies, props, buttons, etc.). The Canvas is overlapped on the Camera, and the relationship between them is defined by the Render modes of the Canvas.
The modes available are Screen Space - Overlay, Screen Space - Camera, and World Space.
In Screen Space - Overlay mode, the Canvas is scaled to fit the screen and rendered without reference to the scene or a camera. The UI will be drawn over any other graphics, and it needs to be stored at the top level of the hierarchy. In Screen Space - Camera mode, the Canvas is rendered as if drawn on a plane object in front of a given camera. The UI size does not vary with distance and is rescaled to fit within the camera frustum.
You can change the Render Mode property of the Canvas in the Unity Editor. Go to the Canvas component in the Inspector window and find the Render Mode dropdown menu. Select the desired render mode from the options provided.


