Installing a rear-view camera, also known as a backup camera, is a great way to improve your vehicle's safety and modernise your driving experience. This device allows you to see what's behind your car without having to crane your neck, making reversing and parking much easier and safer. While some newer cars come with built-in rear cameras, you can also install one on older vehicles. In this article, we'll guide you through the process of choosing and installing a rear camera, ensuring a neat and professional finish. We'll cover the different types of cameras and displays available, the tools you'll need, and provide step-by-step instructions for a successful installation.
| Characteristics | Values |
|---|---|
| Camera Type | Bracket-mounted, Flush-mounted, License plate frame, License plate bar, OEM-specific, Integrated OEM, In-dash aftermarket, On-dash aftermarket, Rearview mirror |
| Display Type | In-dash, On-dash, Rearview mirror |
| Wired/Wireless | Wired, Wireless |
| Camera Location | Above the rear license plate, Mounted on the trunk, Embedded within a license plate frame, Centered in a bar that stretches across the license plate |
| Cable Length | 21 feet (longer for big trucks) |
| Mounting Method | Drilling holes, Double-sided tape |
| Power Source | Power connections near the radio, Compatible reverse lights |
What You'll Learn
![]()
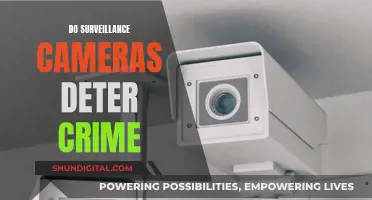
Choosing the camera location
Common Locations
The most common locations for mounting a rear-view camera are above the rear license plate or directly on the trunk. Some backup cameras come with a license plate mount, making installation easier. Alternatively, you can choose to mount the camera on the rear window or the roof of the vehicle, especially if the rear window can be lifted independently.
Cable Length and Routing
Consider the length of the camera's video cable and how you will route it from the camera to the display monitor inside the car. Estimate the required cable length, taking into account any pinch points or problem areas that may need extra length. You can often trace the path of existing wires from the back to the front of the vehicle. Use cable ties to secure the cable along the way.
Drilling and Modifications
Depending on the camera model and your vehicle's layout, you may need to drill holes for mounting the camera and routing the cable. Carefully choose the drilling location, being mindful of what's behind the drilling area. Alternatively, you can use double-sided tape, which is often provided with backup cameras.
Power Connection
The power cable for the rear-view camera typically connects to the reverse light power wire in the rear of the vehicle since the camera only needs to be operational when the vehicle is in reverse. Identify the reverse light wire using a multimeter and splice the camera's power wire into it. Ensure a secure and insulated connection with electrical tape and wire crimp caps.
Replacing Batteries in Your WGI Innovation Nano Camera
You may want to see also
![]()
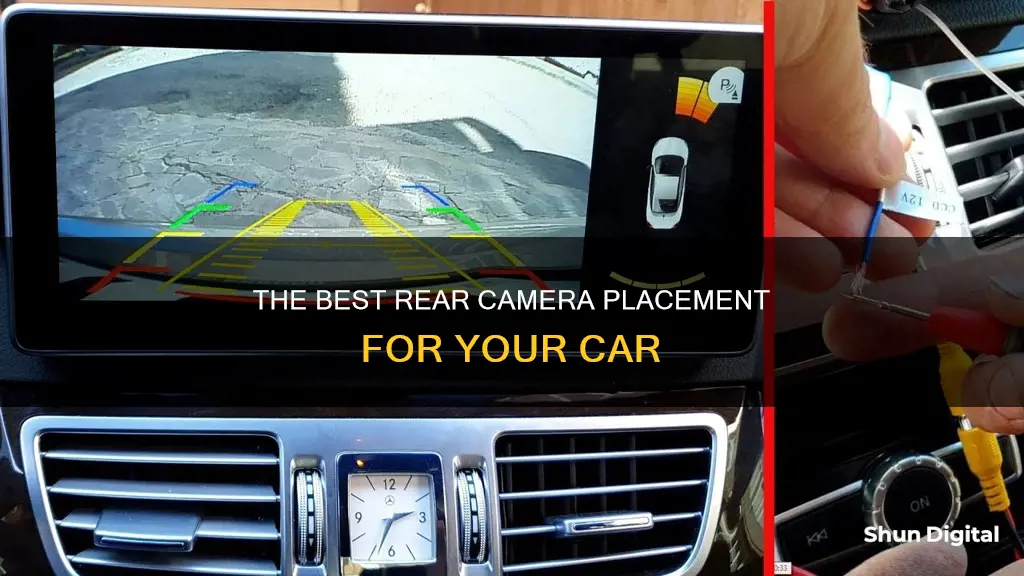
Preparing the mounting area
Firstly, you will need to remove your rear license plate using a Phillips head screwdriver. Unscrew each of the screws holding the plate in place and set it aside, making sure to keep the screws in a safe place.
Next, you will need to remove the interior panel from your trunk. Open the trunk and look for a solid interior panel covering the opposite side of your license plate mounting area. Use a trim removal tool or a thin implement to pry off the panel. Removing this panel will expose the rear wiring chambers of your car.
Now, you will need to drill a small hole in the license plate mounting area. Ensure there are no obstructions between the license plate mount and the rear wiring chamber. Use a power drill with a high-speed twist drill bit to create a hole directly behind where your camera's power and video cable will go. The hole should be large enough to fit your camera's cables.
Before running your camera cable into the car, slip a rubber grommet onto it. These small rubber washers will keep the wire in place and prevent leaks. Choose a grommet that fits just inside the drilled hole. Pull the splitting end of your camera cable through the drilled hole and into the trunk, ensuring the rubber grommet lodges into the hole.
If your camera is to be mounted onto the license plate, you may now need to drill holes for routing the cable and mounting the camera. Be mindful not to drill through any wires or important components. Alternatively, you can use double-sided tape to attach the camera.
Mounting the camera
Secure the camera using fasteners such as screws or adhesive pads. If your camera attaches to the front of the license plate, fix it according to the manufacturer's instructions. If it attaches to the back of the license plate, line up the device with the plate's fastener holes and thread the screws through.
Finally, reattach your license plate and interior panels, giving them firm tugs to ensure they are secure.
Focusing on Stars: Camera Settings for Nighttime Photography
You may want to see also
![]()
Drilling holes for the camera
Prepare the Necessary Tools and Create a Marking Guide:
Before you begin drilling, gather all the required tools, such as a power drill, a high-speed twist drill bit, a Phillips-head screwdriver, and a marker. Remove any interior panels or trim that may obstruct your access to the drilling area. With the camera positioned where you want it, use the marker to indicate the spot where the camera's cord meets the vehicle. This will be your drilling spot.
Select the Appropriate Drill Bit Size:
It is crucial to choose a drill bit that matches the size of the hole you need for the camera's wire and rubber grommet. A visual inspection can usually help determine the right size. The drill bit diameter should typically be between 1/8 and 1/4 inch (0.32 and 0.64 cm).
Drill the Hole:
Using the selected drill bit, carefully drill a hole at the marked spot. Ensure the hole is large enough to accommodate the camera's wiring and grommet. Check for any obstructions and, if necessary, remove or adjust your drilling position.
Install a Rubber Grommet:
Before running the camera cable through the hole, slide a rubber grommet onto the cable. The grommet should fit snugly inside the drilled hole. This will help keep the wire in place and prevent leaks, protecting your vehicle from water damage.
Run the Camera Cable:
Pull the camera's cable through the drilled hole, ensuring the rubber grommet sits securely inside the hole. The cable should run from the outside of the car to the inside of the trunk or designated camera mounting area.
Secure the Camera:
Follow the manufacturer's instructions to attach the camera to the desired position on the vehicle. If the camera mounts to the license plate, use the screws you removed earlier to secure it in place. Ensure the camera is firmly attached and give it a gentle tug to test its stability.
Remember to take your time, work carefully, and always put safety first when drilling holes for your rear-view camera installation.
Computer Cameras: Are Microphones Always Listening?
You may want to see also
![]()
Running the video cable
Before feeding the cable through the hole, slip a rubber grommet onto it to keep the wire in place and prevent leaks. Then, pull the cable into the trunk, ensuring it's tight so the grommet stays lodged in the hole.
Now, locate your car's reverse light wires, which connect the tail lights to the dashboard. Strip and separate these wires, and then fuse them with the camera wires. Make sure to wrap the combined wires with electrical tape for safety.
Finally, route the camera's video cable to the front of the car, connecting it to the camera's video connector if needed. This may involve peeling back side panels or running the cable through the vehicle's frame rail.
For a neat installation, try to pair and route the wiring alongside the existing manufacturer wiring loom.
Setting Up Spy Cameras: Computer Connection Guide
You may want to see also
![]()
Connecting to power
Connecting a rear-view camera to a power source is a crucial step in ensuring its proper functionality. Here are some detailed instructions on how to connect your rear-view camera to a power source:
Identify a Power Source:
Firstly, you need to identify a power source for the camera. The most common power sources are the reverse light or the license plate light. These lights provide the necessary power to the camera when the vehicle is in reverse.
Identify Positive and Negative Wires:
After locating the power source, you need to identify the positive and negative wires. This can be done using a multimeter, which will help you determine which wire is carrying the positive 12 volts and which is the ground wire.
Connect the Camera Wires:
Once you've identified the positive and negative wires, it's time to connect the camera wires. The camera wire cluster should have a video wire, a power wire, and possibly a reverse signal wire. Connect the positive camera wire to the positive light wire and the negative camera wire to the negative light wire. This can be done using wire connectors like Posi-Taps or by splicing the wires together.
Use a Power Converter (if needed):
If your rear-view camera requires a specific voltage, you may need to use a power converter. This is especially important if you want the camera to turn on when the ignition is turned on, as some cameras are designed to work this way. The power converter will ensure the camera receives the correct voltage.
Test the Connection:
After making all the connections, test the camera to ensure it works correctly. Turn on the car engine and check if the camera turns on automatically. If it doesn't, double-check your connections and ensure the camera is mounted securely.
Tips for a Neat Installation:
To achieve a neat and professional installation, consider the following tips:
- Use electrical tape or cable clips to bundle and secure wires.
- Route wires through hoses or rubber tubing to hide them from sight.
- Ensure all connections are insulated and protected with electrical tape or heat shrink tubing.
- If your camera has a dedicated power plug, make sure you're using the correct end for installation.
Traffic Camera Tickets: What Happens After You're Snapped?
You may want to see also
Frequently asked questions
The best place to attach a rear camera depends on your car model and personal preference. Common locations include above the rear license plate, directly on the trunk, embedded within the license plate frame, or on the rear window.
When choosing a location, consider the camera's field of view and ensure it is not obstructed by any defrosting lines or other components. You should also ensure that the camera is securely mounted and has enough slack to move up and down with the rear window if applicable.
Yes, you can attach a rear camera inside your car, such as on the rearview mirror or dashboard. However, keep in mind that this location may obstruct your view out of the front windshield, so choose a suitable monitor size and placement.
Yes, if your rear window can be lifted independently of the trunk hatch, you can install the camera on the roof of the rear instead of the window. This may require a different type of adhesive or mounting method.