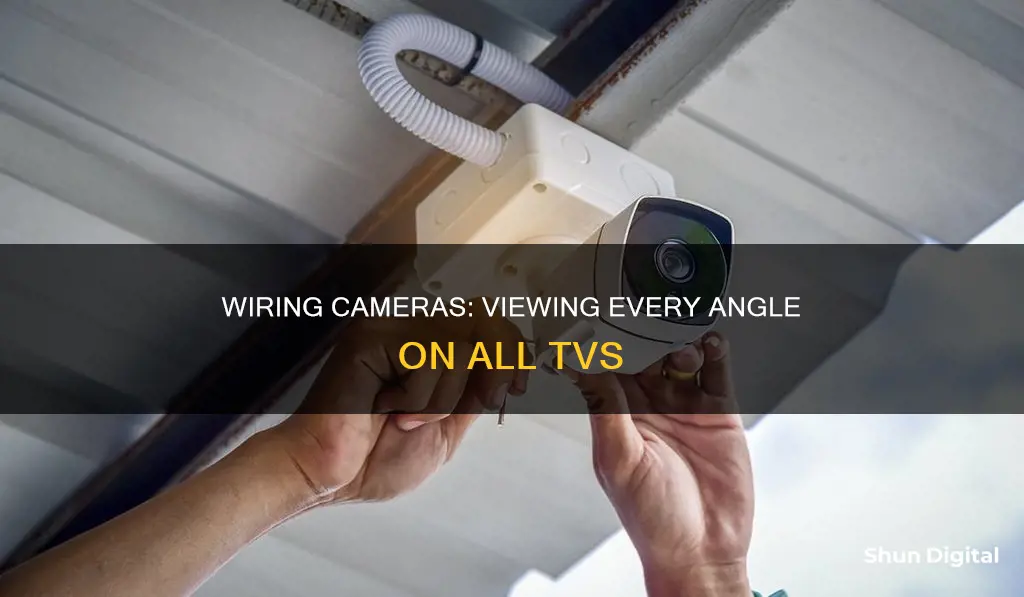
If you're looking to wire security cameras to all the TVs in your house, there are a few steps you need to follow. First, you need to decide on the type of security camera system you want to install – IP cameras or CCTV cameras. This is important because it determines the type of cable you'll need. For IP camera systems, you'll use CAT-5/6 cables, while for CCTV cameras, you'll typically use coax cables.
Once you've decided on the camera system, you need to plan the camera locations. Identify the areas you want to monitor, such as entry doors, windows, porches, and common rooms. Consider possible camera angles and ensure there are no obstructions for a clear line of sight.
After finalising the locations, you can start the installation process. For wired camera systems, you'll need to map out the path of the cables from the cameras to the DVR box. This usually involves drilling holes in walls and ceilings, so make sure you're comfortable with the process or hire a professional installer.
Connect the camera cables to the DVR box and then to the TVs you want to view the footage on. You can use HDMI cables for this, or if you have a smart TV, you may be able to connect directly through your manufacturer's app.
Finally, power up the cameras and configure the DVR or NVR settings, such as storage capacity, recording quality, and motion detection sensitivity.
By following these steps, you'll be able to successfully wire security cameras to all the TVs in your house, providing an extra layer of protection and peace of mind.
What You'll Learn

Choose the right cables for your camera system
Choosing the right cables for your camera system is a crucial step in setting up a functional and efficient security system. The type of cables you select will depend on the specific equipment you are using and your requirements. Here are some factors to consider when choosing the right cables for your camera system:
Camera Type
The first step is to determine whether you will be using IP cameras or CCTV cameras. IP cameras use CAT-5 cables, while CCTV cameras typically use coaxial cables, specifically RG59 Siamese coaxial cables. If you are unsure about the type of cameras you will use or want the flexibility to decide later, you can run both types of cables to each camera location. This option provides more flexibility but will be more expensive.
Cable Quality
When selecting coaxial cables for CCTV cameras, opt for high-quality RG59 cables with a solid copper core. Avoid steel core coax cables, as they are not suitable for CCTV cameras. For IP cameras, you can choose between Cat5 and Cat6 cables. While Cat5 cables are more affordable, Cat6 cables offer faster speeds and improved performance, making them a better choice for higher-definition camera systems.
Cable Length
Consider the length of cables required for your setup. For longer cable runs, you may need to use repeaters to connect segments together. Additionally, ensure that the cables are long enough to reach each camera location without compromising signal quality.
Signal Interference
Coaxial cables are designed to prevent electromagnetic interference (EMI) by using insulating layers and a conducting shield. If you anticipate potential interference from nearby metallic objects or other sources, coaxial cables with shielding can help maintain signal integrity.
Power Requirements
Siamese cables combine a coaxial cable and a power cable in one casing, simplifying your installation by providing both video transmission and power supply in a single cable. This is particularly useful if you want to avoid the complexity and cost of additional power supplies and cables.
Installation Expertise
If you have prior experience with cable installation, you may prefer to buy bulk cable and connectors separately. This allows for a more customizable and professional-looking installation but requires specialized equipment and knowledge. On the other hand, if convenience and ease of use are priorities, pre-made cables with attached connectors might be a better option, although they tend to be more expensive and less flexible in terms of length customization.
Cost Considerations
Evaluate the cost implications of your cable choices. While some cable types may be more expensive upfront, they can offer long-term savings by reducing installation time and disruptions to your operations. Additionally, consider the cost of associated equipment and running costs for your chosen camera system.
System Compatibility
Ensure that your chosen cables are compatible with your camera system and any additional devices you plan to connect, such as motion detectors or door sensors. Check the specifications and requirements of your equipment to make an informed decision.
Future Expansion
If you anticipate future expansion or upgrades to your camera system, consider using cables that offer higher bandwidth and longer transmission distances. This will provide you with the flexibility to accommodate higher-resolution cameras or extend your system's reach without the need for immediate replacements.
By carefully considering these factors, you can choose the right cables for your camera system, ensuring optimal performance, reliability, and compatibility.
Stream Unifi Cameras on Apple TV: Easy Steps
You may want to see also

Plan camera locations and map out wiring
Planning your camera locations and mapping out the wiring is a crucial step in setting up a home security system. Here are some detailed instructions to help you with this process:
Plan Camera Locations:
- Sketch out the layout of your home and identify priority areas you want to monitor. Consider entry doors, off-street windows, porches, stairways, driveways, and interior common rooms.
- Walk around your home and choose specific locations for each camera, ensuring there are no obstructions and a clear line of sight.
- For outdoor cameras, try to choose a placement that is higher than 10 feet and protected from inclement weather.
- Consider the number of cameras you need and the areas they will cover. Avoid trying to get one camera to do the work of two. As a general rule, each camera should cover a horizontal view of no more than 30-40 feet at the preferred viewing distance.
- Think about the height of the cameras. Standard heights that provide a good field of view are typically around 10 feet or higher, making it difficult for people to access the camera without a ladder. However, if the target area is very close to the camera, you may need to lower the height to get a clear view of people's faces.
- Decide whether you want your cameras to be visible or hidden. Visible cameras can act as a deterrent, while hidden cameras offer a tactical advantage.
- Consider the durability of outdoor cameras. Choose cameras with robust designs, weather-resistant features, and suitable temperature ranges.
- Be mindful of reflective surfaces, especially in sunny or mirrored spaces. Opt for cameras with High Dynamic Range (HDR) to minimise glare.
- Identify high-value areas that house valuable objects, appliances, electronics, or jewellery, and prioritise these areas when deciding on camera placement.
- Avoid placing cameras in bedrooms and bathrooms to maintain privacy.
- If possible, stand at each camera's intended location and pay attention to what you can see. This will give you an idea of the camera's field of view and help you identify any blind spots.
Map Out Wiring:
- Decide whether you will use IP cameras or CCTV cameras, as this will determine the type of cable you need. IP camera systems typically use CAT-5 cable, while CCTV cameras use coax cable.
- If you are unsure about the type of camera you will use, it is recommended to run both types of cables to each camera location to give you more flexibility.
- Map out the location of the components and plan how you will run the wires from the cameras to the DVR box.
- Running cables for a wired system will require drilling holes in walls and ceilings. Measure the distances carefully to determine the required length of the cables.
- Consider hiring a professional installer if you are uncomfortable with drilling or running cables.
- If you have the option, mount the cameras on the side of a building rather than directly on the roof to provide some shelter from harsh weather conditions.
- When planning the wiring, keep in mind that you will need to connect the cameras to a power source. Power over Ethernet (PoE) is an option for wired cameras.
- If you are running cables through walls, use fish tape to help feed the cables behind the walls and in tight spots. You may need assistance with this step.
Can Your TV Spy on You?
You may want to see also

Connect camera to power supply
When connecting a camera to a power supply, it is important to first determine the type of camera you are using. For instance, IP camera systems are wired using CAT-5 cables, while CCTV cameras typically use coax cables.
If you are using a CCTV camera, you will need to connect it to a power supply box. CCTV cameras require a power supply that provides the correct voltage and current. The power supply box distributes power to all installed cameras and is a more stable and cleaner option than using individual 12V power supplies for each camera. It is recommended to use a power supply that is operating at 80% of its maximum capacity to avoid any overload problems.
When connecting a CCTV camera to a power supply box, you will need to use a Siamese coax cable with a two-lead power wire or a power pigtail. DC power has a positive and negative wire, with the positive wire being red and the negative being black. It is important to match the leads with the corresponding colours in the power box to avoid damaging the camera.
If you are using a DC male power pigtail, you can plug it directly into the camera's pigtail, which is coax Siamese-tipped with a female terminal. Again, ensure that the positive and negative leads are connected correctly to avoid damaging the camera.
For IP cameras, you will need to connect them to a power source as powering them can be tricky. While wireless security cameras require minimal drilling, their image quality can be impacted by the size of the area they cover. The further the camera is from the receiver, the more interference can affect the picture.
In summary, when connecting a camera to a power supply, it is important to first identify the type of camera and then follow the appropriate connection method, ensuring correct polarity and voltage requirements to avoid any damage.
Big Brother: Is the Government Spying on Us?
You may want to see also

Connect camera to TV
To connect a camera to a TV, you'll need to decide whether you want to use a wired or wireless connection. Wired connections include HDMI, USB, and RCA, while wireless connections include screen mirroring and video casting.
HDMI
To connect your camera to your TV using an HDMI cable, you'll need an HDMI cable and an HDMI adapter. Most cameras have a Micro HDMI port. Simply plug the adapter into your camera, connect the adapter to the HDMI cable, and then plug the other end of the cable into your TV. Power on both devices, and select the correct HDMI source input on your TV. You should now be able to view your camera footage on the TV.
USB
If your camera doesn't have an HDMI output, you can use a USB cable. Plug the USB cable into your camera, and then into the TV. Turn on both devices, and select "Browse" or the equivalent option on your TV. You should now see a live preview from your camera. Navigate to the correct folder to access your photos and videos.
RCA
If you have an older TV that doesn't have an HDMI or USB port, you can use an RCA cable. These cables have three coloured ends (red, yellow, and white) that match the coloured ports on your TV. The other end of the cable should be HDMI, which you can plug into your camera.
Screen Mirroring and Video Casting
If you want to mirror your screen or cast your footage to your TV, you can do so from a phone, tablet, or laptop. For Apple devices, use AirPlay or a third-party app. For Samsung devices, use Smart View. For Android devices, you can use apps like Apower Mirror, MirrorGo, or Screen Mirroring (Castto).
Mobile Cameras and Solar Eclipse: Safe or Not?
You may want to see also

Configure camera and TV settings
To configure your camera and TV settings, you must first mount the camera in a secure location. Consider where it should be placed to provide maximum coverage of the area, and make sure that it'll remain stable once installed.
CCTV cameras can be mounted on walls or ceilings using screws or brackets, depending on the type of camera used. The cables required for the connection must also be connected and secured in place before powering up the camera. This typically involves attaching a BNC connector to each end of the cable, which is then plugged into an adapter and/or plug.
If you are using an analog CCTV camera, you will need an RG59 Siamese coaxial cable for both video signal and power transmission from the power adapter instead of separate wires. For HD security cameras, you will need a BNC-to-HDMI converter.
Once all the connections are made, you can power up your security system. Powering your camera correctly is crucial to ensuring a secure setup and smooth operation. Depending on your CCTV camera type, you'll need different types of power supplies, such as 12V DC, 24V AC, or 9V DC. Ensure correct polarity when connecting the cables.
Now that you've powered your security camera, it's time to connect it to the TV. Use a BNC-to-RCA adapter to connect the camera and TV. Make sure you've selected an AV input on the TV. Connect the power supply cable or use PoE for power connection.
You can now enjoy viewing live video from your security camera on your TV.
To ensure your security camera performs optimally, select the correct input on your TV. Before connecting the camera to the TV, familiarise yourself with input types such as AV, HDMI, or VGA.
RCA composite cables are used for analog transmission of audio and video signals, while HDMI is used for high-definition digital transmission. VGA is an analog connection used for computer monitors and TVs.
With the help of HDMI, wireless, and Google apps, you can easily connect your security camera to a smart TV. All you need is a compatible device for streaming and an app that supports it.
Once installed, simply plug in the HDMI cable from your device to the TV and begin streaming your camera footage. The app will provide all the necessary features such as recording, playback, and alarm settings, allowing you full control over your security setup from anywhere in the world.
Visio Quantum 65 Smart TV: Camera Included?
You may want to see also
Frequently asked questions
There are several benefits to connecting security cameras to a TV, including:
- Easy wiring with no connection failure
- Large storage space and 24/7 continuous recording
- No need for a network or router connection
- More stable signal
The type of cable you use depends on the type of camera you have. CAT-5 cable is used for IP camera systems, while coax cable is typically used for CCTV cameras. If you are unsure or want to decide later, it is recommended to run both types of cables to each camera location.
The steps to connect security cameras to a TV are as follows:
- Mount the security camera to a wall or ceiling.
- Connect the cables from the camera to the NVR, power supply, and TV using the appropriate connectors and cables.
- Power up the camera using either a PoE switch or a 12V DC adapter.
- Connect the camera to the TV using an HDMI cable for an NVR system, or a BNC-to-RCA adapter for an analog CCTV system.
- Select the correct input on your TV to view the live footage from the security camera.
Some alternative ways to connect security cameras to a TV include:
- Using an IP-camera-to-HDMI converter/decoder
- Setting up a DLNA server on a PC and streaming IP videos to the TV
- Using Google Chromecast or Apple TV
- Using streaming apps on smart TVs
When planning your camera setup, it is important to consider the following:
- The type of camera you will use (IP or CCTV)
- The locations where you will mount your cameras and monitors
- Whether you want to display live video feeds on multiple TVs or monitors
- Any additional devices you may want, such as motion detectors or door sensors


