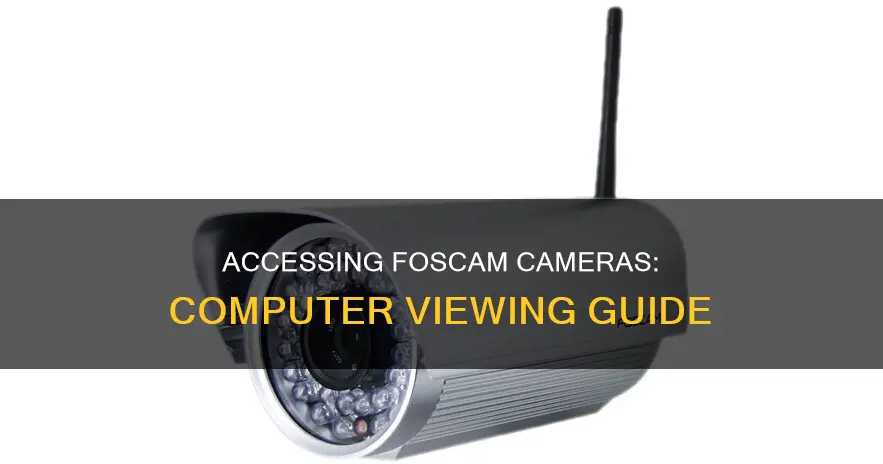
Foscam security cameras are a great way to monitor your home or business over the internet. The cameras can be connected to a computer via an Ethernet cable or Wi-Fi, and you can view the camera feed on your computer's web browser or through an app on your phone. This guide will walk you through the steps to connect your Foscam camera to your computer and access its feed, as well as some general tips for viewing IP camera feeds.
| Characteristics | Values |
|---|---|
| Camera type | HD camera |
| Connection type | Wired (Ethernet cable) or wireless |
| Software | Equipment Search Tool |
| Web browser | Microsoft Edge, IE, Chrome, Firefox, Safari |
| User name | Admin |
| Password | Blank by default |
| Port number | 8090 |
| IP address | 192.168.15.23 |
What You'll Learn
![]()
Connecting your Foscam camera to your computer
This guide will walk you through the process of connecting your Foscam camera to your computer. Please note that the steps may vary slightly depending on your specific Foscam camera model and your computer's operating system. It is also important to ensure that your camera is properly set up and connected to the same network as your computer before proceeding.
Step 1: Install the Equipment Search Tool
Download and install the Foscam Equipment Search Tool on your computer. This software will allow your computer to detect any Foscam cameras connected to the network. You can download the tool from the official Foscam website: http://www.foscam.com/download-center/software-tools.html. Note that there are separate tools available for Windows and MacOS computers.
Step 2: Run the Equipment Search Tool
Once the software is installed, run the Equipment Search Tool. It will display any Foscam cameras connected to the network. Note down the IP address of the camera you want to configure. If you are using a Windows computer, be sure to disable any virtual network drivers, as they may interfere with the Equipment Search Tool.
Step 3: Open a Web Browser
Double-clicking on the IP address of the camera should open up your default web browser. Ensure you are using a compatible browser—Microsoft Edge, Internet Explorer, Chrome, or Firefox for Windows, and Safari for MacOS. Disable any pop-up blockers, as they may interfere with the camera interface.
Step 4: Enter the IP Address and Port Number
If you are manually launching a web browser, enter the IP address and port number for your camera. For example, to log in to the FN3109H camera, enter the following: http://192.168.15.23:88. Press Enter, and the login page for your camera should appear.
Step 5: Log In to Your Camera
Enter your username and password to log in to your camera. If this is your first time logging in, the default username is usually "Admin," and the password is left blank. You will be prompted to create a new username and password during the initial login. Be sure to keep this information secure for future reference.
Step 6: Configure Your Camera
Once you are logged in, you can continue to configure and use your camera as needed. This may include setting up port forwarding and DDNS if you wish to access your camera remotely over the Internet.
How Camera Improvements Revolutionized Visual Storytelling
You may want to see also
![]()
Finding your camera's IP address
To set up your Foscam camera, you will need to find its IP address. This can be done using the Foscam IP Camera Tool (also known as the Equipment Search Tool). This software allows you to find the IP address of your Foscam camera on your local network and modify various network settings such as the gateway, subnet mask, and DNS.
- Connect the camera: Use an Ethernet cable to connect your camera to a LAN port on your router.
- Power on the camera: Turn on your Foscam camera.
- Verify the computer connection: Ensure that your computer is connected to the same router as the camera.
- Wait for the self-test: Allow the camera to complete its self-test. Some models will announce "Wired connection successful" once this step is complete.
- Launch the IP Camera Equipment Search Tool: Open the program to initiate the search for your camera's IP address.
- Locate the camera on the network: The tool will scan your local network and list any Foscam devices found. Your camera's IP address will be displayed in the search results.
- Access the camera: Double-clicking on the IP address in the search results will direct you to a web browser where you can access your camera using your login credentials. Ensure you install any necessary plugins.
It is important to note that both your camera and computer should be connected to the same router (network) to ensure the Equipment Search Tool functions correctly. Additionally, ensure that your camera's status is normal and that the router's DHCP server is enabled.
How Cameras Precede Photos: A Historical Perspective
You may want to see also
![]()
Logging into your camera
Logging into your Foscam camera can be done by following these steps:
- Ensure your camera is powered and connected to the router via an ethernet cable.
- Verify that your camera and computer are connected to the same network.
- Download and install the Equipment Search Tool. Foscam provides this software for Windows and MacOS.
- Run the Equipment Search Tool. This will display any Foscam cameras connected to the network. Note the IP address of the camera you wish to configure.
- If using Windows, disable any virtual network drivers. These will interfere with the Equipment Search Tool.
- Double-click the IP address of the camera to open the default web browser. Ensure you are using a compatible browser (Microsoft Edge, IE, Chrome, or Firefox for Windows; Safari for MacOS).
- Disable any pop-up blockers.
- If manually launching a web browser, enter the IP address and port number for the camera. For example, to log in to the FN3109H camera, enter the following: http://192.168.15.23:88.
- Press Enter. The login page for the camera should appear.
- Enter your username and password. If this is your first time logging in, the default username is "Admin," and the password is blank. You will be prompted to create a new username and password.
You can now continue to configure and use the camera as needed.
How to Extend Your Camera's Battery Life
You may want to see also
![]()
Configuring your network settings
To watch your Foscam cameras from your computer, you will need to configure your network settings. This process will involve several steps, including documenting your local network configuration, assigning a static IP address to your computer, and connecting your camera to your computer via an Ethernet cable.
Step 1: Document Your Local Network Configuration
To begin, you will need to document the configuration of your local network. This can be done by using a Windows-based computer connected to the network. Here are the specific steps:
- Press the "Window + R" keys simultaneously.
- A box will appear; type "cmd" into it.
- Type "ipconfig/all" in the command prompt and hit Enter.
- This will display the IPv4 address, Subnet Mask, Default Gateway, and DNS information. Make sure to document this information for future use.
Step 2: Assign a Static IP Address to Your Computer
Next, you will need to assign a static IP address to your computer. Here are the steps:
- Press the "Window + R" keys again.
- Type "ncpa.cpl" into the box that appears.
- Right-click on "Local Area Connection" and select "Properties".
- Locate and select "Internet Protocol Version TCP/IPv4" by scrolling down the menu or double-clicking it.
- Click "Use the following IP address".
- Enter the IPv4 address, Subnet Mask, Default Gateway, and DNS information that you documented in Step 1.
- Click "OK" to save these settings.
Step 3: Disconnect from Wi-Fi and Connect Your Camera
Now, you will need to disconnect your computer from any Wi-Fi network and ensure it is connected only via a cable. Then, connect your camera to the other end of the Ethernet cable connected to your computer. This process may take up to 10 minutes.
If you are using the Equipment Search Tool, you may see the camera followed by "err2". This indicates that the network card inside the camera is functioning normally.
Step 4: Access Your Camera Locally
To access your camera locally, right-click on it, choose "Network Configuration", and set up the camera with the same static IP address and network segment as your computer.
Once the proper IP address for your camera is displayed, open a web browser and type the address along with the port number into the address bar. You should now be able to view the GUI page for your camera.
Remember to re-enable your Wi-Fi networking and restore your computer's original network settings when you have finished working with the camera.
Transferring Camera Photos: Windows 10 Simplified Steps
You may want to see also
![]()
Viewing your camera feed
To view your Foscam camera feed on your computer, you will need to connect your camera to your computer using an Ethernet cable. This setup is necessary when you cannot connect your camera to a router with an Ethernet cable due to specialised network configurations or the physical location of your router.
First, you must document the configuration of your local network. To do this, use a Windows-based computer connected to your network and simultaneously press the "Window + R" keys. A box will appear; type "cmd" and then type "ipconfig/all" in the command prompt and hit Enter. The IPv4, Subnet Mask, Default Gateway and DNS will be displayed. Write this information down for future use.
Next, assign a Static IP Address to your computer. To do this, simultaneously press the "Window + R" keys again. Another box will appear; type "ncpa.cpl". The Network Connection icon will be displayed. Right-click "Local Area Connection" and select "Properties". Scroll down the menu until "Internet Protocol Version TCP/IPv4" is displayed or double-click it. Click "Use the following IP address" and enter the IPv4, Subnet Mask, Default Gateway and DNS that were documented earlier. Click "OK" to save this information.
Now, disconnect your computer from any WiFi network and leave it connected to a cable only. Connect your camera to the other end of the Ethernet cable connected to your computer. This process can take 5-10 minutes to complete. If the Equipment Search Tool is running, the camera followed by "err2" may be displayed, indicating that the network card inside the camera is functioning normally.
To access the camera locally, right-click it, choose "Network Configuration" and set the camera up with the same static IP with the same network segment as the computer. Once the proper IP address for the camera is displayed, open a web browser and type the address along with the port number into the address bar of the browser and click enter. The GUI page for your camera should now be displayed.
Finally, be sure to re-enable WiFi networking and restore your computer's network settings once you have finished working with the camera.
The Evolution of First Disposable Camera
You may want to see also
Frequently asked questions
First, make sure your camera is configured and connected to the same network as your computer. Then, download and install the Equipment Search Tool. Run the software and note your camera's IP address. Open a web browser and enter the IP address and port number for the camera. Log in with your username and password.
You will need to set up a static IP address for the camera and enable the DDNS. Then, configure port forwarding on your router and verify that the port is open. Finally, use your DDNS and port to access the camera remotely on your computer.
You can connect your camera directly to your computer using an Ethernet cable. First, document the configuration of your local network and assign a static IP address to your computer. Then, disconnect your computer from any WiFi network and connect the camera to your computer using the Ethernet cable.