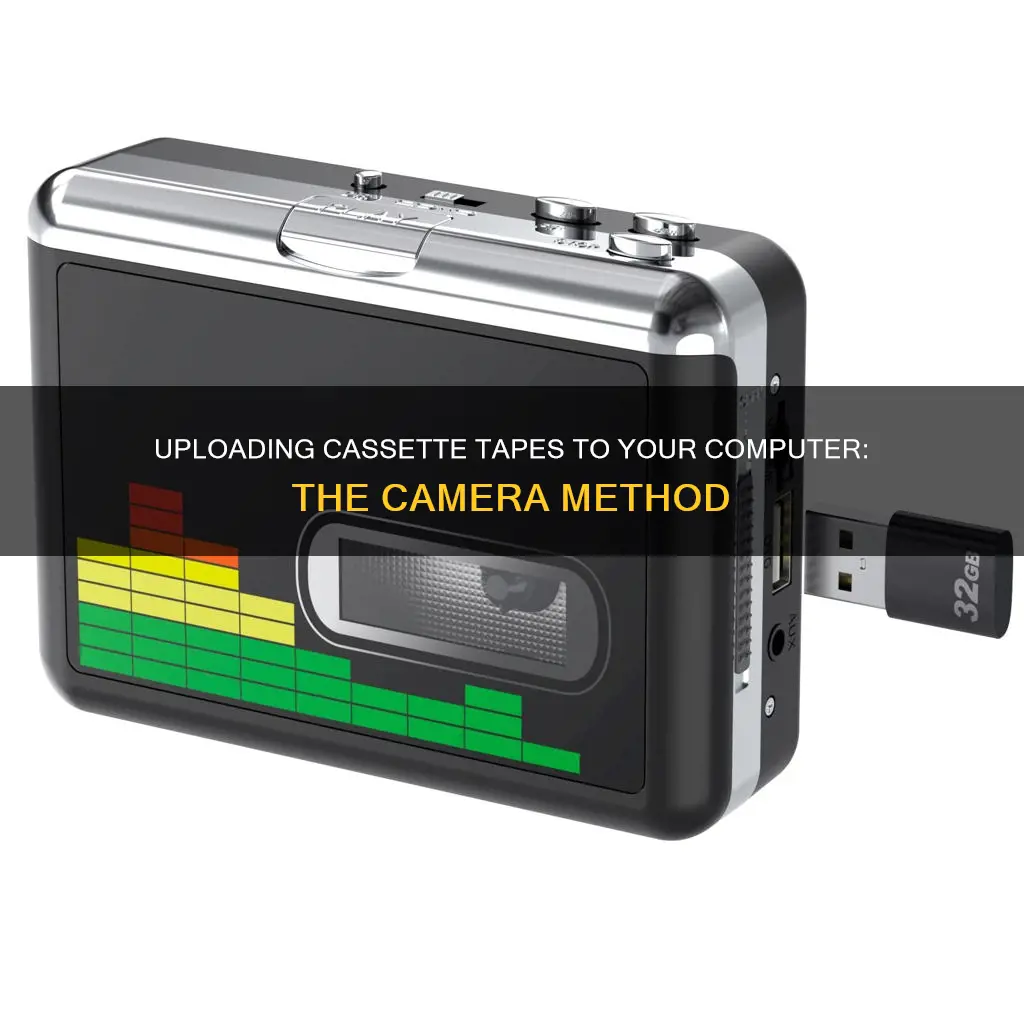
There are several ways to upload cassette tapes to a computer. The first option is to purchase a USB cassette converter, which can be found for as low as $25. The second option is to use a regular cassette tape deck with RCA output jacks or a tape player with a 3.5mm mini-plug, along with a stereo RCA cable. The third method is to send your cassette tapes to a professional digitizing service.
| Characteristics | Values |
|---|---|
| Cost | $25 - $700 |
| Time | Real-time |
| Software | Audacity, QuickTime Player, EZ Tape Converter, EZ Audio Converter |
| File Format | .mp3, .wav, .aiff, .ogg, .flac |
What You'll Learn

Connect your cassette deck to the line-in jack on your computer
Connect Your Cassette Deck to Your Computer
To transfer your cassette tapes to your computer using a camera, you will need a few pieces of equipment. Firstly, ensure you have a cassette deck, which is the device that plays the tapes. If your cassette player is a portable unit, it may have a battery compartment. Ensure it is loaded with fresh batteries or, if it has the option, plug it into a power source using the provided adapter. You will also need a stereo RCA-to-aux cable. One end of this cable will have two male RCA connectors (usually colored red and white), and the other end will have a male 3.5mm connector, which is the standard aux size.
Locate the line-in jack on your computer. This could be on the back or the side of the CPU, or on the front or side panel of your desktop computer's speakers, if you have them connected. The line-in jack is typically colored light blue and is often next to a pink jack, which is the line-out or headphone jack. Plug the male 3.5mm connector into the line-in jack, ensuring it is firmly inserted.
Now, take the RCA end of the cable and plug it into the corresponding output jacks on your cassette deck. The colors should match—red to red and white to white. If your cassette deck only has one output jack, usually the white one, just connect the white RCA connector and leave the red one disconnected.
At this point, you should be physically connected and ready to transfer your cassette tape to a digital format on your computer. Ensure your cassette deck is turned off, and then open your preferred audio recording software on your computer. There are many free and easy-to-use options available, such as Audacity, which is suitable for this task.
With your software open and ready to record, press play on your cassette deck, and you should hear the audio through your computer speakers. Adjust the volume on your cassette deck to get a good audio level, and then start recording in your software when you are ready. When your tape has finished playing, or you have reached the end of the section you wish to digitize, stop the recording and save the file in your preferred format. MP3 or WAV are common formats, but you may wish to research the best format for your needs.
This method allows you to directly connect your cassette deck to your computer, ensuring a direct and good-quality transfer of your precious audio memories. It may take a little time to set up, but it is a reliable way to preserve your cassette tape collection.
Surveillance Cameras: Generating Heat or Just Recording?
You may want to see also

Download and open Audacity (Windows) or QuickTime Player (Mac)
To transfer audio from a cassette tape to a computer, you will need to connect your cassette player to your computer's "microphone" or "line-in" input via the proper cable. You can then use Audacity (Windows) or QuickTime Player (Mac) to record the audio from your cassettes.
To download and open Audacity, follow these steps:
For Windows:
- Go to https://www.audacityteam.org/download/ in your web browser.
- Click on "Audacity for Windows."
- Click on the "Audacity 2.2.2 installer" link.
- Double-click on the installer file once it has finished downloading.
- Follow the setup prompts to complete the installation.
- Open Audacity by going to Start, typing in "Audacity," and clicking on the Audacity application at the top of the Start menu.
For Mac:
Open the QuickTime Player app by clicking on the icon in your Mac's Dock. If it's not there, you can find it in the Applications folder and double-click to open it.
Once you have downloaded and opened either Audacity or QuickTime Player, you can start a new audio project and select the audio input matching your cassette player ("Line In" or "Internal"). Then, you can begin recording by clicking "Record" and pressing "Play" on your cassette player. When you're done, simply stop the recording and export your file as an MP3.
The Matrix Camera Rig: Capturing Action With Multiple Cameras
You may want to see also

Start a new audio project
To start a new audio project, you will need to download and open Audacity (for Windows) or QuickTime Player (for Mac).
Using Audacity (Windows)
- Make sure the sound recording option is MME. In the upper-left corner of the Audacity window, you should see "MME" in a drop-down box. If not, click the drop-down box, then click MME.
- Click the Audio Input drop-down box (the box to the right of the microphone icon near the top of the window) and select the Line In option. This option's name will vary, but make sure it has "Line In" in the title; do not select the Microsoft Sound Mapper or Primary Sound Capture option.
- Click the "Record" button (the red circle at the top of the window). Audacity will begin recording.
- Press your cassette deck's "Play" button. The cassette deck should begin playing, and you should see the sound wave in the middle of the Audacity window spike in response.
- Stop the recording when you're done by pressing your cassette player's "Stop" button, then clicking the black "Stop" button at the top of the Audacity window.
- Save your recording by clicking File in the top-left corner of the window, then selecting Export in the resulting drop-down menu, and finally clicking Export as MP3 in the pop-out menu. Select a save location, enter a file name, and click OK.
Using QuickTime Player (Mac)
- Open QuickTime by clicking the QuickTime app icon, which resembles a "Q" in your Mac's Dock. If it isn't there, you can double-click the QuickTime app icon in the Applications folder.
- Click File in the upper-left side of the screen. A drop-down menu will appear.
- Click New Audio Recording. This option is near the top of the drop-down menu. Doing so switches the QuickTime window to record only audio.
- Click the drop-down menu icon (on the far-right side of the QuickTime window). A drop-down menu will appear.
- Click Built-in Line Input. This option is in the drop-down menu. Doing so selects your Mac's line-in item as the item from which to record audio.
- Click the "Record" button (the red circle in the middle of the QuickTime window). QuickTime will begin recording.
- Press your cassette deck's "Play" button. Doing so will cause QuickTime to begin recording your cassette deck's contents.
- Stop your recording when you're finished. Once you've recorded the audio you want to save on your computer, press your cassette deck's "Stop" button, then click the red "Record" button in the middle of the QuickTime window again to stop the recording. This will save your recording as an audio file on your Mac's Desktop.
Avoid Costly Camera Tickets: Stay Out of Bus Lanes
You may want to see also

Select the audio input matching the cassette player
To select the audio input matching the cassette player, you will need to open Audacity and click on 'Edit' and then 'Preferences'. If it's not there already, click on 'Audio I/O' in the left-hand menu. Then, select the 'Input Source' to record sound from the section heading called 'Recording' and under that, a drop-down menu called 'Device'.
If your computer is operating on any version of Windows, do not select 'Microsoft SoundMapper'. If necessary, try other options under the drop-down until you get the sound to record. Then, adjust the volume for your recording by clicking on the downward-pointing arrow on the right-hand (red) VU recording level meters.
If you are using a Mac, open QuickTime and click on 'File' in the upper-left side of the screen. A drop-down menu will appear. Click on 'New Audio Recording'. This will switch the QuickTime window to record only audio. Click the drop-down menu icon on the far-right side of the QuickTime window. A drop-down menu will appear. Click 'Built-in Line Input'. This will select your Mac's line-in item as the item from which to record audio.
Testing Vintage Polaroid: Battery Check for 1-Step Cameras
You may want to see also

Click Record and hit Play on your cassette player
Once you've connected your cassette player to your computer, you're almost ready to start recording.
First, open Audacity (Windows) or QuickTime Player (Mac). Then, start a new audio project.
Next, select the audio input that matches your cassette player. This will be either "Line In" or "Internal".
Now, simply click "Record" in the software, and hit "Play" on your cassette player.
When you're done, stop the recording and export and save the file as an MP3.
The Everlasting WiFi Camera: Maximizing Battery Life
You may want to see also
Frequently asked questions
The cheapest way to upload cassette tapes to a computer is by purchasing a USB cassette converter. These can be found for as low as $25.
The most expensive way to upload cassette tapes to a computer is by purchasing a cassette tape deck with a CD recorder. This will likely cost you upwards of $200.
The most time-efficient way to upload cassette tapes to a computer is by using a professional digitizing service. This will save you time spent searching for equipment and performing the transfer yourself.
The most convenient way to upload cassette tapes to a computer is by using a professional digitizing service. This will save you the hassle of setting up equipment and performing the transfer yourself.


