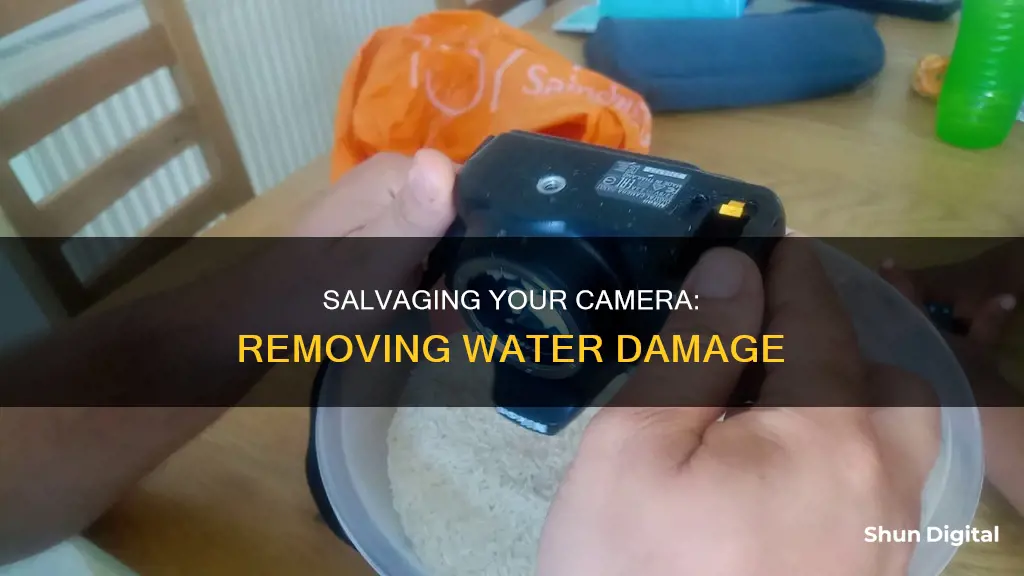
Water in your camera can be a nightmare, affecting photo quality and leading to hardware damage. Here are some tips to help you rescue your camera and remove that water. First things first, turn off your camera or phone. This will prevent electrical components from coming into contact with moisture and reduce the risk of short circuits. If possible, remove the battery. Next, use a soft, lint-free or microfiber cloth to gently wipe away any visible moisture from the camera, battery and battery compartment. Do not use a hairdryer on a high-heat setting as this can damage electrical components. Instead, you can use silica gel packets or uncooked rice to draw out the moisture. Place your camera and battery in an airtight container with the desiccant and leave for 24 hours. If your camera lens is simply foggy, try warming your equipment by turning on the heater in your vehicle or using a hairdryer on low heat.
How to Remove Water from a Camera Lens
| Characteristics | Values |
|---|---|
| Turn off the phone | As soon as you notice water in the camera lens, turn off the phone to prevent short circuits and further hardware damage. |
| Use a soft cloth | Gently wipe away any visible water with a soft, lint-free cloth. Do not press too hard, as this could push water further into the device. |
| Keep the phone upright | Place the phone upright to prevent water from travelling deeper into the device or towards sensitive areas. |
| Avoid using heat | Do not use hairdryers or other heat sources to dry the phone, as intense heat can damage internal components. |
| Do not shake the phone | Shaking the phone can move water to undamaged parts. |
| Remove the SIM card and case | Remove the case and eject the SIM card tray to create an outlet for moisture to escape and improve air circulation. |
| Place the phone in a dry environment | Place the phone in a dry, well-ventilated area to assist the evaporation process. Avoid direct sunlight, as this can damage the device. |
| Do not charge the phone | Do not charge the phone until you are certain all moisture has evaporated, as this increases the risk of a short circuit. |
| Use rice | Place the phone in a sealed bag or container filled halfway with uncooked rice to draw out the moisture. Leave for at least 24 hours. |
| Use silica gel | Silica gel packets are more effective than rice at absorbing moisture, and there is no risk of particles getting stuck in the device. Place the phone and several silica gel packets in a sealed bag or container for at least 24 hours. |
| Disassemble the phone | For those with technical skills, you can try disassembling the phone to remove the battery and other components, then gently soak up any visible moisture with a lint-free cloth. |
What You'll Learn

Turn off the device
If you find that your camera or phone has come into contact with water, it is important to act quickly to prevent damage to your device. The first thing you should do is turn off the device. Powering off your device will reduce the risk of electrical short circuits, which can cause irreversible damage to your device's internal components.
If your device has a removable battery, you should take it out. Additionally, if your device has a protective case, remove it. You can then use a soft, lint-free or microfiber cloth to gently wipe away any visible water or moisture on your device. Ensure you don't press too hard when doing this, as it could push water further into the device.
It is also important to place your device in an upright position to prevent water from travelling deeper into the device or towards other sensitive areas. You should also remove the SIM card tray with a SIM card removal tool or a paper clip. Leaving the tray out creates a small outlet for moisture to escape and allows for better air circulation around the device.
Once you have completed these steps, you can then move on to other methods to remove moisture from your device, such as using silica gel packets or uncooked rice.
Capturing a Solar Eclipse: Mirrorless Magic
You may want to see also

Wipe away visible water
If your camera has fallen into water, the first thing you should do is turn it off to prevent damage to the electronics. Then, remove the memory card and batteries, and leave them somewhere to dry.
If there is no water lining the seal where the lens connects to the camera, you can remove the lens. Be sure to clean the lens as soon as possible, especially if it has been submerged in saltwater. Always dab when cleaning the lens to avoid scratching or putting pressure on the lens.
Use a small cloth to gently dab the inside of the camera and soak up any visible water. Be careful not to push water droplets further into the camera.
If there is water on the camera lens, use a lens bulb to pump air onto the lens and blow away any dirt or particles. Brush away any remaining particles with a soft lens brush. Then, use a microfiber cloth to gently wipe the lens, moving from the inside out in a circular motion. Do this several times to remove all water droplet residue. Always wipe gently to avoid rubbing off the protective coating of the lens.
If the camera has been submerged in saltwater, it is important to rinse off the salt to avoid rust or corrosion. Fill a large bowl with fresh water, dip the camera in for no more than 5 seconds, and then place it on a towel and pat it dry. Alternatively, wet a cloth and wipe it over the camera to remove any salty residue.
Removing Camera Tilt in Cesium: A Step-by-Step Guide
You may want to see also

Avoid using heat
When removing water from a camera, it is important to avoid using heat. While it may be tempting to use a hairdryer or other heat sources to speed up the drying process, doing so can be detrimental to your camera. Intense heat can cause several issues, including warping internal components, melting adhesives, and sealing in moisture in areas where it might have otherwise evaporated. This can lead to irreversible damage to your camera's internal components.
Instead of using heat, it is recommended to place your camera in an airtight container with a desiccant such as silica gel packets or raw rice. These desiccants can help absorb moisture from the camera. It is recommended to leave the camera in the container for at least 24 hours to ensure complete drying. If available, you can also use a vacuum bag to seal the camera and desiccant together and then use a vacuum pump to draw out the air, speeding up the drying process.
Another important thing to keep in mind is to avoid charging your camera or turning it on until you are certain that all moisture has evaporated. Charging a damp device increases the risk of a short circuit, which can cause permanent damage to your camera.
Additionally, if you have access to one, you can use a small air compressor to blow air onto your camera, helping to remove any remaining moisture. However, always make sure to use the cool air setting and avoid using hot air, as this can cause overheating and potential damage to the internal components.
In summary, when removing water from your camera, it is crucial to avoid using heat. Instead, opt for desiccants, vacuum sealing, or an air compressor on a cool setting to effectively remove moisture and protect your camera's internal components from damage.
Reality TV: Unveiling the Truth Behind the Cameras
You may want to see also

Use silica gel
Silica gel is a mix of water and silica, the main component in sand. It is often found in shoe boxes, bags, or other newly purchased items. Brands use them to keep their products at the perfect humidity. The silica gel absorbs water from the moist air, keeping the products from becoming damp.
If you do not have silica gel packets in your house, they are inexpensive and can be bought online or from supermarkets and retailers such as Walmart, Amazon, or Home Depot.
Step 1: Put the silica gel in a zip bag, plastic bag, or airtight container.
Step 2: Disassemble your camera lens from the camera.
Step 3: Place the camera lens inside the bag or container with the front element facing down.
Step 4: Seal the bag or container tightly to avoid air from getting inside.
Step 5: Leave the bag or container in a warm area for approximately 50+ hours for the gel to completely absorb the water from the lens.
It is important to note that silica gel needs to be recharged periodically to stay effective. As it absorbs water, it becomes saturated and less effective. Photographers should dry and reuse silica gel to reduce humidity and prevent lens fungus.
To dry silica gel, follow these steps:
- Spread the silica gel across the bottom of a bake-safe oven dish, ensuring the beads or crystals are less than an inch deep in the dish.
- Place the dish in an oven and heat it to 120° C (248° F) for 1–2 hours.
- When the silica gel has returned to its original color, it is ready to be removed from the oven.
- Allow the silica gel to cool inside the oven before transferring it to an airtight container for storage.
Silica gel can be reused up to 500 times, making it an eco-friendly option. However, its efficiency decreases after 100 uses. It is important not to overheat silica gel, as its internal structure will be destroyed.
Additionally, silica gel should not be recharged in a microwave oven, as the high temperatures can shatter the porous structure of the silica gel. Instead, a conventional oven or stove-top method should be used.
Running Q-See Camera Cables: Through-Wall Installation Guide
You may want to see also

Disassemble the phone
If you have some technical skills and are feeling brave, you can try disassembling your phone to remove moisture. However, this method comes with risks, including the possibility of voiding your warranty, so proceed with caution.
- Find a clean, well-lit, and organized workspace. Lay down a white cloth or piece of paper to clearly see and organize the tiny screws and parts.
- Using a specialized screwdriver, remove the screws flanking the charging port. Keep them in a safe place, as they are easy to lose.
- Carefully separate the display from the back of the phone using a plastic spudger or a suction handle. This step requires patience and gentle prying.
- Before touching anything else, locate and disconnect the battery. This is an important step to minimize the risk of short-circuiting components.
- With the phone open, inspect for visible signs of moisture. Use a soft, lint-free cloth to gently dab away any visible droplets.
- If there is extensive moisture, you might consider leaving the phone open in a dry, well-ventilated environment for several hours. Do not place the phone under direct sunlight as this can damage the screen and other internal components.
- After ensuring the internals are dry, carefully reassemble the phone in the reverse order. Make sure every part goes back to where it belongs and that all connectors snap firmly into place.
Remember to always be gentle. Forcing components can lead to permanent damage. If you feel unsure at any point, it is best to seek professional help.
TCL 55-Inch TV: Camera-Equipped or Not?
You may want to see also
Frequently asked questions
Turn off your device immediately. Powering off your device will reduce the risk of electrical short circuits that can cause irreversible damage to your camera's internal components.
The best way to dry your camera is to use a desiccant such as silica gel packets or uncooked rice. Place your camera in an airtight container with the desiccant and leave it for at least 24 hours.
Yes, if you have access to a vacuum pump, you can use it to draw out the air from the airtight container. This will speed up the drying process. Alternatively, you can use the cool air setting on a hairdryer, but avoid using heat as this can damage the internal components.
Avoid using your camera in humid environments or places with extreme temperature changes. Use a waterproof case or a camera lens protection film to prevent water droplets from entering the lens.
If your camera has been damaged by water, it is best to consult a professional repair service. They have specialised equipment, such as ultrasonic cleaners, that can effectively address water damage.


