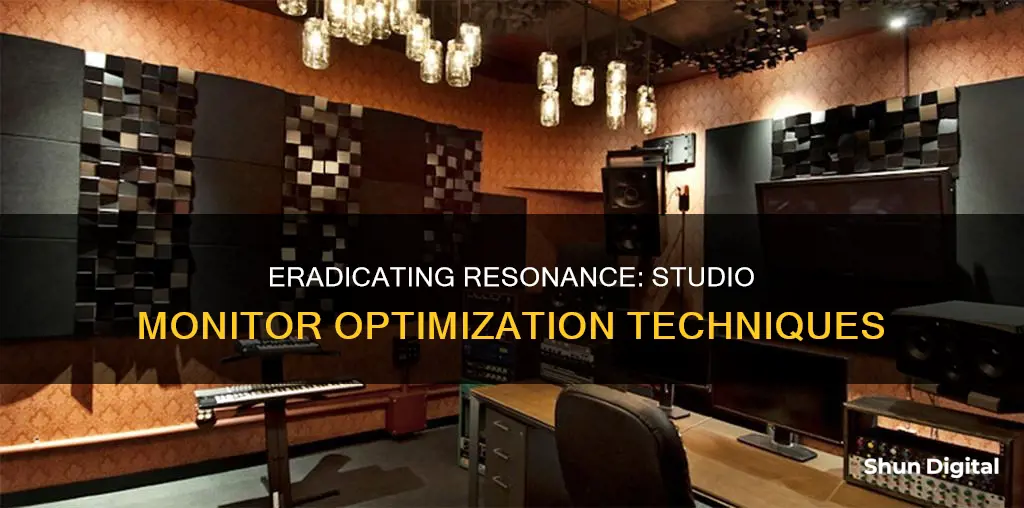
Studio monitor stands can affect sound quality in a few ways. One of the most important factors is the isolation of the studio monitors from the desk, floor, or wall. When studio monitors are placed directly onto a surface such as a desk, the desk will start to resonate at specific frequencies, which are determined by its size and shape. These resonances will then combine with the sound from the studio monitors, causing interference. This interference negatively impacts the frequency response at the listening position. To prevent this, studio monitor stands often feature isolation pads or added density to reduce the transfer of energy.
| Characteristics | Values |
|---|---|
| Vertical Positioning | Speakers should be positioned so that the high-frequency drivers are on-axis with your ears when sitting in the listening position. |
| Horizontal Positioning | An equilateral triangle should be formed between the listening position and the two speakers. |
| Isolation | Stands with isolation pads or added density can be used to isolate studio monitors from the desk, floor, or wall. |
| Weight | Adding weight to the table or getting a denser table can help reduce resonance. |
| Surface | Identify the exact surface that is resonating and stop it with your hand or by placing heavy items on the surface. |
| Reflection | Angle the studio monitors to avoid reflections off the desk or move them further away so that the angle of reflection becomes too obtuse. |
| EQing | Use a wide Q of about 1 and boost it by 5dB, then scroll through the frequency spectrum to amplify certain ranges. Once a sensitive area is spotted, increase the Q to 2.5 and adjust the covered area to pinpoint the resonance. |
What You'll Learn

Use monitor isolation pads
Using monitor isolation pads is a great way to remove resonance from your studio monitors. Isolation pads are designed to absorb the vibrations produced by your studio monitors, which are passed through the desk, table, or stand that they are sitting on. This reduces resonance and creates a flatter frequency response, which is ideal for mixing.
There are many different types of isolation pads available, from foam pads to cinder blocks, and even high-end options with multiple layers of separation. One of the most popular options is the Sound Addicted 5-Inch Monitor Pads, which come with multiple foam pads that can be placed on top of each other to adjust the height and angle of your monitors. When setting up your monitors, ensure that the tweeters are at ear level and pointed directly at your ears. You should also create an equilateral triangle shape with the speakers, with you, the listener, in the middle.
Isolation pads are relatively inexpensive and are a great way to get the best out of your studio monitors. They can help provide a transparent frequency response and an accurate depiction of your mixes, enabling you to make more informed decisions. Additionally, they can also help to prevent unwanted resonance from your surface rattling.
If you are experiencing resonance from the rear panel of your monitors, isolation pads can also help with that issue. By damping the cabinet and reducing the vibrations reflected from the supporting surface, isolation pads can minimize panel resonances. This can be further improved by damping the panel resonance itself using products like DynaMat.
Asus Monitors: Rapid Response Times Explored
You may want to see also

Adjust the vertical and horizontal positioning of the monitors
To remove resonance from studio monitors, one must consider the vertical and horizontal positioning of the monitors. The placement of studio monitors can have a significant impact on the sound quality and overall listening experience. Here are some detailed instructions to adjust the positioning:
Firstly, it is important to create an equilateral triangle setup between the monitors and your listening position. This means that the left and right speakers should be equidistant from each other and the listener, forming an equal-sided triangle. This setup helps create an accurate stereo image and a balanced sound stage. It also establishes an optimal "sweet spot" for monitoring, allowing you to experience the most accurate representation of the audio with minimal phase issues and frequency response discrepancies.
Secondly, ensure that the monitors are placed at ear level or slightly above. This helps direct the sound accurately towards your ears and reduces unwanted reflections from other surfaces. If your desk is too high or too low for the speakers, consider using height-adjustable monitor stands to achieve the desired height.
Thirdly, try to avoid placing the monitors directly against walls or corners. Acoustic resonance can occur when monitors are placed in corners, leading to a buildup of low-frequency energy due to the reinforcement of bass frequencies. Instead, place the monitors between 5 and 60 cm from the walls to avoid the worst opposite waves and sound cancellation issues. If there is limited space, consider using absorbers or acoustic panels on the surface behind the monitors to help trap some reflections.
Lastly, pay attention to the vertical angle of the monitors. If your monitors are placed on a surface higher than your seated position, you may need to adjust the vertical angle so that the high-frequency driver is at the same height as your ears. High-frequency content is more directional than low-frequency content, so ensuring it is directed at your ears will provide a more accurate listening experience.
By following these instructions and making adjustments as needed, you can optimize the vertical and horizontal positioning of your studio monitors to reduce resonance and improve sound quality.
Tucson's Best Places to Sell Your Old Monitors
You may want to see also

Add weight to the table
Adding weight to the table is one way to reduce resonance from a studio monitor. This can be done by placing heavy objects on the table, such as books, a toolbox, or a cinder block. Another way to add weight is to fill the drawers of the table with heavy items. If your table doesn't have drawers, you can try attaching a length of PVC pipe filled with sand to the underside of the table. This will only work if the table is sturdy enough to bear the added weight.
If adding weight to the table doesn't work, you may need to try other methods to reduce resonance. One suggestion is to use speaker stands to isolate the speakers from the table. These stands can often be filled with sand or shot to reduce resonance and vibrations. Additionally, isolation pads can be used on the stands or directly under the speakers to further reduce vibrations.
If you want to keep your speakers on the table, you can try placing them on isolation pads or foam monitor isolator pads. You can also try attaching the speakers to the wall or edge of the table using stands or wall mounts. This will help to create space between the speakers and the table, reducing the transfer of energy and subsequent resonance.
Finally, you can try treating the room itself with acoustic panels or bass traps to reduce sound reflections and improve the overall acoustics. This can be done by adding thick foam, acoustic curtains, or bass traps to the walls and surfaces in your studio.
What Monitor Do I Have? A Guide to Finding Out
You may want to see also

Get a denser table
If you're experiencing desk resonance, one solution is to get a denser table. This is because denser materials tend to absorb more sound, reducing the amount of sound reflection and, in turn, resonance.
When looking for a denser table, consider the material it is made from. For example, a table made of solid wood will be denser than one made of cheap particle board. Additionally, the thickness of the table top will also impact its density. A thicker tabletop will be denser and less prone to resonance than a thinner one.
You can also increase the density of your current table by adding weight to it. This can be done by placing heavy objects on the table, such as books or tools. Another option is to attach something heavy to the underside of the table, such as wooden bars or a length of PVC pipe filled with sand.
If you're unable to find a denser table or add weight to your current one, you may want to consider other solutions to reduce desk resonance. These include decoupling your monitors from the desk using isolator pads or stands, or reducing desk reflections by placing foam pads or cinder blocks between the monitors and the desk.
Monitor Size for Office Workers: What's the Sweet Spot?
You may want to see also

Use a spectrum analyser to identify the exact frequencies that are problematic
A spectrum analyser is a tool that allows you to visualise the frequency balance of a signal. It measures the magnitude of an input signal versus frequency within the full frequency range of the instrument. The display of a spectrum analyser will show frequency on the horizontal axis and amplitude on the vertical axis.
Spectrum analysers are useful for identifying resonance problems. Resonance is a buildup of energy at a particular frequency, and unpleasant resonances can cause problems in your mix. Resonances are easy to spot on a spectrum analyser as they show up as sharp, narrow peaks in the upper midrange or broader bumps in the lower mids and lows.
To identify problematic resonances, insert a spectrum analyser plugin at the end of the device chain. Look for frequency spikes and address them with an EQ, filter, compressor, or other processing plugins.
Spectrum analysers are particularly useful when your ears can't pick up on certain frequencies. For example, if there is a buildup of energy in the low end, you might not notice how bad it is if your speakers or headphones don't reach down to the sub-bass. Even though you can't hear it, that information still exists in your mix and can cause issues with mastering and translation to other listening systems.
Spectrum analysers can also help you identify unwanted low frequencies and rumble. Set the cutoff frequency too low, and you risk leaving frequencies that cause issues. Cut too much, and you'll rob the sound of its fullness and body. A spectrum analyser can help you spot unwanted frequencies by identifying the lowest frequency bump on the analyser's display, which represents the sound's fundamental frequency.
Spectrum analysers can also be used to compare two frequency responses. This is useful for ensuring that different elements in a mix are not conflicting with one another. Each sound in the mix should occupy its own sonic space, both in the frequency spectrum and in the stereo field.
- Trust your ears first and use the spectrum analyser as a supporting tool to confirm what you hear or don't hear.
- Use a spectrum analyser with an external sidechain input to compare two or more sounds and identify conflicting frequency areas.
- Set the spectrum response to a slow speed so it displays an average reading, which will give you a smoother frequency curve.
- Use a spectrum analyser with a highly customisable mode system and support for multi-channel audio.
- Some EQ plugins include integrated spectrum analyser displays, so check if your EQ plugin of choice supports spectrum analysis.
Calibrating LCD Monitors: Syncing Printer Output for Perfect Results
You may want to see also
Frequently asked questions
Resonance can be identified by an unevenness in the musical line, or a "boxy" small room timbral signature. You can also use a spectrum analyser to identify which note fundamentals are louder than others.
You can try to reduce reflections from your desk by using studio monitor stands, which help to isolate the monitors from the desk. You can also try adding weight to the table, or getting a denser or smaller table.
You can try using isolation pads, or adding density to the stands, such as by filling them with sand.
EQing resonant frequencies can be difficult and is often dependent on the specific case. However, some general tips include starting with a wide Q of about 1, boosting it by 5dB, and then scrolling through the frequency spectrum to amplify certain ranges. Once you spot a sensitive area, you can increase the Q to 2.5 and adjust the covered area to pinpoint the resonance. Then, you can cut down on the problematic frequency by starting with a cut of 3dB.
Yes, there are sophisticated plugins such as Tokyo Dawn's Slick EQ GE that can detect and remove annoying resonances.


