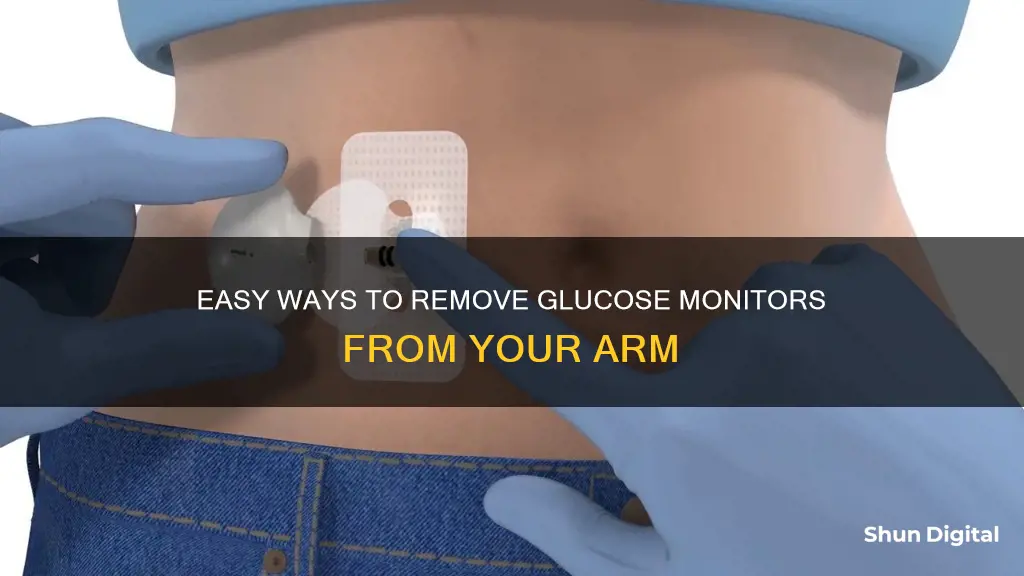
Glucose monitors are an essential tool for people with diabetes, helping them to manage their blood sugar levels. While finger-prick monitors have been a common method for testing blood sugar, they can be painful and time-consuming. In recent years, new technologies have emerged that allow for continuous glucose monitoring (CGM) without the need for finger pricks. These CGM devices use a sensor placed under the skin to measure glucose levels in the interstitial fluid, providing real-time data on how glucose levels are changing. This paragraph will discuss the different types of CGM devices available and provide an overview of the process for removing a CGM sensor from the arm.
| Characteristics | Values |
|---|---|
| Removal process | Depends on the type of glucose monitor. For Dexcom G6, G7, and Stelo, the user must first end the session in the app. For all types, the user then removes the cover, gently peels the edges of the monitor from the skin, and throws it away. |
| Adhesion | If the monitor is strongly adhering to the skin, apply baby oil or vegetable oil for 5-10 minutes before removing it. |
| Transmitter | Remove the transmitter from the holder by pushing down on the lip of the transmitter holder and breaking open its wide end. |
| Transmitter reuse | Do not throw away the transmitter. It can be reused for up to 90 days. |
| Transmitter cleaning | Clean the transmitter with an alcohol wipe before applying it again. |
| Wait time | Wait 20 minutes before applying a new monitor to ensure the sensor fully disconnects from the app. |
What You'll Learn

How to remove Dexcom G6 CGM
To remove a Dexcom G6 CGM sensor and transmitter, follow these steps:
- Your G6 CGM will notify you when it is time to replace the sensor, which should be done every 10 days.
- Grab the edge of the adhesive patch and peel it up and away from your body like a band-aid.
- Break the purple transmitter holder at the notches.
- Slide the transmitter out of the holder. You can reuse the transmitter with your next sensor.
- Dispose of the adhesive patch according to your local guidelines for disposal of blood-contacting components.
If you need to end a sensor session early, you can do so through the Dexcom G6 App. Go to the main menu, scroll to the bottom, select "Stop Sensor", and confirm by selecting "Yes".
Monitor Data Usage: Simple Tips for Combating Overage
You may want to see also

How to remove Freestyle Libre CGM
Removing the Freestyle Libre CGM is a simple process. Here is a step-by-step guide on how to do it safely and effectively:
First, locate the edge of the adhesive pad that keeps the sensor attached to your skin. Gently pull up on the edge of the adhesive to lift it slightly off your skin. It is important to do this slowly and carefully to avoid any sudden movements that might cause discomfort.
Next, once you have lifted the edge of the adhesive, continue to slowly peel away the sensor from your skin in one single motion. Ensure you do this in one motion to avoid any residue being left behind and to make the removal process as smooth as possible.
If there is any remaining adhesive residue on your skin after removing the sensor, you can easily remove it. Using warm soapy water, isopropyl alcohol, or even baby oil, gently rub the area until all traces of adhesive are gone. These products will help to dissolve any leftover adhesive and are gentle on the skin.
Finally, properly dispose of the used sensor according to your local regulations. It is important to follow the correct disposal guidelines for electronic equipment and biohazardous materials. For specific instructions on how to discard your Freestyle Libre CGM, refer to the product's instructions or contact customer support.
By following these steps, you can safely and effectively remove your Freestyle Libre CGM, ensuring comfort and cleanliness throughout the process.
Monitor Size: GPU Performance Impact?
You may want to see also

How to remove Dexcom G7 CGM
To remove a Dexcom G7 CGM sensor, follow these steps:
First, you will need to end the sensor session. On the G7 app, go to Connections and tap Sensor. You will then have the option to either Replace Sensor or Stop Sensor Session. If you choose to replace the sensor, you can start a new sensor immediately. If you choose to stop the sensor session, you will end the current session without starting a new one.
Once you have ended the session, you can remove the sensor by peeling off the patch like a bandage. If the sensor is adhering strongly to your skin, you can apply baby oil or vegetable oil for 5-10 minutes to loosen it before removing it.
After removing the sensor, you must throw it away. Dexcom G7 sensors cannot be reused or recycled.
You can then take a break before applying a new sensor, or apply a new one straight away by following the instructions provided by Dexcom.
Stretching Your CS Res ASUS Monitor: Tips and Tricks
You may want to see also

How to remove Dexcom Stelo CGM
To remove a Dexcom Stelo CGM, follow these steps:
- In the Dexcom Stelo app, go to Settings and select Sensor.
- If you want to start a new sensor immediately, choose Replace Sensor. If you want to stop the current session completely, choose Stop Sensor Session.
- Remove the Levels Performance Cover.
- Remove the green Dexcom G7 cover (if you're wearing one).
- Gently peel the edges of the CGM away from your skin, as you would a bandage. If the CGM is strongly adhering to your skin, you can apply baby oil or vegetable oil for 5-10 minutes to loosen it before removing it.
- Throw away the used CGM. Do not attempt to reuse or recycle it.
Note that it is okay to take a break between using CGMs. However, keep in mind that CGMs have an expiration date, so make sure to use them before they expire.
Understanding Monitor Pixel Sizes: 1920x1080 Resolution Explained
You may want to see also

How to remove a CGM with a break between uses
It's important to know how to remove your CGM safely, especially if you're taking a break between uses. The process will differ depending on the type of CGM you use, so be sure to follow the manufacturer's instructions. Here's a general guide on how to remove a CGM with a break between uses:
Step-by-Step Guide to Removing a CGM:
- End the Sensor Session: Using your CGM app, go to the main menu and select the option to stop the current sensor session. This is usually found by scrolling to the bottom of the menu. Confirm that you want to end the session.
- Remove Any Covers: If you're using a Levels Performance Cover or any other type of cover, make sure to remove it first.
- Loosen Adhesion (if needed): If your CGM is strongly adhering to your skin, you can apply baby oil or vegetable oil to the edges for 5-10 minutes to help loosen it.
- Peel Off the CGM: Gently peel the edges of the CGM away from your skin, just like you would with a bandage. Be careful not to pull too hard, especially if the adhesion is still strong.
- Remove the Transmitter: To remove the transmitter from the holder, push down on the lip of the transmitter holder and break open its wide end. Then, simply pull the transmitter out.
- Clean and Store the Transmitter: Clean the transmitter with an alcohol wipe and keep it in a safe place. You will reuse this transmitter with your next sensor until its lifespan ends (usually around 90 days).
- Dispose of the Used CGM Properly: CGMs cannot be reused or recycled, so dispose of the used CGM according to your local guidelines for disposing of blood-contacting components.
- Wait Before Applying a New CGM: It's important to wait for a while (around 20 minutes) to ensure the sensor fully disconnects from the app before applying your next CGM.
- Apply Your Next CGM: When you're ready, follow the instructions provided by the manufacturer to apply and connect your new CGM.
Taking a Break Between CGM Uses:
It's perfectly fine to take a break between CGM uses. The Levels app, for example, will be waiting for you when you're ready to continue. However, keep in mind that CGMs do have an expiration date, so make sure to use them before they expire. Additionally, members using the Freestyle Libre CGM may experience differences in glucose readings between arms, so it's recommended to use the same arm for more consistent results.
Tips for CGM Removal:
- Always follow the specific instructions provided by the manufacturer of your CGM.
- Be gentle when peeling off the CGM to avoid damaging your skin or causing discomfort.
- Properly dispose of used CGMs and any adhesive patches according to local guidelines.
- Keep your transmitter in a safe place, as you will need to reuse it with your next sensor.
- If you experience skin irritation or discomfort from your CGM, contact your healthcare provider.
Monitoring Data Usage: TDS Telecommunications Service Guide
You may want to see also
Frequently asked questions
First, in the Dexcom G6 app, go to the main menu, scroll to the bottom, select "Stop Sensor", and confirm by selecting "Yes". After ending the session, go to "New Sensor". Then, remove the Levels Performance Cover. Next, gently peel the glucose monitor from your skin, applying baby oil or vegetable oil first if it is adhering strongly.
First, remove the Levels Performance Cover. Then, gently peel the monitor from your skin, applying baby oil or vegetable oil first if it is adhering strongly.
First, remove the Levels Performance Cover. Then, remove the green Dexcom G7 cover if you are wearing one. Next, gently peel the monitor from your skin, applying baby oil or vegetable oil first if it is adhering strongly.


