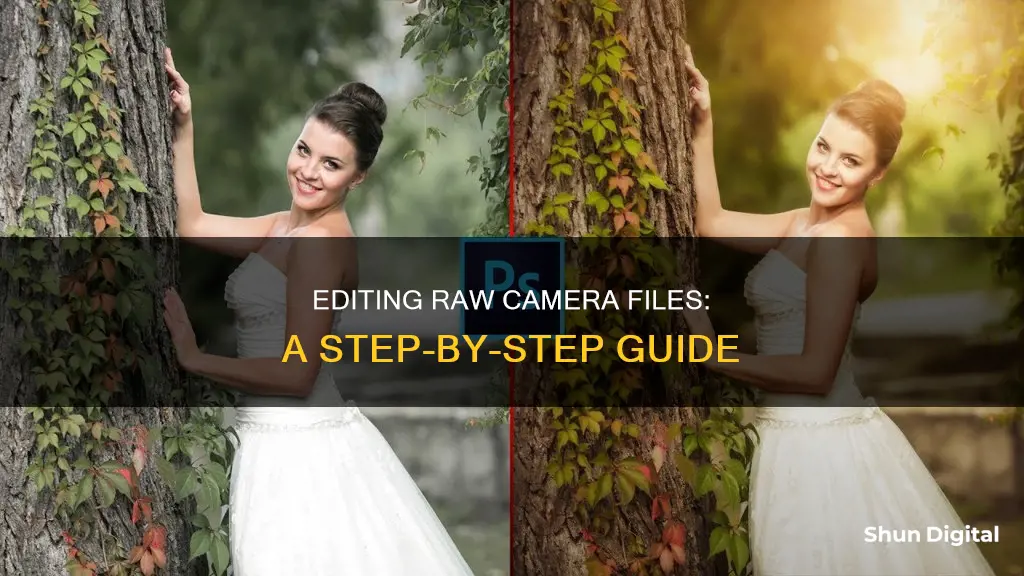
If you're new to photography, you might be wondering how to process and edit raw files from your camera. A raw file is the image as seen by the camera's sensor, like an unprocessed film negative. When you shoot in raw, you have total control over your images in post-processing, rather than letting the camera process the image for you and turn it into a JPEG.
To process and edit raw files, you'll need a digital camera that can shoot in raw and image processing software like Adobe Lightroom, Photoshop, or the software that came with your camera. Keep in mind that different camera manufacturers use their own proprietary file formats, so not all raw files are the same.
Once you've transferred the raw files from your camera, you can open and edit them in your chosen image processing software. This usually involves making adjustments to elements like white balance, tonal range, contrast, colour saturation, and sharpness.
Processing and editing raw files gives you the power to perfect your images according to your creative vision. So, if you're ready to take your photography skills to the next level, dive into the world of raw file editing!
| Characteristics | Values |
|---|---|
| File type | RAW |
| File size | 18-22 MB |
| Image sensor data | Minimally processed data |
| Compression | Lossy compression |
| Image editing software | Adobe Photoshop, Adobe Lightroom, Adobe Camera Raw, Picasa, iPhoto, Bridge |
| File formats | .NEF, .CR2, .CRW, .DNG, .ARW |
What You'll Learn
![]()
Importing raw files into a computer program
- Choose a Compatible Program: Not all programs support RAW files, so ensure you have software that can handle them. Examples include Adobe Lightroom, Adobe Camera Raw, Adobe Photoshop, or the software provided by your camera manufacturer.
- Connect Your Camera: Use a USB cable or memory card reader to connect your camera or insert your memory card into your computer. This allows you to access the RAW files stored on your camera or memory card.
- Locate the RAW Files: Navigate to the folder on your computer where your RAW files are stored. They are typically located in the camera or memory card's root directory.
- Open the Program: Launch the compatible software you chose in step 1.
- Import the RAW Files: The specific steps will depend on the program you're using, but there should be an option to import or open files. In Adobe Lightroom, for example, you can go to "File > Import Photos and Videos" and select the RAW files you want to import. In Adobe Camera Raw, you can go to "File > Open" and navigate to your RAW files.
- Select Your Import Settings: Some programs allow you to apply import settings during this process. These settings can include renaming files, applying metadata, or adding keywords. These options help with organisation and management of your RAW files.
- Confirm the Import: Once you've selected your RAW files and adjusted any import settings, confirm the import process. The files will then be imported into the program, and you'll be able to view and edit them using the software's tools.
Remember that the exact steps may vary slightly depending on the software you're using, but the general process of connecting your camera, locating the RAW files, and importing them into the program remains consistent.
Correcting GoPro Photos: Camera Raw Techniques
You may want to see also
![]()
Adjusting white balance
White balance is one of the most basic yet trickiest aspects of photography. It affects how warm or cool your pictures look.
When you shoot in RAW, you can use any white balance setting and then adjust it in post-processing.
Using Adobe Camera Raw
In the Basic panel of the Camera Raw interface, you can adjust the white balance by choosing an option from the drop-down menu that best suits your needs.
The white balance dropper tool is another tool in Camera Raw that provides white balance adjustment. At the top of the window, select the white balance tool, then click on the part of the image that should be white. Camera Raw will then adjust the colour temperature to make that component a true white.
Using Adobe Photoshop
You can also adjust the white balance in Photoshop using the Curves tool. First, add a Curves adjustment layer. You will see a drop-down list to choose between RGB (the default), Red, Green, and Blue. Select one of the specific colours, and the tool will alter that colour and its complement. For example, when you increase red, cyan is reduced.
Using the Histogram and RGB Values
The histogram shows all three channels (red, green, and blue) of the image simultaneously. As you adjust the settings in the Camera Raw dialog box, the histogram changes automatically.
As you move the Zoom tool, Hand tool, or White Balance tool over the preview image, you will see the RGB values in the upper-right corner of the dialog box.
Capturing Moments: 6Ti Cannon Battery Shots
You may want to see also
![]()
Adjusting exposure
Adjusting the exposure of your image is one of the most important reasons for shooting in raw. It allows you to recover image detail in case something goes wrong, such as blowing out your exposure so that there are white patches of highlights everywhere.
To adjust the exposure of your image in Adobe Camera Raw, you can move the exposure slider to simulate the effect of adjusting your exposure in-camera. The results will be automatically reflected in the image. You can also recover extra image detail by adjusting the exposure slider.
To recover shadow detail in underexposed areas, use the same technique as for recovering highlights. Simply move the slider until you see detail appearing again.
If you are using Exposure 7 or later as a standalone product, this information is not necessary as Exposure 7 and later support Raw processing directly. If you are using Exposure in Lightroom or Photoshop, it is recommended that you try lowering the contrast value for the default setting if you find that your images are too high in contrast.
In Adobe Camera Raw, you can also use the Adjustment Brush tool to selectively apply Exposure, Texture, Clarity, and other adjustments by "painting" them onto the photo.
Troubleshooting Eufy Camera Charging Issues
You may want to see also
![]()
Adjusting contrast
Adjusting the contrast of an image can make it more vivid or mute the tones for a more subdued feel. Contrast refers to the difference between the light and dark pixels in an image. Low-contrast images contain a narrow range of colours, while high-contrast images have bright highlights and dark shadows.
Most photo editing software will have a basic Brightness/Contrast slider, which is a simple way to adjust the contrast of an image. Moving the slider to the right will increase the contrast, while moving it to the left will decrease it.
However, this method can be quite crude as the adjustments are applied equally across all tones in the image. This can result in blown-out highlights when attempting to bring up details in shadowed areas.
A more advanced method of adjusting contrast is through the Levels tool, which can be found in most image editors, including Photoshop. The Levels tool allows for more precise adjustments to the tonal range of an image. The histogram display in the Levels dialog box plots tones from pure black on the left to pure white on the right along the horizontal axis. The vertical axis represents the number of pixels at each tonal level.
To increase the overall contrast of an image in Levels, move the white point slider to the left, mapping the pixels at that level to pure white. Similarly, move the black point slider to the right to map the darkest pixels to pure black.
To adjust the midtones of an image without dramatically altering the highlights or shadows, use the middle slider. Moving the middle slider to the left will brighten the midtones, while moving it to the right will darken them.
Another way to adjust contrast is through the Curves tool, which can be used to make small but visually significant adjustments to the highlights and shadow areas of an image. The Curves function plots the tonal histogram against a diagonal line, which can be used to increase or reduce brightness in specific tonal zones.
To increase contrast, create an S-shaped curve by dragging a point in the lower third of the diagonal line down and raising a point in the upper third slightly. To reduce contrast, do the opposite: drag the low point up and the high point down.
When making adjustments to the Curves function, be sure to avoid raising a darker point higher than a lighter one, as this will upset the tonal balance of the image and produce unnatural-looking results.
Charging the WASP 4K Camera: A Step-by-Step Guide
You may want to see also
![]()
Adjusting saturation
When adjusting saturation, you can either modify all colours or just one colour. If you want to increase the saturation of a blue sky, for example, you will need to increase the saturation of the range of blues in the image.
In Photoshop, you can adjust saturation in the same panel as the hue and lightness adjustments. To do this, select the layer you want to adjust and then:
- Select Layer -> New Adjustment Layer -> Hue/Saturation from the menu bar
- Click on the "Create New Fill Or Adjustment Layer" icon in the Layers panel and select "Hue/Saturation" from the options list.
You can then decide whether you want to adjust all colours or just one colour. To adjust all colours, select "Master" from the drop-down menu to the right of the On-image adjustment tool. To adjust a single colour, select it from the same drop-down menu. The default colour options are reds, yellows, greens, cyans, blues, and magenta, but you can also choose a custom colour.
Once you have selected the colour(s) you want to adjust, you can increase or decrease the saturation by dragging the Saturation slider towards the right (higher saturation) or left (lower saturation). You can also manually enter a saturation value. The slider goes from -100 (100% desaturation, turns the colour to grey) to +100 (100% increase in saturation, turns the colour to fully saturated).
It is important to note that increasing saturation too much can make photographs look artificial. It is recommended to make subtle tweaks and use real-world references to avoid overdoing the colours.
Charging Your Polaroid: A Step-by-Step Guide to Powering Up
You may want to see also
Frequently asked questions
A RAW file is a file from the image sensor of a camera that contains minimally processed data. It is like a photo negative, and gives you total control over your image in post-processing.
You can use image processing software such as Adobe Lightroom, Photoshop, or the software that came with your camera. There are also web-based tools such as WebRaw and Pics.io.
First, set your camera to save files in its own camera RAW file format. Then, transfer the files from the camera's memory card to your computer.