Dash cams are an invaluable tool for drivers, providing evidence in accidents, enhancing security, and even documenting road conditions. When installing a dash cam, it's essential to consider its placement, power source, and legal regulations. The optimal location is typically the center of the windshield behind the rear-view mirror, ensuring an unobstructed view and maximum coverage. The power source can be the vehicle's power outlet or hardwiring for continuous operation. Familiarity with local laws is crucial, as some jurisdictions restrict dash cam placement and size. Installation is generally straightforward, with options for suction or adhesive mounting, and cable management techniques to ensure a neat setup.
What You'll Learn
- Choosing the right location: Centre your dash cam behind the rear-view mirror to maximise coverage without obstructing the driver's view
- Power supply: Locate the nearest power source and plan how to route the cables to minimise obstruction
- Car pillars: Understand the structure of your vehicle to effectively set up your dash cam
- Cable management: Use adhesive cable clips to keep loose cables in place
- Configuration: Adjust settings like resolution, time, date, and recording schedule
![]()
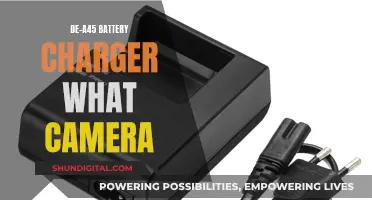
Choosing the right location: Centre your dash cam behind the rear-view mirror to maximise coverage without obstructing the driver's view
When installing a dashcam, choosing the right location is essential to ensure optimal functionality and a good driving experience. The ideal spot for a dashcam is centred behind the rear-view mirror, preventing any interference with your line of sight. This position maximises coverage of both sides of the vehicle without obstructing the driver's view, which is a legal requirement in most places.
The dashcam should be mounted securely, with its view unobstructed by the sunshade and within the reach of the windshield wipers. It's also important to ensure the camera's lens is clean and free from residue, as this can affect the quality of the footage.
For those with a rear dashcam, the ideal location is the top centre of the rear windshield, capturing a clear view of the road behind. However, this can be challenging to wire, and it's important to ensure the camera doesn't interfere with the functionality of a rear windshield sunshade if your car has one.
The type of mount you use will also affect the installation process. Suction mounts are popular as they are easy to adjust, but they can cause camera shake and affect video stability. On the other hand, double-sided tape provides a more stable solution but is less adjustable and can leave residue.
Overall, taking the time to choose the right location for your dashcam is crucial to ensure you get the most out of this valuable piece of technology.
The Evolution of Bell & Howell's Electric Eye Camera
You may want to see also
![]()
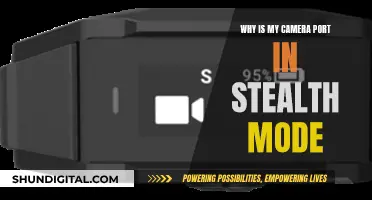
Power supply: Locate the nearest power source and plan how to route the cables to minimise obstruction
When installing a dashcam, it is important to carefully plan the routing of the power cables to ensure a neat and unobtrusive installation. Here is a detailed guide on how to do this:
Firstly, identify the nearest power source to the dashcam. Typically, this will be a USB outlet or a 12V cigarette socket located in the armrest compartment, centre console, or somewhere on either side of the driver or passenger. Make sure that the power outlet turns off when the vehicle is turned off to prevent battery drain.
Next, plan how you will route the cables to minimise obstruction. You can use the car pillars as a guide. Car pillars refer to the vertical supports in a car and are labelled from A to D, front to back. The A-pillar is the frontmost pillar and often holds the windshield in place. To route the cables, start by tucking the power cable into the headliner (the roof lining of the car) and direct it towards the power source, either to the left or right. Continue through the headliner and use a trim tool to gently pry open the A-pillar covering and tuck the cable inside the crevice of the A-pillar.
Then, route the cable down the A-pillar by hiding it inside the rubber weather strip. Again, use a trim tool to help tuck the cable in neatly. Continue routing the cable through the underside of the dashboard and plug it into the power source.
If you are installing a rear dashcam, the process is similar. Place the rear camera in the centre of the rear windshield to maximise the viewing angle. Route the cable inside the headliner of the rear windshield and continue down the pillars, inside the rubber weather strip, until you reach the A-pillar. Make sure to route the rear camera cable in the opposite direction of the front cable to avoid overlapping. Once you reach the A-pillar, route the cable into the front windshield's headliner and plug it into the front dashcam.
To keep cables neat and secure, you can use adhesive cable clips. This is especially useful if the cables are loose and do not hold inside the headliner.
The Evolution of Cameras: From Black and White to Color
You may want to see also
![]()
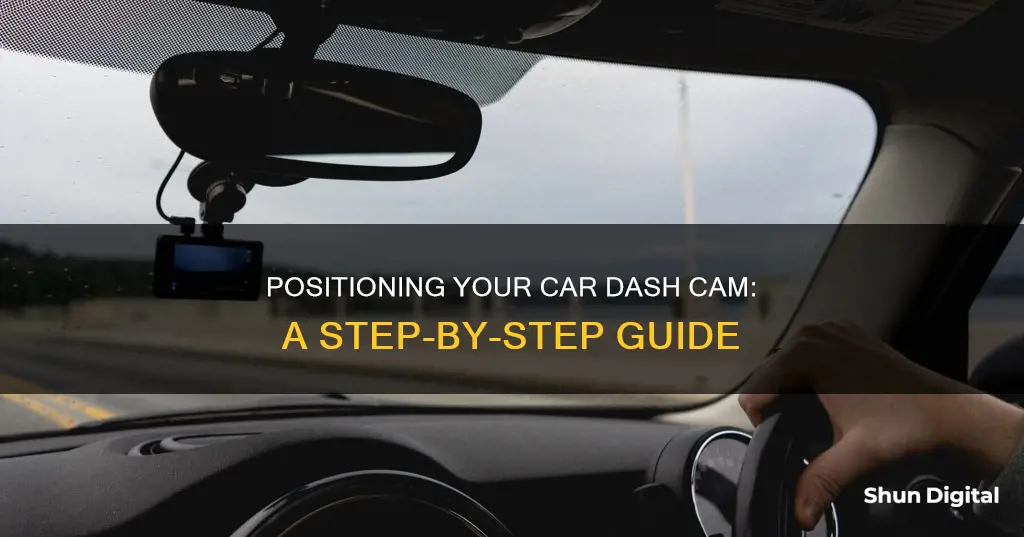
Car pillars: Understand the structure of your vehicle to effectively set up your dash cam
Car pillars are the vertical supports that hold up the roof of your car. They are lettered from A-D, starting from the front of the car. By understanding the placement of these pillars, you can effectively route and conceal your dash cam cables for a seamless installation. Here's a breakdown of each pillar and how it can be utilized for dash cam installation:
A-Pillar
The A-pillar is the frontmost pillar and is often responsible for holding the windshield in place. It is a common location for routing dash cam cables as it provides a path from the dash cam to the power source. To install the cable, you can carefully pry open the A-Pillar covering using a trim tool and tuck the cable inside the crevice. Ensure that the cable is securely tucked inside, and use adhesive cable clips if needed to hold it in place.
B-Pillar
The B-pillar is located behind the A-pillar and separates the front seats from the rear seats. It can be utilized to route cables for rear dash cams or to conceal cables running along the side of the car.
C-Pillars
C-pillars refer to the passenger compartment behind the rear seats. In larger vehicles like trucks or vans, the C-pillars may provide additional routing options for dash cam cables.
D-Pillars
D-pillars are typically found in larger vehicles, such as trucks or vans, and can be used for cable management in those cases.
When installing your dash cam, understanding the structure of your vehicle's pillars will help you effectively route and conceal cables for a neat and seamless installation. Remember to refer to your vehicle's manual or seek professional assistance if needed during the installation process.
The Making of a Camaro: An Inside Look
You may want to see also
![]()
Cable management: Use adhesive cable clips to keep loose cables in place
Cable management is an important aspect of installing a car dashboard camera. One effective method to keep loose cables in place is to use adhesive cable clips. These clips are designed with a self-adhesive backing that allows for easy installation on most vehicle surfaces, including dashboards.
Adhesive cable clips offer a convenient and neat solution to cord management. They are designed to hold cables securely, preventing them from dropping or becoming loose. This is especially useful for dash cam cables, which need to be securely fastened to the windshield or dashboard.
When choosing adhesive cable clips, look for those that are compatible with the size and type of your dash cam cable. Some clips accommodate a range of cable diameters, while others are designed for specific cable types. It is also important to ensure that the adhesive is strong enough to withstand the weight of the cable and the temperature conditions in your vehicle.
Additionally, consider the ease of use and adjustability of the clips. Look for options that allow you to easily add or remove cables without causing damage to the surface or leaving residue. This is particularly useful if you need to make changes or adjustments to your cable setup.
Adhesive cable clips are available in packs of various quantities, so you can choose the number that best suits your needs. They are also versatile and can be used not only in your car but also on your desk or anywhere you need cable management.
Surveillance Cameras: How Accurate Are They Really?
You may want to see also
![]()
Configuration: Adjust settings like resolution, time, date, and recording schedule
When configuring your car dashboard camera, it's important to adjust the settings to ensure optimal performance and functionality. Here are some detailed instructions for adjusting settings like resolution, time, date, and recording schedule:
Resolution:
The resolution setting determines the quality and detail of your recorded videos. It is recommended to select the highest resolution available, usually 1440P or 1920 x 1080P, to capture finer details such as license plates. Lower resolutions may result in a significant loss of detail. Additionally, a high bitrate can improve video quality, especially when recording fast motion or high-contrast scenes, but it will also reduce the available recording time on your memory card.
Time and Date:
Setting the correct time and date on your dashboard camera is crucial for accurate recording. Most cameras allow you to adjust the time and date in the settings menu. You can manually set the time zone, ensuring that it is adjusted for daylight savings, or you can enable GPS time and date calibration if your camera has that feature. Regularly checking and updating the time and date settings is essential to maintain accuracy.
Recording Schedule:
Dashboard cameras typically offer different recording modes, such as continuous loop recording or parking mode. Continuous loop recording overwrites older videos with new footage, ensuring the camera keeps recording even when the memory card is full. You can usually adjust the length of the video clips, typically ranging from 1 to 10 minutes. Parking mode, on the other hand, activates recording when a moving object is detected during parking. You can set the duration for parking mode recording, with some cameras offering extended recording times of up to 12 hours.
Scheduling Recording:
Some cameras allow you to schedule recording based on your preferences. For example, you can set the camera to record only during specific times of the day or on certain days of the week. This can be useful if you only want to capture footage during peak traffic hours or when you expect your vehicle to be parked in a high-risk area.
In conclusion, taking the time to configure your dashboard camera settings will ensure that you capture high-quality, relevant footage while also maximizing storage efficiency and battery life. Refer to your camera's user manual for specific instructions on adjusting these settings.
Transferring Camera Footage to Your Computer: A Step-by-Step Guide
You may want to see also
Frequently asked questions
The most common place to mount a dash cam is in the center of the windshield and behind the rearview mirror. This placement ensures an even field of view for both sides of the vehicle and does not obstruct the driver's view.
Clean the windshield with a window cleaner and let it dry. Once the area is at room temperature, apply the adhesive mount that comes with the dash cam and press your hands against the mount for about 10 seconds to secure it.
If your dash cam has a screen, turn it on and check the live view. If you're satisfied with the angle, you're good to go. Some dash cams also have Wi-Fi and a smartphone app that allow you to view the live footage and adjust the position and angle in real time.