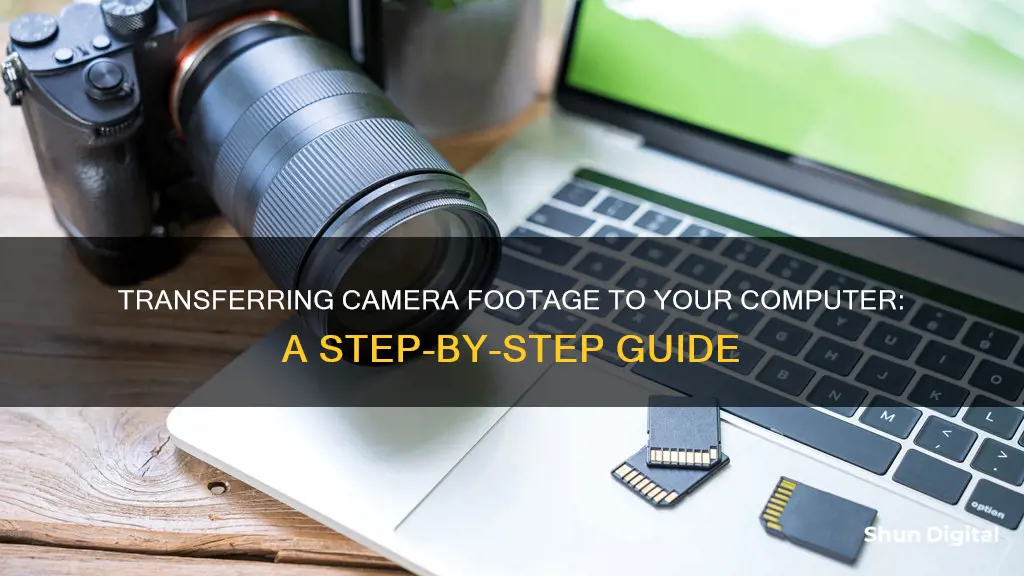
Transferring footage from your camera to your computer is a straightforward process. The first step is to check the ports on your camera and your computer. The most common ports are USB, FireWire, and Thunderbolt. Once you've identified the ports, you can purchase a cable that connects the two. If your camera uses an SD card, you can simply insert it into the SD slot on your computer or purchase an external SD card reader that connects via USB. With the correct cable or card reader, you can then connect your camera to your computer. Your computer should automatically recognize the connection, and you can transfer your footage by dragging and dropping the files or using the built-in import function.
| Characteristics | Values |
|---|---|
| Connection | Firewire, USB cable, Thunderbolt, WiFi, SD card adapter |
| Computer OS | Windows, macOS, Microsoft Windows |
| Camera | Sony, Canon, Nikon |
| File transfer location | File Explorer, Finder, DCIM folder, Pictures folder |
| File format | MP4, MOV, WMV, AVI, MPEG, ProRes, VHS, 8mm film |
What You'll Learn

Using a USB cable (Windows)
Transferring photos and videos from your camera to your Windows computer can be done in a few simple steps. Here is a detailed guide on how to do it using a USB cable:
Step 1: Turn on Your Computer and Camera
This method will work on Windows 11, 10, 8, or earlier. Ensure that your computer is turned on and booted up before proceeding to the next step.
Step 2: Connect Your Camera to the Computer
Use the USB cable that came with your camera. If you don't have this cable, you must purchase a compatible replacement. Connect your camera to an open USB port on your computer. If you can't find the port on your camera, check for any panels that can be flipped open to reveal the port.
Step 3: Set the USB Connection Mode on Your Camera
On your camera, set the USB Connection or Transfer mode to Mass Storage, MTP, or Auto. This setting is usually found in the camera's menu. Here's what each mode means:
- Mass Storage: Treats the camera memory as a USB flash drive and is the fastest transfer method.
- Media Transfer Protocol (MTP): Designed specifically for transferring image and video files, with unique functions depending on the operating system. It has a slower transfer speed than Mass Storage mode.
- Auto: Automatically establishes a Mass Storage or MTP connection, depending on the connected device.
Step 4: Turn on Your Camera
Your computer should recognize the camera immediately. If not, try turning on your camera. You may need to switch your camera to Review mode for it to connect properly. This process may vary depending on your camera model.
Step 5: Open the Autoplay Window
Once your camera is connected and recognised, click on the "Autoplay" box that appears in the bottom-right corner of your screen.
Step 6: Open the Folder to View Files
In the Autoplay window, select "Open folder to view files." This will open the File Explorer, allowing you to browse the files on your camera. If you can't find this option, you can manually open the folder by right-clicking the Start menu, selecting File Explorer, and then clicking on your camera device listed on the left panel.
Step 7: Navigate to the DCIM Folder
In the File Explorer, click on the DCIM folder. This folder typically contains your photos and videos. Depending on your camera, you may need to open additional folders within the DCIM folder to access your media files.
Step 8: Select the Photos or Videos to Transfer
In the DCIM folder, select the photos or videos you want to transfer to your computer. You can select individual files or press CTRL + A to select all the files in the folder. To select multiple files, hold CTRL and click on each file.
Step 9: Drag and Drop the Files to Your Computer
Once you have selected the files you want to transfer, simply drag and drop them to your desired location on your computer, such as the Pictures folder or a new folder you create. The transfer time will depend on the number of files and your computer's speed.
Step 10: Eject Your Camera
After the files have finished transferring, eject your camera before unplugging it. Click the arrow in the bottom-right corner of the taskbar, then click the device icon and select Eject. Now you can safely unplug the USB cable from your camera and computer.
How Truck ATS Can Benefit From Camera Mode
You may want to see also

Using a USB cable (Mac)
To transfer footage from your camera to your Mac using a USB cable, you will need:
- A camera with videos that need to be transferred
- A USB cable (this usually comes with your camera)
- A USB port on your Mac
Firstly, turn on your camera and connect it to your Mac using the USB cable. If it is your first time connecting the camera to your Mac, you may need to wait for the drivers to be installed.
Next, you will need to set your camera to the correct mode. This could be Mass Storage, MTP, or Auto, depending on your camera model. Mass Storage establishes the camera memory as a USB flash drive and is the fastest transfer method. MTP is designed specifically for transferring images and videos but has a slower transfer speed. Auto will automatically establish a Mass Storage or MTP connection.
Once your camera is connected and set to the correct mode, your Mac should recognise the connection and list the camera drive as "NO NAME" or "UNTITLED" on the desktop. Click on this icon to access the camera's files.
Now, locate the video files you wish to transfer. You may need to navigate through several folders, depending on your camera model. For example, to find XAVC S 4K video files, click on the PRIVATE folder, then the M4ROOT folder, then the CLIP folder. The 4K video will have an .MP4 extension.
Once you have located the video files, select the ones you want to transfer and copy them to the desired folder on your Mac. You can use Command+C to copy the files and Command+V to paste them into the desired location.
Finally, once the files have finished copying, you can unplug your camera from your Mac.
Camera Tickets in LA: Do You Have to Pay?
You may want to see also

Using an SD card (Windows)
If your computer has a built-in SD card reader, transferring photos from your camera to your computer is simple. If not, you will need to purchase an external SD card reader.
Step 1: Remove the SD card from your camera
Open the panel that contains the internal storage, then press the SD card to unlock it from your camera.
Step 2: Insert the SD card into the computer's card reader
If your computer has a card reader, insert the SD card. If not, insert the SD card into an external card reader and connect it to your computer via USB.
Step 3: Open the File Explorer
Right-click the Start menu and click File Explorer.
Step 4: Select your SD card
Click on your SD card in the left panel. If you don't see it, click the arrow on the left of 'This PC' to expand the options.
Step 5: Select the pictures you want to transfer
You can transfer individual photos, or press 'CTRL + A' to select all the photos in the folder. To select multiple photos, hold 'CTRL' and click each photo.
Step 6: Drag the pictures to a new location
You can drag the photos into the Pictures folder, or you can create a new folder. The amount of time it takes to transfer will depend on the amount of data and your computer's specifications.
Step 7: Eject the SD card
Click the arrow in the bottom-right corner of the taskbar. Click the flash drive icon, and then click 'Eject'. You can now insert the SD card back into the camera.
Axis Cameras: Where Are They Manufactured?
You may want to see also

Using an SD card (Mac)
Transferring footage from your camera to your computer using an SD card on a Mac is a straightforward process. Here is a detailed, step-by-step guide:
Firstly, you need to locate the SD card slot on your Mac. If your Mac has a built-in SD card slot, insert the SD card directly into it. If your Mac does not have a built-in slot, you will need to use an external card reader. Connect the card reader to your Mac, typically by plugging it into an available USB port, and then insert your SD card into the reader.
Now, open the Photos app on your Mac. In the sidebar on the left-hand side of the Photos app, locate the 'Import' heading. Under this heading, you should see your SD card listed by name. Click on the name of your SD card.
If you do not see your SD card listed in the sidebar, there is a simple solution. Look at the upper left-hand corner of your Mac's screen and click 'File' from the toolbar. From the drop-down menu, select 'Import'. A pop-up window will appear, allowing you to find and select your SD card.
With your SD card selected, all the photos stored on it will appear in the centre of the Photos app window. Here, you have several options. To import all the photos on the SD card that haven't already been imported, click 'Import All New Items'. To select specific images to import, click on the individual images you want, and then click 'Import Selected'.
Finally, if you want to free up space on your SD card, select the 'Delete After Import' option. This will erase the photos from your SD card after they have been imported to your Mac.
And that's it! You have successfully transferred photos from your camera's SD card to your Mac.
Blur the World: Stop Your Camera Focusing
You may want to see also

Using a Wi-Fi connection
Many modern cameras have built-in Wi-Fi support, allowing you to transfer your photos and videos wirelessly to your computer. If your camera does not have this feature, you can purchase a Wi-Fi SD card, which combines photo storage and a Wi-Fi radio in the form factor of an SD memory card.
Wi-Fi SD Cards
Before purchasing a Wi-Fi SD card, check your camera model online to see if it has built-in Wi-Fi capabilities. Also, ensure that your camera can support an SDHC card (an upgraded form of the original SD card format).
There are several Wi-Fi SD cards on the market, including the Toshiba FlashAir, the Transcend Wi-Fi, and the EZ Share SD Card. One popular option is the Eye-Fi card, which comes with 3-12 months of free online photo storage, depending on the model. The Eye-Fi Mobi Pro is a worthwhile upgrade, offering double the base storage space of the regular Mobi, as well as additional features like selective transfer and RAW format file syncing.
To set up your Eye-Fi card, first download the desktop software for your Windows or Mac computer from the Eye-Fi website. After running the installer, enter your name, email, and a password when prompted. You can skip this step if you do not want to create an account or take advantage of the online photo storage.
Next, click on "Start your card activation" and enter the activation code found on the credit-card-sized registration card that came packaged with your Eye-Fi SD card. Choose where you want the photos and videos to be transferred from your camera. You can change the directories later, so it is recommended to leave them in their default state until you become familiar with the Eye-Fi workflow.
At this point, the setup process will differ depending on whether your computer has a Wi-Fi connection or a hardwired Ethernet connection. If your computer has Wi-Fi, insert the card into your camera and take a photo. The software will use your computer's Wi-Fi to scan for the temporary ad-hoc network created by the Eye-Fi card. If this process fails, or if your computer uses a wired network connection, insert the SD card into your computer, exit the setup wizard, and select the "Options" menu entry in the Keenai icon in your system tray.
Within the options menu, click on the arrow to expand the Advanced Options. Select your local Wi-Fi network, enter the password when prompted, and click "OK". If the setup is successful, the network name will appear under the "Configured Networks" column.
Transferring Files
To transfer files, insert the SD card into your camera and turn it on. Your camera needs to be on for the transfer to initiate. Take a batch of photos, and make sure to leave the camera on for 5 minutes to ensure that all images are transferred.
Camera Models with Built-in Wi-Fi
If you are shopping for a new camera, look for models with built-in Wi-Fi capabilities. Examples include certain Sony Cyber-shot, Handycam, and α (Alpha) cameras. To see if your current camera has Wi-Fi, consult the instruction manual supplied with your product.
Keystone Movie Cameras: How Many Were Manufactured?
You may want to see also
Frequently asked questions
First, remove the SD card from your camera. Insert the SD card into your computer's card reader. If your computer does not have a card reader, you can purchase an external SD card reader that connects via USB. Open the File Explorer on your PC or the Finder on your Mac. Click on your SD card, then select the pictures or videos you want to transfer. Drag the selected items to a new location on your computer.
Connect your camera to your computer using the USB cable that came with your camera. Turn on your camera. Your computer should recognise it immediately. If not, you may need to switch your camera into Review mode. A pop-up window should appear on your computer. Click this, then open the DCIM folder to access your images and videos. Select the footage you want to transfer, then drag and drop the files into a new location on your computer.
Connect your camera to your Mac using the USB cable that came with your camera. Open the Photos app. Turn on your camera. Your Mac should recognise it immediately. If not, you may need to switch your camera into Review mode. Select the footage you want to transfer, then click Import Selected.


