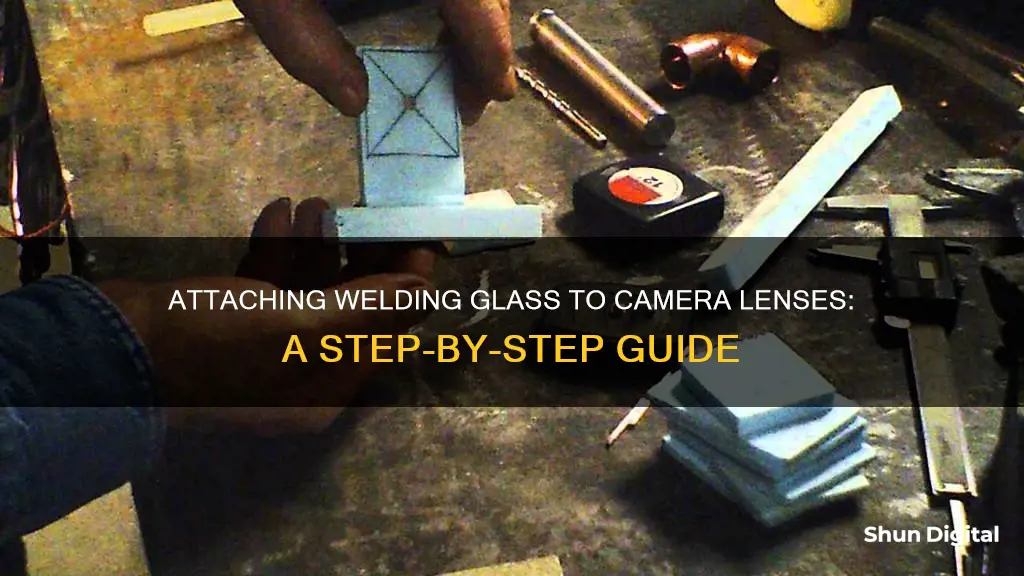
Welding glass can be used as a neutral density (ND) filter for your camera lens, allowing you to take long exposure shots in bright daylight. ND filters are expensive, but welding glass is a cheap alternative, costing as little as $1. However, it can be a challenge to attach the glass to your lens without letting in light leaks that will ruin your shot.
There are various methods for attaching welding glass to your lens. One of the simplest is to use rubber bands to strap the glass to the lens or a reversed lens hood. You can also use a filter mount, attaching it to the glass with heavy-duty tape such as Gorilla Tape. Another option is to glue a 77mm adapter ring to the welding glass, and then screw the glass onto your lens.
| Characteristics | Values |
|---|---|
| Welding Glass Cost | $1-$7 |
| Filter Mount Cost | $2 |
| Filter Mount Type | 58mm > 77mm filter adapter |
| Tape Type | Heavy Duty (e.g. Gorilla tape) |
| Rubber Bands | Thick blue rubber bands |
| Cloth Size | 16"x16" |
What You'll Learn

Attaching the welding glass to the camera lens
There are a few ways to attach welding glass to your camera lens. One way is to use rubber bands to strap the welding glass to the lens hood. You can try to put the lens hood on in reverse, so the petals are facing towards the back of the camera, and hook the rubber bands around two petals. If this doesn't work, you can try wrapping the rubber bands around the back of the camera. Another method is to glue the welding glass to a step-up ring, which can then be screwed onto the filter thread of the lens. A third option is to superglue the welding glass to a Cokin adapter ring, which can then be screwed onto the lens. This last method minimises the gap between the glass and the lens, reducing the risk of light leaks and glare.
Adjusting Camera Lenses: The Ultimate Guide to Perfect Focus
You may want to see also

Fixing light leaks
To fix light leaks when mounting welding glass to a camera lens, you can follow these steps:
- Use a thick light-proof cloth to drape over the camera, lens, and welding glass. This will prevent light from leaking in through any cracks between the lens and the glass.
- Secure the welding glass to the lens using rubber bands. This will minimise the gap between the glass and the lens, reducing the risk of light leaks.
- If using a lens hood, try flipping it backwards so the petals face the back of the camera. This can provide a better surface to attach the rubber bands and help block light leaks.
- For additional protection against light leaks, you can also attach a lens cap to the front of the welding glass. Make sure the lens cap is large enough to cover the entire glass and lens assembly.
- When shooting, be mindful of your surroundings and try to minimise the amount of stray light that can enter the lens. Avoid shooting in direct sunlight or bright conditions, if possible.
By following these steps, you can effectively reduce light leaks when using welding glass as a neutral density filter for your camera.
Verizon Wireless Stores: Do They Sell Camera Lenses?
You may want to see also

Using a custom white balance
Here's a step-by-step guide to creating a custom white balance:
- Set your camera to manual mode or custom white balance mode.
- Place a neutral white or grey reference card in the same lighting conditions as your subject. This can be a white piece of paper or a grey card specifically shaded at 18% grey.
- Fill the frame with the reference card and take a photo.
- Go to your camera's menu and find the custom white balance option.
- Select the photo you just took as the reference.
Your camera will now adjust the white balance based on the reference photo, ensuring that the colours in your images are true to life.
It's important to note that different lighting conditions create different colour temperatures. For example, shooting with natural light from an overcast sky will give your photos a cold, bluish tone, while shooting under certain types of fluorescent lights can give your photos a green tint. By using a custom white balance, you can ensure that your camera accurately represents the colours in the scene.
Additionally, you can also adjust the white balance in post-processing using photo editing software such as Adobe Lightroom or Photoshop. These programs offer white balance adjustment sliders, allowing you to fine-tune the colour temperature and tint of your image. You can also use an eyedropper tool to select a neutral or grey area in your photo, and the software will adjust the white balance accordingly.
Analog Camera Lenses: Interchangeable or Not?
You may want to see also

Removing the green colour cast
To remove the green colour cast from your image, you can use a few different methods in Photoshop. Here are four approaches:
Method 1: Using a Levels Adjustment Layer
This method requires a bit of trial and error, but it is a powerful tool that can be used for many purposes. Here are the steps:
- Open a Levels Adjustment Layer.
- Change the Channel to Red.
- Pull the left knob (controlling the darks) towards the right until it meets the left edge of the histogram. Skip this step if the histogram touches the left-side wall.
- Grab the right knob (controlling the highlights) and pull it left until it meets the right edge of the histogram.
- Repeat steps 3 and 4 for the Green and Blue channels.
Method 2: Match Color Technique
This technique is best suited for situations where the colour cast is very dominant. It only requires three simple steps:
- Go to Image -> Adjustments -> Match Color.
- In the window that appears, check the box for Neutralize.
- Done!
Method 3: Colour Sampler Tool
This method is useful if you have shot a video with a green screen and want to remove the green screen colour cast. Here are the steps:
- Open your image in Photoshop and select the colour sampler tool from the toolbar.
- Click on an area of the image that should be white or neutral grey. This tells Photoshop what colour should be considered neutral.
- Go to Image > Adjustments > Auto Color, and Photoshop will attempt to remove the green screen colour cast.
Method 4: Channel Mixer
This method is another way to remove a green screen colour cast. Here are the steps:
- Open your image in Photoshop and go to Image > Adjustments > Channel Mixer.
- In the dialogue box that appears, check the Monochrome box at the bottom.
- Adjust the sliders for each channel until the green screen colour cast is removed from the image.
Additional Tips:
- If you are not familiar with colour correction in Photoshop, some of these techniques may be advanced and require a good understanding of colour theory.
- You can also manually remove the green screen colour cast by painting over it with a brush tool in Photoshop.
- Remember that a colour cast isn't always a bad thing and can sometimes add value to a photograph.
Understanding the Reach of 800mm Camera Lenses
You may want to see also

Shooting in black and white
Welding glass can be used as a neutral density (ND) filter to achieve a similar effect to a professional ND filter, blocking out light so you can shoot daytime long exposures. ND filters are great for blurring anything moving, like water, clouds, or people, and they usually cost up to $200. However, with this hack, you can achieve the same effect for only $5.
How to Mount Welding Glass to Your Camera Lens
You will need:
- A digital camera with the ability to shoot in bulb mode
- A camera lens – any lens will work, except ultra-wide-angle and fisheye lenses
- Welding glass filter
- Thick rubber bands
- Light-proof cloth
- Tripod
- Remote shutter release
- Viewfinder cover for the camera
- Stopwatch to time the exposure length
- Set up your tripod and attach your camera.
- Put your lens into manual focus, compose your image, and focus on your subject. Do not use autofocus. The welding glass is so dark that once you attach it, your camera will just keep trying to focus.
- Attach the welding glass to your lens using rubber bands. Place the rubber bands around two sides of the welding glass, parallel to each other. Then take your lens hood, put it on the lens backward, and pull the rubber bands around the lens hood.
- Take a piece of cloth and drape it over your camera, lens, and the corners of the welding glass to prevent light from leaking in through the crack between your lens and the glass.
- Take your picture, using the bulb switch on your shutter release, and use a stopwatch to keep track of the time.
Samy's Camera: Renting Lenses and Photography Equipment
You may want to see also
Frequently asked questions
Neutral density filters reduce the amount of light going into the lens, allowing you to take long exposures in bright light.
You can buy welding glass online, at a welding supply store, or at a local hardware store such as Home Depot or Lowes.
You can attach welding glass to your camera lens using rubber bands, a filter mount, or by clipping the glass to a piece of black plastic.
You can correct the colour cast caused by welding glass by setting a custom white balance, shooting in black and white, or by using photo editing software such as Photoshop or Lightroom.
Yes, welding glass can be prone to fingerprints, dust, and scratches. It is also highly reflective, especially in sunny conditions.


