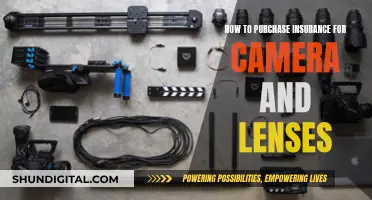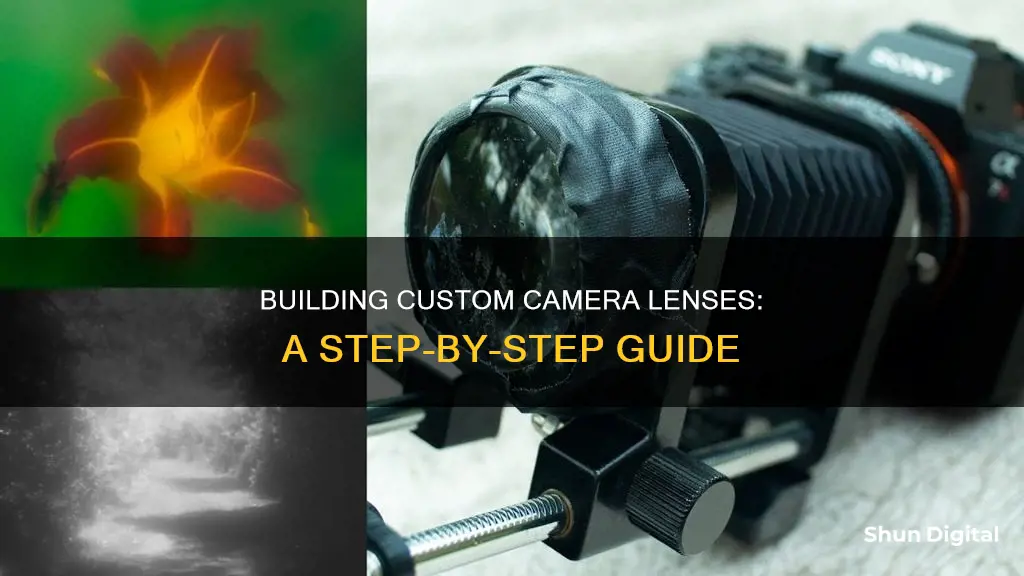
Building your own camera lens is a challenging but rewarding endeavour. While it may seem daunting, with the right tools, knowledge, and dedication, it is possible to create a functional and aesthetically pleasing lens. This process involves understanding the optics and mechanics of lenses, sourcing or creating the necessary components, and carefully assembling them to achieve the desired results. Whether you're aiming for sharp, crisp images or embracing the soft, dreamy world of DIY lenses with their unique imperfections, building your own camera lens can be a fascinating journey that provides valuable insights into the complex world of optics and photography.
| Characteristics | Values |
|---|---|
| Required components | Optics (to focus the light) and mechanics (to hold the optics in place and provide a method of adjusting the focus and aperture) |
| Optics | Any lens that focuses light (a double convex, plano convex, or positive meniscus) can theoretically be used as a camera lens |
| Optics sources | Magnifying glasses, lenses from binoculars, close-up “filters,” reading glasses, etc. |
| Optics cost | $4.00 to $10.00 |
| Focal length | The distance from the lens to the point of focus |
| Focal length measurement | Project light from a lamp through the lens and onto a piece of paper, then adjust the distance between the lens and paper until the image is at its sharpest |
| Focal length mechanics | Focal lengths in the range of 60–200 mm are good candidates for DIY camera lenses |
| Mechanics | Reusable, interchangeable-parts approach |
| Mechanics options | Old-style macro extension tubes, such as a set of Nikon K rings; two tubes with slightly different diameters to build a sliding (telescoping) focuser; bellows; steel electrical conduit with a screw-in coupler |
| Base | T2-Ring |
| Lens options | Old optical devices (e.g., film projectors, still projectors, cameras); old film camera; broken lens |
| Additional features | Diaphragm, focusing range |
What You'll Learn
![]()
Sourcing materials
The first step in building your own camera lens is to gather the necessary materials. The specific items you will need will depend on the type of lens you want to create and your level of expertise.
For those new to lens-making, a good starting point is to source a T2-Ring, also known as a T-ring adapter. This will serve as the base of your lens and ensure it fits securely onto your camera. T2-Rings are commonly used for astrophotography and can be purchased online or from photography stores. It is important to select a T2-Ring that is compatible with the brand and model of your camera.
The next step is to source the optics, or the lens itself. You can experiment with various optical devices such as old film camera lenses, magnifying glasses, lenses from binoculars, or even reading glasses. Flea markets, thrift stores, and online marketplaces are great places to find these items at affordable prices.
If you're feeling more adventurous, you can try crafting your own lens from scratch. This involves grinding and shaping the lens elements to your desired specifications. Online communities and forums are excellent resources for learning these techniques and finding the necessary tools and materials.
To hold the optics in place and provide a method for adjusting focus and aperture, you will also need mechanical components. Old camera lenses, extension tubes, and filter threads can be recycled and modified for this purpose. Super glue can be handy for attaching mounts and threads.
Finally, don't forget to gather basic tools and supplies such as sandpaper, tape, scissors, and cleaning materials to ensure your lens functions optimally.
Universal Camera Lenses: A Myth or Reality?
You may want to see also
![]()
Making glass
Once the glass is obtained, the next step is to create the lens shape. This involves grinding and polishing the glass into the desired curve for the lens. It is crucial to ensure precision during this stage, as the lens needs to refract light accurately for effective focusing. Both surfaces of the lens need to be shaped, and multiple elements might be required to avoid chromatic aberration. The grinding process can be done using a grinding wheel with water to avoid thermal shock and reduce the risk of cracks.
After grinding, the lens undergoes polishing to achieve a transparent and scratch-free surface. This step utilizes progressively finer grit wheels, from a rough diamond grit wheel to a felt wheel, to create a perfect glass shine. The felt wheel can be used with a mix of pumice and water to further enhance the shine.
It is important to note that creating a lens from scratch is a challenging and time-consuming endeavour. It may take months of work and dozens of attempts to create a functional lens. Additionally, maintaining the homogeneity and purity of the glass can be difficult, and even small bubbles or impurities can impact the final product.
While making glass for a camera lens from scratch is possible, it requires a high level of dedication, expertise, and access to specialized equipment and materials. The process involves a range of steps, from gathering raw materials to shaping and polishing the glass, all while paying close attention to precision and optical parameters.
Camera Lenses: Heavy Weights for the Perfect Shot
You may want to see also
![]()
Grinding glass
Preparation:
Before you begin, ensure you have the necessary equipment, including a spherometer, dial micrometer, motor-driven vertical spindle or simple spindle, lathe, and safety gear such as a mask, apron, and plastic boots. Check your glass for any cracks using a polarized lens. Mark the glass with a sharpie to indicate the desired lens location, drawing a slightly smaller circle inside to avoid carving the outer edge.
Grinding Process:
Partially fill a small pan with #220 or #240 carborundum or Aloxite, mixed with water, to create an abrasive slurry. Apply this mixture to both the lens and the grinding tool. Hold the upper glass at the edge with your fingers and thumb, and gently bring it into contact with the grinding tool. As the sound of grinding becomes faint, slide the tool and add more abrasive. Continue this process for 15-20 minutes, adjusting the curvature of the glass as needed. Check the radius, centre thickness, and centering (wedge) at various intervals to ensure accuracy. Maintain the wedge below certain thresholds: less than 0.001 during #220 grind and below 0.0004 inches for #400 grind.
Edge Bevelling:
To bevel the edges of your lens, use a #220 carborundum stone at a 45-degree angle, with adequate water, to grind and smooth the sharp corners.
Polishing:
Before polishing, use a 15-inch fluorescent tube as a source of monochromatic light to test the lens surface for interference fringes. Prepare two convex and concave wooden discs by wrapping their edges with gummed paper, duct tape, or masking tape to create a circular dam. Pour pitch into the concave disc, let it cool, and then press the convex disc into it, creating a mould. Remove the lens and immerse the pitch in cool water to set it. Repeat this process with a second set of wooden tools. Use a polisher shaped by R3 for the initial polishing, and then switch to a plate glass tool for further polishing. Continue polishing until the desired level of transparency and shine is achieved, testing with the Ronchi test as needed.
Final Steps:
Polish the flat surfaces of the test glass (R1) and R4 until clear. Then, polish R1 and R2 using the warmed pitch polisher. As polishing proceeds, use the test glass to achieve a 3-fringe or better match for both sides of the biconvex lens.
Lending Camera Lenses: A Unique Library Offering
You may want to see also
![]()
Lens assembly
The first step in building your own camera lens is to get the base. This is a T2-Ring, which is used for astrophotography. It is important to get a ring that matches the brand and model of your camera. The ring can come as part of a kit or alone, and some include an extender that can change the length for the focal size. The next step is to get your lens. You can either purchase a lens or use one from old optical devices such as film projectors, still projectors, or cameras. If using a purchased lens, it is important to clean it properly before use.
If you choose to use a lens from an old optical device, you will need to ensure it is the correct size to fit your camera. The lens should be mounted on a barrel with a similar size to a normal camera lens. Tape can be used to secure the lens in place if there is a minimal difference in size. It is important to note that some lenses have a fixed focus distance, which means you will need to move the camera to adjust the focus.
Another option for obtaining a lens is to use the lens module from an old film camera. These often have multiple lenses with different focal distances. This option may also include additional features such as a diaphragm and a focusing range.
Once you have assembled your lens, it is important to clean it to ensure that no particles end up inside your camera. Additionally, a pinhole camera cap is necessary for experimental photography. This involves removing the logo from a cap with sandpaper to create interchangeable paper holes.
Camera Lenses: Do They Have an Expiry Date?
You may want to see also
![]()
Testing and troubleshooting
Check Focus and Clarity
One of the critical aspects of lens testing is evaluating focus and clarity. Place your lens on your camera and try capturing images at different distances and lighting conditions. Ensure that the lens can focus on objects at varying distances and that the resulting images are sharp and clear. Adjust the aperture and focus settings to fine-tune the results.
Measure Focal Length
Every lens has a specific focal length, which is the distance from the lens to the point where light rays converge to form a clear image. To measure the focal length of your lens, set up a distant light source, such as a lamp across the room. Project the light through the lens and onto a piece of paper. Adjust the distance between the lens and the paper until the projected image is at its sharpest. Then, simply measure the distance from the lens to the image – this is your focal length.
Evaluate Image Quality
Analyze the images captured with your lens for any distortions, aberrations, or artefacts. Look for issues such as spherical aberration, where light rays passing through the edge of the lens focus at a different distance than those near the centre. Additionally, check for chromatic aberration, which can cause colour fringing at high-contrast transitions between black and white. Compare your results with images taken with commercial lenses to identify areas for improvement.
Experiment with Different Optics
Troubleshooting and refining your lens may involve experimenting with different optical components. Try using lenses from old optical devices, such as film projectors, magnifying glasses, binoculars, or reading glasses. You can also explore using achromatic lenses, which combine convex and concave lenses to reduce chromatic aberration. Surplus stores and online marketplaces are great sources for affordable lenses to test and modify.
Adjust Mechanics and Mounting
The mechanics of your lens, including its connection to the camera, can impact image quality and functionality. Ensure that your lens is securely mounted to the camera body and that any adapters or rings used are compatible with your camera brand and model. Consider using old macro extension tubes, such as Nikon K rings, to create a reusable and interchangeable system. If your lens lacks adjustable focus, explore options such as recycling helical focusers from old lenses or using sliding tubes to create a telescoping focuser.
Document and Iterate
Throughout the testing process, document your findings, measurements, and modifications. Keep notes on the lenses, focal lengths, and mechanical adjustments that yield the best results. Iteration is key to refining your homemade camera lens, so use your documentation to make informed decisions about future changes and improvements.
Building your own camera lens is a creative and experimental process. Embrace the imperfections and unique characteristics of your homemade lens, and don't be afraid to make adjustments until you achieve the desired results. Happy building and shooting!
Camera Lenses: Weatherproof or Not?
You may want to see also
Frequently asked questions
You will need a lens that focuses light, such as a double convex, plano convex, or positive meniscus, and a way to hold the lens in place, such as a T2-Ring.
Lenses can be purchased from Surplus Shed or Amazon, or sourced from old optical devices such as film projectors, still projectors, or other cameras.
A T2-Ring is a cost-effective solution, but there are other options that are more complex.
Make sure to clean the lens so that no particles end up inside your camera.