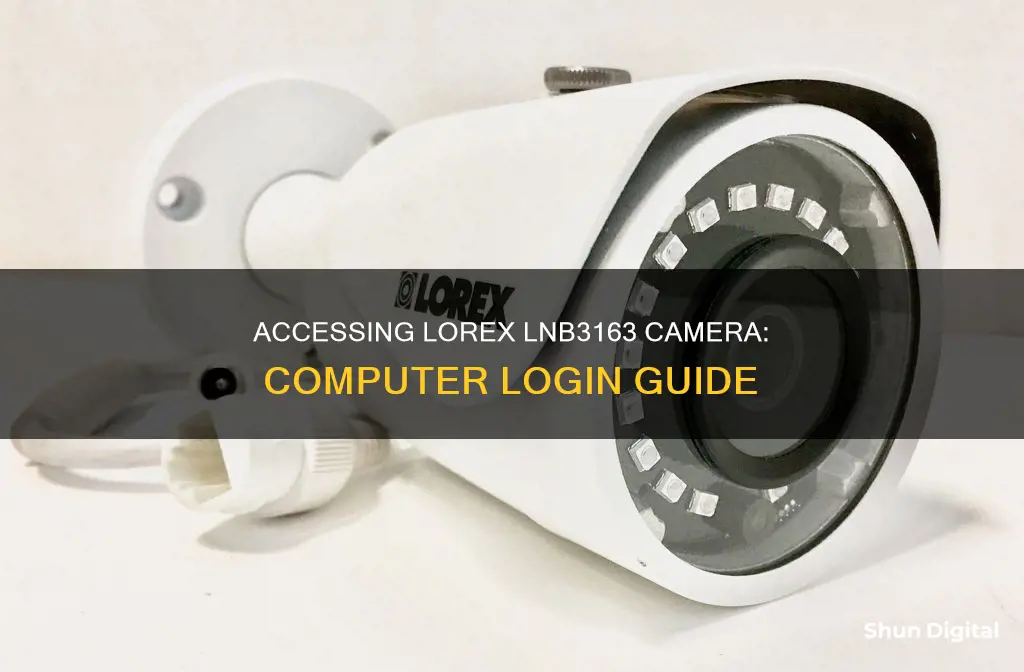
The Lorex LNB3163 camera is a 3MP HD IR bullet IP camera that can be used for indoor or outdoor security surveillance. It is compatible with select Lorex NVRs and can be accessed remotely via the Lorex Cloud app on a smart device or personal computer. This guide will outline the steps to log on to the Lorex LNB3163 camera from a computer, including any relevant port and login information.
| Characteristics | Values |
|---|---|
| Camera Resolution | 3MP |
| Camera Type | HD IR Bullet IP Camera |
| Camera Use | Indoor/Outdoor |
| Camera Features | Night Vision, Weatherproof, Vandal-Resistant |
| Camera Mounting | In-Wall, Surface, Floor-to-Floor |
| Camera Positioning | Point Away from Direct Sunlight and Obstructions |
| Camera Cleaning | Damp Cloth Only, No Harsh Cleaners |
| Camera Power | DC Power Adapter with Regulated Power Supply |
| Camera Connection | NVR or External PoE Switch |
| Camera Compatibility | Only with Select Lorex NVRs |
| Camera Cable | Cat5e UL Compliant (CM) Ethernet Extension Cable |
| Camera Software | Available on www.lorextechnology.com |
| Camera Manual | Available on www.lorextechnology.com |
| Lorex Cloud App | Remote Access via Smart Device or Computer |
What You'll Learn
- Lorex LNB3163 camera: Connect to NVR or external PoE switch
- Lorex Cloud app: View cameras remotely via smart device or computer
- Lorex LNB3163 camera: Use only with compatible Lorex NVRs
- Lorex LNB3163 camera: Use a regulated power supply to avoid damage
- Lorex LNB3163 camera: Position to minimise obstructions and maximise security

Lorex LNB3163 camera: Connect to NVR or external PoE switch
The Lorex LNB3163 camera is a 2K (3MP) IP bullet camera that comes with a Lorex NR8182 Series 8 Channel 2TB 4K NVR. The NVR has built-in PoE (Power-over-Ethernet) ports that make installation a breeze. You can simply connect the NVR and camera with a single Ethernet cable, reducing installation time and cord clutter.
If you want to connect the Lorex LNB3163 camera to an NVR or an external PoE switch, here are the steps you can follow:
Connecting to an NVR:
To connect the Lorex LNB3163 camera to an NVR, you can use the built-in PoE ports. Here's what you need to do:
- Use a single Ethernet cable to connect the NVR and the camera.
- Power on the camera and the NVR.
- Right-click on the Live View to access the Quick Menu.
- Click on "Device Search."
- Log in using your administrator credentials. Refer to your user manual for the default username and password.
- The system will search for compatible cameras on the network. This may take a few moments.
- Select the camera you want to add. If it doesn't appear, disconnect and reconnect the camera, then wait 30 seconds.
- Click "Add." The status indicator will turn green if the connection is successful.
- Click "OK" to save the changes.
- After about 2 minutes, the camera video feed will display.
Connecting to an External PoE Switch:
If you prefer to connect the Lorex LNB3163 camera to an external PoE switch, you can follow these instructions:
- Connect an Ethernet cable from the LAN port on the PoE switch to your router.
- Connect the power cable to the PoE switch and a power outlet or surge protector.
- Use the included Ethernet extension cables to connect the IP cameras to ports 1 to 8 on the PoE switch.
- Ensure that your PoE switch is providing power and video transmission as your NVR would. Refer to the instructions for your specific PoE switch model for detailed information.
By following these steps, you can successfully connect your Lorex LNB3163 camera to either an NVR or an external PoE switch, depending on your preference and setup.
Speeding Tickets: When to Expect That Camera Ticket
You may want to see also

Lorex Cloud app: View cameras remotely via smart device or computer
The Lorex Cloud app allows you to monitor your security camera system from anywhere in the world, using your smartphone, tablet, or computer. This means that you can access your Lorex LNB3163 camera remotely, and view it from your smart device or personal computer.
The Lorex Cloud app is a professional app for professional security camera systems. It keeps you connected no matter where you are. With the app, you can view your cameras in real-time, access playback and event timelines, and receive motion notifications. You can also customise your camera settings and movements, and save important videos and snapshots for quick retrieval.
To use the Lorex Cloud app, you will first need to download it onto your device. The app is optimised for the latest two major versions of iOS and Android operating systems on mobile phones and 64-bit devices. Lorex does not guarantee compatibility for iPad or tablet devices.
Once you have downloaded the app, open it and follow the prompts to log in or create an account. If you have multiple Lorex devices, you can use the same account for all of them.
After you have logged in, you will be able to access your camera feed and adjust your camera settings. You can also set up motion-activated push notifications and email alerts, which will notify you of any motion-triggered events.
Surveillance Cameras: Watching Our Every Move
You may want to see also

Lorex LNB3163 camera: Use only with compatible Lorex NVRs
The Lorex LNB3163 camera is a 3MP HD IR bullet IP camera that is only compatible with select Lorex NVRs. Lorex NVRs support ONVIF-compliant cameras, and it is recommended to connect the camera to an NVR or an external PoE switch.
To ensure compatibility with your Lorex NVR, follow these steps:
- Log into the Lorex NVR.
- Go to SETUP > REMOTE DEVICE > MANUAL ADD.
- Click the PROTOCOL drop-down menu and ensure that ONVIF is listed as one of the protocols.
If you are using a DC power adapter with the camera, a regulated power supply is required. Use of a non-regulated, non-conforming power supply can damage the camera and void the warranty.
The Lorex LNB3163 camera is suitable for both indoor and outdoor usage. It is IP66-rated weatherproof and resistant to freezing temperatures as low as -30°C. The camera offers colour night vision with a range of up to 130ft, providing 24/7 security monitoring.
For optimal performance, it is recommended to point the camera towards areas with minimal obstructions, such as tree branches, and to install it in a location that is difficult for vandals to access. Additionally, ensure that the cabling is secure and not exposed or easily cut.
By following these guidelines and using the Lorex LNB3163 camera with compatible Lorex NVRs, you can effectively utilise this camera for your security needs.
Exploring the E-M10 Mark II: Does It Offer RAW Photography?
You may want to see also

Lorex LNB3163 camera: Use a regulated power supply to avoid damage
The Lorex LNB3163 camera is a 3MP HD IR bullet IP camera. When using a DC power adapter with the camera, it is important to use a regulated power supply to avoid potential damage to the camera and to ensure the warranty remains valid.
The Lorex LNB3163 camera is designed to be used with a regulated power supply. This is because the camera requires a consistent and stable power input to function properly. A non-regulated power supply may provide fluctuating or inconsistent power, which can damage the sensitive components of the camera.
Using a non-regulated or non-conforming power supply with the Lorex LNB3163 camera can have several negative consequences. Firstly, it can void the warranty provided by the manufacturer. This means that if the camera malfunctions or becomes damaged due to the use of an incorrect power supply, the user may not be covered by the warranty and would have to bear the cost of repairs or replacement. Secondly, using an incorrect power supply can damage the camera's circuitry and internal components. This can lead to reduced performance, malfunction, or even render the camera completely inoperable.
To avoid these issues, it is crucial to use a regulated power supply that meets the specifications provided by the manufacturer. This will ensure that the camera receives the correct voltage and current, preventing any potential damage and ensuring optimal performance.
By following the manufacturer's guidelines and using the recommended regulated power supply, users can protect their Lorex LNB3163 camera from potential damage and maintain its proper functioning over its lifespan.
Credit Score Concerns: Camera Tickets' Impact Explained
You may want to see also

Lorex LNB3163 camera: Position to minimise obstructions and maximise security
The Lorex LNB3163 camera is a versatile security solution for both indoor and outdoor use. Here are some tips to maximise security and minimise obstructions when positioning your Lorex LNB3163 camera:
Install cameras up high
Mounting the camera in an elevated position will provide a wider field of view, allowing you to monitor a larger area. This also makes it more difficult for potential vandals to access the camera, reducing the risk of tampering.
Keep under shelter
Placing the camera in a sheltered location will reduce the impact of precipitation on the quality of the security footage. This is especially important for maintaining clear and usable footage in areas with high rainfall or snowfall.
Avoid obstructions
Ensure that the camera's field of view is free from obstructions to maximise the area under surveillance. Avoid positioning the camera where objects such as trees, signs, or buildings may block the view or become the focal point of the image.
Point away from direct light sources
It is important to consider the position of the camera in relation to light sources. Mount the camera so that the lens points away from direct light, as this can affect the image quality and potentially create blind spots.
Protect camera cables
To maintain the security and functionality of the camera, it is advisable to install the cables in a discreet manner. Running cables along the sides of buildings, soffits, or ceilings can help to conceal them from potential intruders and reduce the risk of tampering.
Opt for obvious placement
The presence of security cameras can often act as a deterrent to potential intruders. Consider placing the camera in a visible location to make it obvious that the area is under surveillance. This can be a preventative measure in itself.
By following these guidelines, you can optimise the positioning of your Lorex LNB3163 camera to minimise obstructions and maximise security. This will help ensure that you get the most out of your security system and improve overall surveillance effectiveness.
Side Mirror Surveillance: Are You Being Watched?
You may want to see also
Frequently asked questions
First, make sure your camera is connected to your NVR or an external PoE switch. You can then access your camera via Firefox by using the IP address and port numbers.
You will need a REGULATED power supply to avoid damaging the camera and voiding the warranty.
No, you must use a regulated, conforming power supply.
No, do not disassemble the camera.
No, do not point the camera directly at the sun or a source of intense light.


