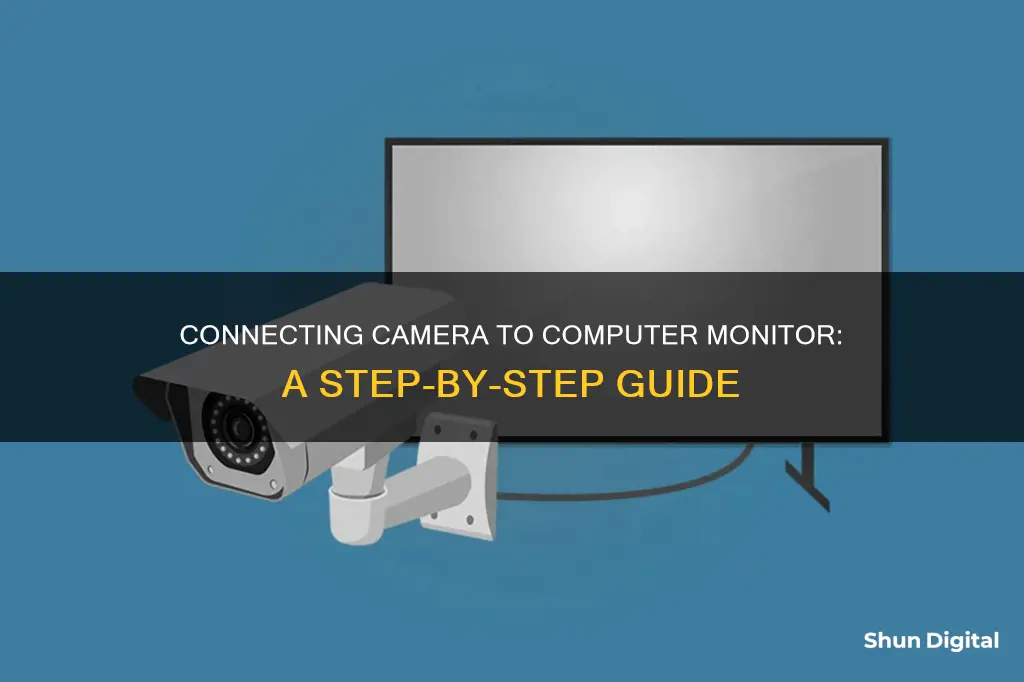
Connecting a camera to a computer monitor can be a great way to view security footage in real-time or to use your monitor as a display for photography or videography. The process of connecting a camera to a computer monitor can vary depending on the type of camera and monitor you have, but there are some general steps and considerations to keep in mind. In this paragraph, we will introduce the topic of how to hook up a camera to a computer monitor and provide an overview of the process and equipment required.
| Characteristics | Values |
|---|---|
| Camera Type | Wireless security camera |
| Monitor Type | Computer monitor |
| Connection Methods | Direct connection, NVR, PoE injector, WiFi router |
| Required Equipment | Camera, monitor, power source, cables (Ethernet, HDMI, VGA), WiFi router, PoE injector |
| Steps | Determine compatibility, connect camera to power source, connect camera and monitor, set up software, configure camera settings, adjust camera settings, monitor feed |
What You'll Learn
![]()
Wireless security cameras: using an Ethernet cable, camera software, and LAN
Wireless security cameras can be connected to a computer monitor or other display devices such as a Smart TV or mobile phone. This allows you to watch live footage from anywhere in the world.
Step 1: Install the Camera
Place the camera in the desired location and direct it towards the area you want to monitor. Power the camera using the provided power adapter.
Step 2: Connect the Camera to the Computer with an Ethernet Cable
Take an Ethernet cable and connect one end to the LAN port of the camera. Connect the other end of the cable to the LAN port on the back of your computer.
Step 3: Download and Install the Camera Software
If you are setting up a new wireless security camera, you should have received a CD containing the necessary software. Insert the CD into your computer and install the software. Create an account if prompted.
Step 4: Scan the Local LAN
Launch the viewing program within the camera software. Depending on the brand and features of your camera, you may need to obtain the default IP address of your camera. This can usually be found in the camera's user guide or on a label on the device itself. Scan your network using the software to detect the camera.
Step 5: Configure Network Settings
To access a device on the same LAN, the devices must share the same network prefix. You may need to change the IP address of your computer or camera to ensure they are on the same network. Consult your camera's user guide or a networking professional for detailed instructions on configuring network settings.
Step 6: View the Camera Feed
Once the setup is complete, open the camera software and select the live view option to watch the camera feed and ensure everything is functioning correctly.
By following these steps, you can successfully connect a wireless security camera to a computer monitor using an Ethernet cable and camera software. This setup allows you to remotely monitor your home or office with ease.
Disputing Camera Speeding Tickets in New Orleans: Your Rights
You may want to see also
![]()
HDMI wireless security cameras: using an HDMI cable
There are several ways to connect a wireless security camera to a computer monitor. Here is a method using an HDMI cable:
Method 2: Pick HDMI Wireless Security Camera
If you have a standalone Wi-Fi camera and want to connect it to a computer monitor, this method will work well.
This method requires a wireless camera with an additional HDMI port next to the main pigtail of the camera body. There are many wireless surveillance cameras on the market, and each one has a unique shape and connection. Some models come with an HDMI port, an Ethernet port, and a power cable, and offer resolutions ranging from 1080p to 4K.
To connect your wireless security camera to a computer monitor, take the HDMI cable from the camera port and insert it into the PC display screen.
Note: Before selecting this type of camera, ensure that the camera's resolution matches your screen specifications to avoid viewing problems.
Method 3: Make Connections with NVR
The default way to connect a wireless security camera to a computer monitor when you have a complete surveillance system is by using a Network Video Recorder (NVR). The NVR is a device used with wired PoE IP cameras and wireless cameras to store recorded videos on the hard drive installed inside the device and to enable security cameras to broadcast video feeds online.
To use this method, connect the NVR to the computer monitor using an HDMI or VGA cable, depending on the ports available on the NVR and the monitor.
Note: This method and the cables used depend on the ports available on the NVR and monitor. If your NVR and monitor only have VGA ports, use a VGA cable. If neither device has an HDMI or VGA port, you may need to use a converter.
Method 4: Use a Home Wi-Fi Router
Another method to connect a wireless security camera to a computer monitor is through a Wi-Fi router. This method can be used with wireless cameras that have additional wires for network cable connections or with wire-free cameras that are entirely wireless.
- Install the antennas and ensure that the camera placement is free from physical obstacles that may affect the signal strength.
- Power the camera using a DC 12V adapter or a battery pack.
- Connect the wireless security camera to the home Wi-Fi router directly or using a mobile app provided by the supplier.
- If your laptop or PC is connected to Wi-Fi, connect it to the same Wi-Fi router. If not, use a USB Wi-Fi adapter to receive the Wi-Fi signal from the router.
- Download the viewing software and adjust the settings as needed. Now you're ready to view the camera footage on your computer monitor.
Additional Tips for Setting Up and Using a Wireless Security Camera:
- Ensure that your camera is within the Wi-Fi range, and if your computer uses a Wi-Fi signal, place it near the router.
- Check the compatibility of your camera and monitor, as well as the type of cables used for connections between devices.
- Install any necessary software or drivers on your PC, or download a smartphone application if you plan to view the camera feed on your mobile device.
- Connect the camera to the monitor and power it on to ensure that the connections, whether wired or wireless, are correct.
- Adjust the settings as needed and enjoy your new security camera setup!
Recharging Olympus Camera Batteries: A Step-by-Step Guide
You may want to see also
![]()
Network Video Recorder (NVR): using a VGA or HDMI cable
Using a Network Video Recorder (NVR) to connect a camera to a computer monitor is a default method when you have a complete surveillance system. The NVR is a device used with wired PoE IP cameras and wireless cams to store recorded videos on the hard drive installed inside the device, and to enable security cameras to broadcast video feeds online.
To connect your camera to a computer monitor using an NVR, you will need the following equipment:
- A wired or wireless camera
- An NVR device
- A computer monitor
- A VGA or HDMI cable
- Viewing software
First, install and set up your camera in the desired location, and power it using the provided power adapter. Then, connect the camera to the NVR device. For a wired camera, use a video cable such as coaxial or CAT5e. For a wireless camera, power it on and pair it to the NVR according to the provided instructions.
Next, connect the NVR to the computer monitor using a VGA or HDMI cable. The type of cable you use will depend on the ports available on your NVR and monitor. VGA cables support a maximum output of 1080p resolution, while HDMI can support up to 4K, depending on the model of your recorder. Ensure that you switch the input channel on the monitor to the correct source (VGA or HDMI).
Finally, install the manufacturer-provided viewing software on the computer connected to the monitor. This will allow you to view and control the NVR system, including live feeds, playback recordings, and advanced settings.
Mastering Camera Raw White Balance
You may want to see also
![]()
Home Wi-Fi router: using a Wi-Fi signal
To hook up a wireless security camera to a computer monitor using a Wi-Fi signal, you can follow these general steps:
Step 1: Check Compatibility
First, ensure that your wireless security camera and computer monitor are compatible. Check the camera specifications to see if it supports a direct connection to a monitor, looking for features like HDMI or VGA output. Similarly, check your monitor's input ports—HDMI or VGA are the most common for video input. If your camera and monitor aren't directly compatible, you may need additional hardware like an HDMI-to-VGA converter.
Step 2: Connect the Camera and Monitor
Position your camera in the desired location and connect it to a power source using the provided adapter. Then, use an HDMI or VGA cable to connect the camera and monitor, depending on their compatibility. If both devices have HDMI ports, use an HDMI cable for better video quality. Ensure that the camera's VGA output is connected to the monitor's VGA input if using a VGA cable.
Step 3: Power On and Establish Connection
Turn on the camera and monitor to establish the connection. Wait for both devices to power up and ensure a successful connection. If additional configuration is needed, refer to the camera's user manual or manufacturer's website for instructions.
Step 4: Set Up and Configure Software
Check if the camera manufacturer provides software or apps specifically for their wireless security cameras. Install this software and follow the prompts to set up a new camera or connect to an existing one. You may need to create or log in to an account to access certain features or remote viewing.
Step 5: Configure Camera Settings
Explore the software interface to adjust various camera parameters. You may be able to customize motion detection sensitivity, video quality, and recording schedules, depending on your camera and software. Ensure that your camera is connected to your wireless network to enable remote access.
Step 6: Test the Camera Feed
Once the software setup is complete, test the camera feed on your computer monitor. Ensure that the video is visible and clear. If you encounter any issues, refer to the troubleshooting steps below.
Troubleshooting:
- No video signal: Check that all cables are securely connected and the camera and monitor are powered on. Try reconnecting or using different cables if necessary.
- Poor video quality: Ensure that your camera and monitor support the same resolution. Adjust the video quality settings in the camera software and monitor settings to improve clarity.
- Connection issues: Ensure that both devices are on the same network. Try restarting the network or resetting the camera and monitor. Check that your Wi-Fi signal is strong and stable near the camera.
- Software compatibility: Install the latest version of the camera software, compatible with your camera model. If issues persist, try reinstalling the software.
- Audio issues: Check that the audio settings are properly configured in the camera software and that your computer's audio settings are not muted or set too low. Ensure that any external speakers are connected correctly.
- Hardware compatibility: Double-check the hardware compatibility between the camera and monitor, ensuring they have compatible ports for direct connection or using appropriate adapters.
Best Cameras for Zone Focusing Techniques
You may want to see also
![]()
Wired connection: using a power source and VGA or HDMI cable
Connecting a camera to a computer monitor can be done in several ways, but one of the most reliable methods is through a wired connection using a power source and a VGA or HDMI cable. This setup allows for a direct and smooth transmission of feeds from your camera to your monitor. Here is a detailed guide on how to set up a wired connection:
Step 1: Prepare the Necessary Equipment
Before you begin, ensure you have the following equipment:
- A security camera (wired or wireless)
- A computer monitor with an HDMI or VGA input
- A security DVR or NVR (base station for recording footage)
- Video cables (HDMI or VGA)
- Power adapters and cables
Step 2: Connect the Camera to the DVR/NVR
First, connect your security camera to the DVR/NVR base station. For wired cameras, use a video cable (coaxial or CAT5e) to connect the camera to the corresponding channel input on the DVR/NVR. For wireless cameras, power them on and pair them with the DVR/NVR according to the provided instructions.
Step 3: Connect the DVR/NVR to the Computer Monitor
Next, connect the DVR/NVR to the computer monitor. Use an HDMI cable if both devices have an HDMI port, as it can transmit HD video and audio signals. Connect one end of the HDMI cable to the HDMI output port on the DVR/NVR and the other end to the HDMI input port on the monitor.
If HDMI is not available, you can use a VGA cable to transmit the video signal. Connect one end of the VGA cable to the VGA output port on the DVR/NVR and the other end to the VGA input port on the monitor. You may need to switch the input channel on the monitor to the assigned VGA source.
Step 4: Install Viewing Software
To view and control the DVR/NVR system on your computer, you will need to install the manufacturer-provided software. This is typically simple video management software that can be included with the system or downloaded from the manufacturer's website. Follow the installation instructions and input the necessary information, such as the DVR/NVR IP address and credentials.
Step 5: Configure the Display View
Once the setup is complete and the software is operational, you can customise the display view on the monitor according to your preferences. Common options include cycling through full-screen views of individual cameras, a quad view (2x2) showing four cameras, a 3x3 grid for nine cameras, or displaying multiple cameras simultaneously. You can adjust these settings in the viewing software or DVR/NVR menu.
Step 6: Troubleshooting
If you encounter any issues with the camera feeds or display, there are several troubleshooting steps you can take:
- Ensure all video cables are securely connected at both ends.
- Try using different video cables in case the original cable is faulty.
- Verify that the monitor input source is set correctly (HDMI, VGA, etc.).
- Check the video output settings on the DVR/NVR if the image appears distorted.
- Reinstall the viewing software and confirm that the IP address is entered correctly.
- Power cycle the DVR/NVR and monitors if the feeds freeze or become unresponsive.
- Adjust camera channel assignments if feeds are displayed on the wrong channel.
- Update the firmware of the DVR/NVR and camera if connectivity issues persist.
- Contact the manufacturer for further assistance if issues persist.
By following these steps, you will be able to establish a reliable wired connection between your camera and computer monitor, providing you with a smooth and budget-friendly surveillance solution.
iMac's Built-In Camera: What You Need to Know
You may want to see also
Frequently asked questions
Yes, you can. However, you need to ensure that the camera and the monitor are compatible and have the necessary ports and connections.
You will need the camera, a power source for the camera, a wireless receiver or transmitter, and the necessary cables to connect the receiver or transmitter to the computer monitor.
First, connect the camera to a power source. Then, connect the wireless receiver or transmitter to the camera. After that, use the appropriate cables to connect the receiver or transmitter to the computer monitor. You may need to adjust the monitor settings to display the camera feed.
Yes, you can. Ensure that the monitor has enough inputs for all the cameras, and you may need a switcher or multiplexer to toggle between the camera feeds.
Connecting a wireless security camera to a computer monitor provides a dedicated display for monitoring. This is especially useful for real-time surveillance of your home or business and offers a larger, more detailed view compared to a smartphone or tablet.