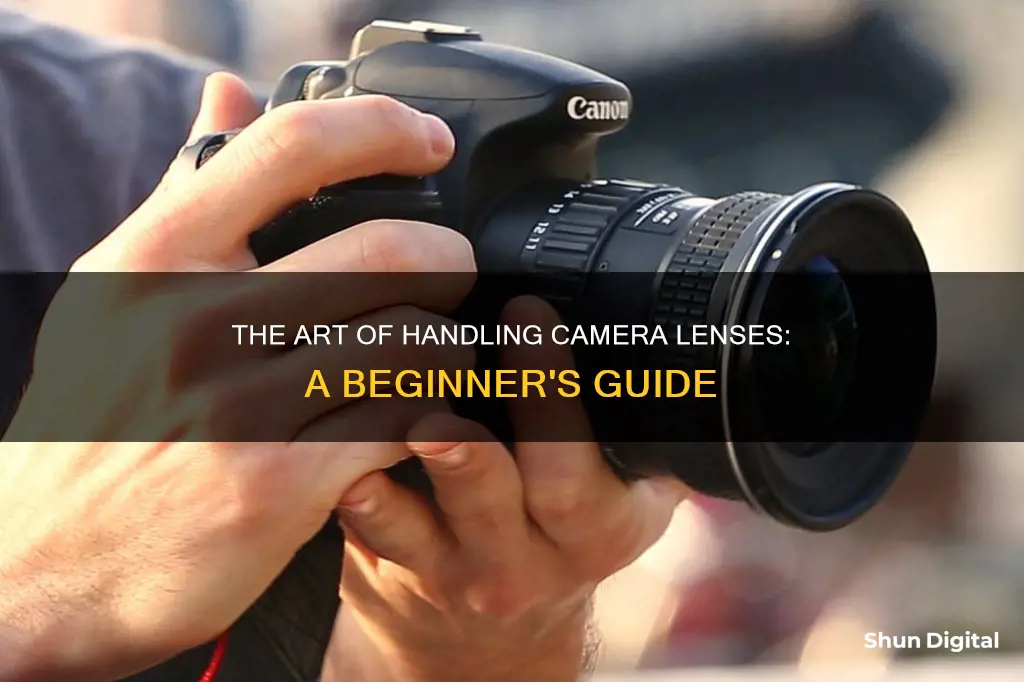
Handling camera lenses is a crucial aspect of photography, as it can significantly impact the quality of your images. The lens is what focuses light from what you see through the viewfinder, and a high-quality lens can elevate your photographs even when using a basic camera. Conversely, a low-quality lens can diminish the performance of an advanced camera. Therefore, understanding how to properly handle your camera lenses is essential for capturing sharp and clear images.
When holding your camera, the general rule is to grip the camera with your right hand and the lens with your left. This distribution of weight aids in stabilisation and reduces the risk of camera shake, which can cause blurriness in your photos. It is important to keep your elbows tucked into your body to further enhance stability. Additionally, breathing techniques are vital when handling camera lenses, as breathing out before clicking the shutter can minimise camera shake by reducing body movements.
Different lenses have varying features and specifications, such as focal length and maximum aperture, which influence the types of photos you can capture. For instance, telephoto lenses have a narrower angle of view and are more prone to camera shake due to their longer focal length. Therefore, understanding the unique characteristics of your lens and practising proper handling techniques are key to achieving the best results.
| Characteristics | Values |
|---|---|
| Importance of camera lenses | Arguably the most important piece of equipment a photographer can buy |
| How to hold a camera | Hold the camera grip with the right hand and the lens with the left hand |
| How to hold the lens | Rest the lens on the left hand and cup the lens from the bottom |
| How to press the shutter button | Press the shutter button with the index finger of the right hand |
| How to prevent camera shake | Breathe out right before clicking the shutter button |
| How to hold the camera for vertical orientation | Turn the camera until the shutter button is at the top and rest the camera’s viewfinder on the eyebrow |
| How to hold a telephoto or physically long lens | Move the hands further down the lens to hold it evenly |
| How to stabilize the camera | Keep the elbows closer together and towards the body |
| How to stabilize the camera while sitting | Rest the elbow on the knee while holding the camera |
| How to stabilize the camera while lying down | Place the elbows on the ground while lying flat on the stomach |
What You'll Learn

Know the anatomy of a lens
The lens is the eye of the camera. It is arguably the most important piece of equipment a photographer can buy. The various parts of a lens have important purposes and functions.
The Anatomy of a Lens
The barrel is the physical outer body of the lens that houses the internal components. The elements are the individual pieces of glass that make up the optics of a lens. The bayonet is the end of the lens that attaches to the camera body, with different mounts for different cameras.
The focus ring is present on most lenses and allows the photographer to manually adjust the focus. The zoom ring controls the zoom of zoom lenses. Manual lenses have an aperture ring that controls the physical size of the aperture.
Lens Terminology
The focal length is the magnification strength of the lens, measured in millimetres. Lenses with a shorter focal length are "wide-angle", while longer focal length lenses are "telephoto". A prime lens has a fixed focal length and does not zoom.
Lens speed is connected to the aperture. The wider the maximum aperture, the "faster" the lens, as it can shoot in lower light at faster shutter speeds. The aperture is the opening in the lens where light passes through to the camera sensor. The aperture is measured in f-stops, such as f/2 or f/11. The f-number increases as the aperture decreases.
Other Lens Markings
The first set of numbers on a lens is usually the focal length in millimetres. A single number indicates a prime lens, while a range denotes a zoom lens. The second series of numbers represents the maximum aperture. A single number means a fixed maximum aperture, while two numbers indicate a variable aperture.
Other markings include:
- IS/VR/OSS: image stabilisation, vibration reduction, or optical stabilisation
- ASPH/ASP: aspherical, which reduces spherical aberrations
- CRC: close-range correction, for close-range sharpness
- USM/HSM/SWM: ultrasonic motor, high-speed motor, or silent wave motor
- EF-S: the lens is for a specific camera body
Vintage Camera Lenses: Worth the Money or Not?
You may want to see also

Understand focal length
Understanding Focal Length
Focal length is a fundamental concept in photography, dictating what your camera can focus on and how your images will turn out. It is the optical distance, usually measured in millimetres, from the point where light converges inside the lens to the camera's sensor. This measurement is taken when the lens is focused on infinity.
The focal length of a lens determines its angle of view and magnification. A longer focal length results in a narrower angle of view and higher magnification, while a shorter focal length provides a wider angle of view and lower magnification. This means that a lens with a short focal length will capture a broader view, whereas a lens with a long focal length will capture a more focused, "zoomed-in" view.
Focal length is not a measurement of the physical length of a lens but rather an optical property. It is determined by the distance between the nodal or optical centre point of the lens and the camera's sensor. The nodal point is where light converges in a lens, and it is also known as the optical centre.
Lenses are named by their focal length, which can be found on the barrel of the lens. For example, a 50mm lens has a focal length of 50 millimetres. This measurement is independent of the camera used, meaning a 50mm lens is a 50mm lens regardless of whether it is used on a full-frame, cropped sensor, or medium-format camera.
The focal length of a lens is crucial as it determines the lens's field of view, or how much of the scene will be captured. It also dictates how large or small a subject will appear in the photo.
There are two main types of lenses: prime and zoom. Prime lenses have a fixed focal length, meaning the photographer is locked into shooting at a single focal length. Zoom lenses, on the other hand, have variable focal lengths, allowing for more flexibility.
The choice between a prime and zoom lens depends on the specific needs of the photographer. Prime lenses tend to be more compact and lightweight, making them ideal for travel and street photography. They also usually have larger maximum apertures, making them suitable for low-light conditions and achieving a shallow depth of field. Zoom lenses, on the other hand, offer the convenience of multiple focal lengths in a single lens, reducing the need to change lenses frequently.
Understanding focal length is essential for photographers to master their craft and create compelling images. It allows them to choose the right lens for the job, whether it's capturing sweeping landscapes or intimate portraits.
Understanding Camera Lenses: A Beginner's Guide to Photography
You may want to see also

Understand maximum aperture
Understanding the maximum aperture of a camera lens is key to creating great photos. Aperture refers to the opening of a lens through which light passes. It is calibrated in f-stops and is generally written as numbers such as 1.4, 2, 2.8, 4, 5.6, 8, 11, and 16. Lower f-stops denote a greater aperture, allowing more light to reach the film or image sensor, while higher f-stops represent smaller apertures, reducing the amount of light that reaches the sensor.
The maximum aperture is the widest the lens's aperture blades can open, letting in the most amount of light. It is a property of the lens, not the camera. Typical maximum apertures for lenses include f/1.4, f/1.8, f/2.8, f/3.5, and f/4. A wider aperture not only increases the exposure but also reduces the depth of field, creating a shallow focus effect. This is particularly useful for portrait photography, where a shallow depth of field helps to separate the subject from the background.
Wider apertures are also beneficial in low-light conditions, allowing more light to reach the sensor and resulting in brighter images. For example, an f/1.4 or f/1.8 lens is ideal for Milky Way photography or capturing dimly lit scenes. Additionally, a wider aperture can help create a pleasant blur in portrait photography, isolating the subject and adding a creative dimension to the image.
It is important to note that the maximum aperture is usually included in the name of the lens. For instance, the "Nikon 35mm f/1.4G lens" has a maximum aperture of f/1.4. Lenses with wider maximum apertures tend to be more expensive due to the larger glass and specialty lens elements required.
While a wider aperture offers several advantages, it is essential to strike a balance with other camera settings such as shutter speed and ISO, collectively known as the Exposure Triangle. Adjusting the aperture size also affects the depth of field, with larger apertures resulting in a shallower depth of field and vice versa.
The Art of Camera Lenses: Beautify or Uglify?
You may want to see also

Know how to hold the camera and lens properly
The first thing to know is that, unless you purchase an adapter, cameras are right-handed. This means that you should hold the camera grip with your right hand and the lens with your left hand. With your right hand on the grip, use your index finger to press the shutter button. You won't need to remove your hold on the grip to do this.
When holding the lens, rest it on your left hand and cup it from the bottom. You can twist the lens barrel with your fingers without loosening your hold on the lens. Make sure to tuck your elbows into your body to keep the camera sturdy.
If you want to photograph in a vertical orientation, turn the camera until the shutter button is at the top and rest the camera's viewfinder on your eyebrow.
With telephoto or physically long lenses, you'll need to account for the weight distribution of the long lens. Just move your hands further down the lens to hold it evenly.
The key is to keep your elbows closer together and towards your body, no matter how you grip the equipment. This will help to stabilise you!
Most photography is done standing up, so make sure that your feet are perpendicular to the subject you are photographing. Widen your stance a bit to find your greatest balance. Hold the camera to your face and press on your face a bit, creating an additional balancing point for your gear.
Keep your back straight! It may be tempting to lean forward or back, but this isn't very good for your posture and won't help your photography. It's better to back up or move forward than lean.
If you can, lean on something or push on something that can bear your weight to limit your movements.
A big secret that photographers keep close is to breathe out right before clicking the shutter to take a picture. When you breathe out right before, you lessen the chance of camera shake because your body performs fewer movements.
If you are using a heavy lens, it's important to handle the camera by the lens, not the body, in order to avoid damaging the lens mount.
Camera Lenses for DSLRs: Are They Piratical and Affordable?
You may want to see also

Learn how to breathe properly to stabilise yourself
Learning to breathe properly can help stabilise yourself and improve your health. It can also be a great way to calm yourself down when handling fragile and expensive camera equipment. Here are some tips on how to breathe properly:
Diaphragmatic Breathing
Also known as "belly breathing", this technique involves breathing in through your nose, feeling your stomach pressing into your hand, and exhaling slowly through pursed lips. This type of breathing is particularly helpful for people with breathing challenges due to chronic obstructive pulmonary disease (COPD), heart problems, or cancer. It is also recommended by the NHS for stress relief.
Pursed Lip Breathing
This technique helps to slow down your breathing pace by having you exhale slowly through pursed lips. It may be especially useful during activities such as bending, lifting, or stair climbing.
Breath Focus Technique
This technique uses imagery or focus words and phrases. You can choose a word that makes you feel relaxed, such as "peace", "let go", or "relax". As you build up your breath focus practice, you can start with a 10-minute session and gradually increase the duration.
Alternate Nostril Breathing
Also known as Nadi Shodhana Pranayama in Sanskrit, this technique involves breathing through one nostril at a time and is a breathing practice for relaxation. It has been shown to enhance cardiovascular function and lower heart rate.
Resonant or Coherent Breathing
This technique involves breathing at a rate of 5 full breaths per minute by inhaling and exhaling for a count of 5. This type of breathing maximises your heart rate variability (HRV), reduces stress, and may reduce symptoms of depression when combined with Iyengar yoga.
Deep Breathing
Deep breathing helps to relieve shortness of breath by preventing air from getting trapped in your lungs and helping you to breathe in fresher air. It involves drawing your elbows back slightly to allow your chest to expand, taking a deep inhalation through your nose, retaining your breath for a count of 5, and slowly releasing your breath by exhaling through your nose.
Humming Bee Breath (Bhramari)
This technique involves placing your first fingers on the tragus cartilage that partially covers your ear canal, inhaling and gently pressing your fingers into the cartilage as you exhale, and then making a loud humming sound with your mouth closed. This creates a unique sensation that helps to calm you down.
General Tips for Healthy Breathing and Lungs
- Exercise regularly: Getting regular aerobic exercise helps improve lung capacity.
- Avoid large meals: Eating large meals can cause abdominal bloating, which can press against the diaphragm and prevent it from moving up and down efficiently.
- Maintain a moderate weight: Being overweight increases the risk of experiencing breathing difficulties such as obstructive sleep apnea.
- Quit smoking: Smoking damages the alveoli in the lungs, making them less efficient.
- Monitor air quality: Limit your exposure to pollutants and allergens that affect breathing.
- Stay hydrated: Drinking plenty of water helps the throat and mouth add humidity to the air you breathe in, making it less likely to irritate the airways.
- Eliminate sources of indoor air pollution: Ensure your living and working environments are clean, well-ventilated, and free of mould.
- Use protective equipment: If you work in an environment with exposure to dust, chemicals, or vapours, wear a mask to avoid inhaling these irritants.
- Get vaccinated: The flu shot or pneumonia vaccine can help protect people with respiratory conditions.
Now that you know how to breathe properly to stabilise yourself, you can feel more confident handling camera lenses. Remember to always handle camera equipment with care and support the lens and camera body with both hands whenever possible.
Understanding APS-C Camera and Lens Cropping: What's the Difference?
You may want to see also
Frequently asked questions
Cameras are designed to be held in the right hand, with the lens supported by the left. Tuck your elbows into your body to keep the camera stable and minimise any camera shake. If you're shooting vertically, turn the camera so the shutter button is at the top and rest the viewfinder on your eyebrow.
When using a telephoto or long lens, move your hands further down the lens to balance the weight distribution. Keep your elbows close together and towards your body for stability.
Camera shake is caused by natural hand movements and can be minimised by breathing out before you press the shutter button.
If you're sitting, rest your elbows on your knees or a table for support. If you're lying down, place the camera and lens directly on the ground and lie on your stomach.


