Capturing the night sky in all its glory is a challenging but rewarding endeavour. The right camera lens can make all the difference.
The first thing to consider is the type of night photography you plan to do. If you don't plan on including stars in your shots, you can use whatever lens you want. However, if you want to capture the stars, you'll need a lens that maximises exposure while minimising blur caused by the movement of the earth.
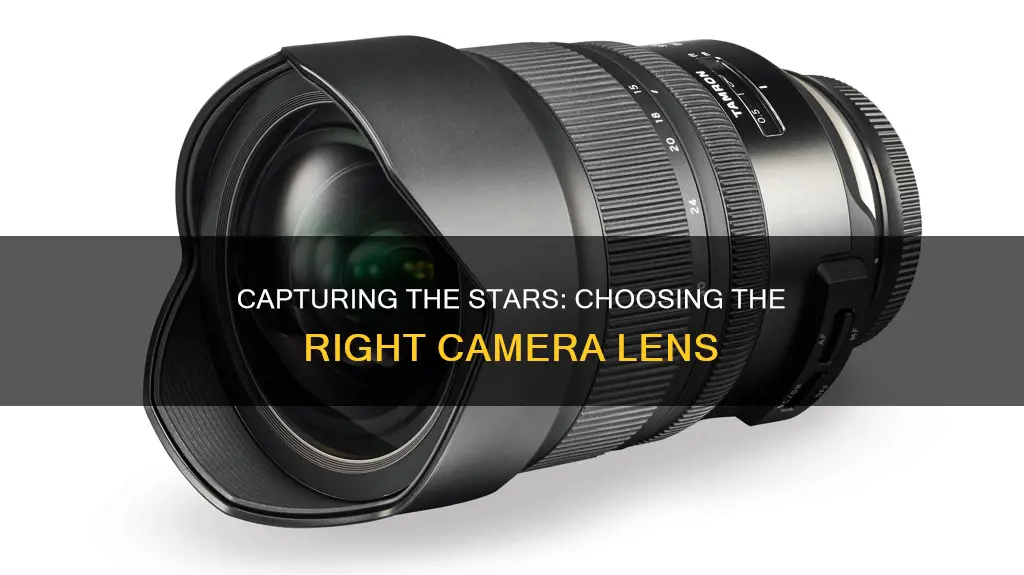
A fast lens with a wide aperture is ideal for astrophotography. Look for a lens that opens up to f/2.8 or wider. A lens with a maximum aperture of f/4.0 is acceptable, but anything less than that probably won't work. You'll also want a wide-angle lens—generally, 24mm or wider.
Some recommended lenses for astrophotography include the:
- Sigma 14mm f/1.4 DG DN Art
- Sony FE 12-24mm f/2.8 G Master
- Nikon Nikkor Z 14-24mm f/2.8 S
- Sigma 14mm f/1.8 DG HSM Art
- Canon RF 15-35mm f/2.8L IS USM
- Sony FE 14mm f/1.8 G Master
- Sigma 14-24mm f/2.8 DG HSM Art
- Canon EF 16-35mm f/2.8 III
- Tokina 16-28mm f/2.8
- Rokinon 14mm f/2.8
- Sigma 24mm F/1.4 Art series lens
- Rokinon 135mm F/2 mid-range telephoto
What You'll Learn

Wide-angle lens for night sky photography
Wide-angle lenses are the go-to for night sky photography, and there are a few reasons for this. Firstly, they allow you to capture as much of the sky as possible. Secondly, they let you use slower shutter speeds without the stars appearing to move across the sky, which is known as streaking or trailing.
When it comes to night sky photography, you need to maximise exposure as quickly as possible. Starlight is extremely dim, and the stars are moving across the sky due to the rotation of the earth. This means that you need to use a combination of shutter speed, aperture and ISO to let in as much light as possible, as quickly as possible.
A wide-angle lens will allow you to open the shutter for longer without the stars streaking across the sky. The rule of thumb here is that the shorter the lens focal length, the more time can be used for exposure.
The other factor to consider is aperture. A wide-angle lens with a large aperture (or small f-number) will let in as much light as possible. An aperture of f/2.8 or wider is ideal, with f/4.0 also being acceptable.
Some recommended wide-angle lenses for night sky photography include:
- Canon EF 16-35mm f/2.8 III
- Nikon AF-S NIKKOR 14-24mm f/2.8G ED
- Sony 16-35mm f/2.8 GM
- Tokina 16-28 mm f/2.8
- Rokinon 14mm f/2.8
- Sigma 14mm f/1.8 DG HSM Art
- Sony FE 12-24mm f/2.8 G Master
- Canon RF 15-35mm f/2.8L IS USM
Welding and Cameras: Can Welding Damage Camera Lenses?
You may want to see also

Fast maximum aperture
A fast maximum aperture is critical for astrophotography. The aperture of a lens is a measure of how wide the lens opens when taking a photo. The wider the aperture, the more light the lens lets in, and the faster the maximum aperture, the wider the lens opens.
For astrophotography, a fast maximum aperture is important because it allows more light to reach the camera sensor in a shorter amount of time. This is crucial because astrophotography requires long exposure times, and if the shutter speed is too slow, star trails will appear in the photo—a blur effect caused by the movement of the Earth.
A fast maximum aperture also means you can use a lower ISO, which reduces noise in your images. With a wider aperture, you can also achieve a shallower depth of field, which can help create a soft, blurry background that makes your subject stand out.
The ideal aperture settings for astrophotography are between f/2.8 and f/4. Lenses with these settings will allow your camera sensor to pick up the most starlight in the shortest amount of time while keeping the ISO low.
While a wide aperture is important, it's not the only factor to consider when choosing a lens for astrophotography. You also want a lens with a wide field of view to capture as much of the sky as possible and minimise star trails. Additionally, it's essential to have a sturdy tripod to keep your camera steady during long exposures.
Understanding Camera Focal Lengths: A Beginner's Guide
You may want to see also

Manual focus lenses
- Set your camera to manual or bulb mode.
- Set your lens to manual focus mode.
- Locate a bright star or planet and frame it in your camera's live view.
- Enhance the star by zooming in on it as much as possible.
- Adjust the focus ring on your lens until the star becomes a small pinpoint of light.
- Use a bright star, such as Sirius, Vega, Deneb, Altair, or Arcturus, to focus your lens.
- If you are using a telescope, you can use a Bahtinov mask to help you achieve perfect focus.
- If your lens has an infinity sign, do not rely on it for astrophotography as it may not be accurate enough.
- Tape the focus ring to the body of the lens after achieving focus to avoid having to refocus every time.
- Use a high ISO setting (e.g. 1600 or above) to capture more stars.
- Use a wide aperture (e.g. f/2.8 or below) to gather more light.
- Samyang XP 14mm f/2.4: This lens is ideal for Canon and Nikon full-frame cameras, offering a wide field of view and superb image quality.
- Sigma 14mm f/1.8 DG HSM Art: Available for Canon, Nikon, Sony, and L-mount cameras, this lens delivers exceptional image quality and has a fast maximum aperture.
- Rokinon/Samyang 14mm f/2.8: A budget-friendly option that offers a flexible focal range and decent image quality.
Keeping Camera Lenses: Tips for Longevity and Performance
You may want to see also

Star tracker
A star tracker is a type of camera mount that rotates in sync with the Earth's rotation to capture clear, long-exposure images of the night sky. They are essential for astrophotography as they prevent star trailing—the appearance of blurred stars in images due to the Earth's rotation.
Choosing a Star Tracker
When choosing a star tracker, consider the following factors:
- Portability: Look for a compact and lightweight model for ease of transport to remote locations.
- Weight capacity: Ensure the tracker can support the weight of your camera and lens setup.
- Ease of polar alignment: Accurate polar alignment is critical for long exposures. Automated or motorized alignment is preferred for convenience and precision.
- Battery life: Opt for a tracker with ample battery life to last through long astrophotography sessions.
- Additional features: Consider wireless remote control, auto-guiding capabilities, and compatibility with your specific camera and lens.
Using a Star Tracker
To use a star tracker effectively, follow these steps:
- Polar alignment: Adjust the tracker's base altitude and azimuth to align its axis with the celestial pole (North Star in the Northern Hemisphere or South Celestial Pole in the Southern Hemisphere). This ensures the tracker rotates in sync with the Earth.
- Balancing: Properly balance the weight of your camera and lens setup on the tracker to avoid slippage or instability.
- Long exposures: With the tracker polar-aligned and balanced, you can capture long-exposure images of the night sky without star trailing. Experiment with different shutter speeds and camera settings to achieve the desired results.
- Post-processing: Star trackers can introduce some blur to the foreground of your images. Be prepared to use photo editing software to blend and enhance your astrophotography shots.
Unleashing Creative Photography with Unique Camera Lenses
You may want to see also

Astrophotography on a budget
Astrophotography can be an expensive hobby, but there are ways to cut costs and still produce amazing images. Here are some tips and equipment recommendations for getting started in astrophotography on a budget.
Equipment
When starting out with astrophotography on a budget, it is best to choose one type, such as landscape astrophotography or deep sky/planetary astrophotography, and build your setup accordingly. Here is a breakdown of the essential equipment for each type:
Landscape Astrophotography:
- Camera: A full-frame sensor DSLR camera is ideal, but older models can be picked up second-hand for a more affordable price. Alternatively, a standard DSLR or mirrorless camera can also be used.
- Lens: A wide-angle lens with a low aperture (f/2.8-f/4) is recommended. The Rokinon 14mm f/2.8 is a great budget option, available for Canon, Nikon, and Sony cameras.
- Tripod: A sturdy tripod is important to keep your camera stable during long exposure shots. Look for one with enough weight capacity to support your camera and lens.
- Star tracker (optional): A star tracker sits between your camera and tripod and moves your camera at the speed of the Earth's rotation, allowing for longer exposures and better astrophotography images. The Omegon LX3 is a good budget option at around $160.
Deep Sky/Planetary Astrophotography:
- Camera: A regular DSLR or mirrorless camera can be used, but a cheaper option is a CCD/CMOS astronomy camera like the ZWO ASI120MC.
- Telescope: An apochromatic refractor telescope is best for astrophotography. The Sky-Watcher Evostar 72 is a good option. Alternatively, a telephoto lens of 100mm or more can be used instead of a telescope.
- Tracking mount: A tracking mount is essential for deep-sky photography. The iOptron SmartEQ Pro Mount is a budget-friendly option.
- Tripod: Choose a tripod that can comfortably support the weight of your equipment.
Tips for Saving Money:
- Make the most of what you have: Start with the equipment you already own, such as a standard DSLR, lens, or even a modern smartphone, and upgrade gradually as you learn and identify areas for improvement.
- Buy used equipment: Buying second-hand gear can save you a significant amount of money. Look for deals on classifieds sites, camera shops, or online marketplaces.
- Acquire gradually: Instead of investing in a complete setup at once, upgrade your gear gradually as you learn and identify your specific needs.
- Don't add unnecessary items: Only purchase what you truly need. For example, if your camera already has a built-in intervalometer, you don't need to buy an external one.
- Use free resources: There are plenty of free resources available online, such as YouTube tutorials and Instagram accounts, to learn more about astrophotography.
The Camera Power of Note 10
You may want to see also
Frequently asked questions
The best lens for astrophotography depends on your budget and the type of camera you have. Some of the best lenses for astrophotography include the Sigma 14mm f/1.4 DG DN Art, the Sony FE 12-24mm f/2.8 G Master, the Nikon Nikkor Z 14-24mm f/2.8 S, the Sigma 14mm f/1.8 DG HSM Art, and the Canon RF 15-35mm f/2.8L IS USM.
The cheapest lens for astrophotography is the Rokinon/Samyang 14mm f/2.8 lens, which can be purchased for around $200.
The best lens for astrophotography with a Canon camera depends on the type of camera you have. If you have a Canon RF camera, the Canon RF 15-35mm f/2.8L IS USM is a great option. For Canon EF cameras, the Sigma 14mm f/1.8 DG HSM Art lens is a good choice.
The Sony FE 12-24mm f/2.8 G Master lens is considered the best lens for astrophotography with a Sony camera.
The Nikon Nikkor Z 14-24mm f/2.8 S is the best lens for astrophotography with a Nikon mirrorless camera. For Nikon DSLR cameras, the Nikkor AF-S 14-24mm f/2.8 ED is a good option.


