The Horizon is a swing-lens panoramic camera manufactured by Krasnogorsky Mechanicheskiy Zavod (KMZ) in Russia. It has a rotating lens that captures a 120-degree panorama when the shutter button is pressed. The Horizon 202, one of the models, has a traditional 28mm f/2.8 prime lens, with panoramic mechanics that create panoramic images by exposing a curved film plane. The camera has a fixed focus lens, and its hyperfocal distance is set to approximately 13 meters, allowing a depth of field from 5.5 meters to infinity. While the Horizon camera has a fixed focus, some users have attempted to modify the focus distance with tape.
What You'll Learn
- Utilise natural lines, such as the horizon or indoor floors/ceilings, to level your shot
- Adjust your camera angle until the on-screen graphic is level for in-camera levelling
- Use a tripod to fine-tune your camera angle and straighten your frame
- Enable viewfinder grids for a less intrusive visual aid when composing your shot
- Modify the focus distance with tape to bring the focus closer
![]()
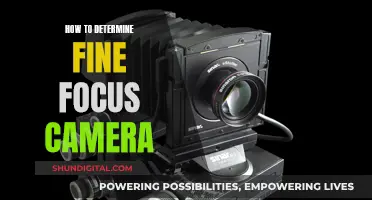
Utilise natural lines, such as the horizon or indoor floors/ceilings, to level your shot
When taking photos, you want to ensure that your horizon is straight. A tilted horizon can ruin a good photo, and while sometimes an intentional tilt can be creative, an off-kilter horizon almost always looks wrong. The good news is that it's a simple problem to fix, either when taking the photo or with simple editing tools.
One way to ensure your horizon is straight is to utilise natural lines in your scene, such as the horizon itself or indoor floors and ceilings, to level your shot. There are certain natural lines in every scene that will look awry unless they are perfectly horizontal or vertical. Identifying these lines is one of the key steps in taking a straight photo. If you're shooting a seascape, it's easy, as the horizon is an obvious visual aid. Similarly, with indoor scenes, the floor or ceiling is a useful indicator.
However, there are plenty of scenes that have no obvious horizon line or vertical line to use for reference. This is when your judgement comes into play. You'll need to find the likeliest guide, like the edge of a pavement or a row of fence posts. Sometimes you'll need to work out a sort-of average horizon by roughly evening out distant details, like the differing levels in a mountain range or the tops of a row of trees. If there's no obvious flat horizon line, then distant scenery can often help you straighten the frame.
When shooting panoramas, levelling out the horizon can be tricky. Even if you get the first image in the sequence straight, the rest may not be. This often happens when shooting with a tripod, as if the legs aren't at the same height or the ground is uneven, the swivel head may throw off the horizon as you capture the scene in segments. Before shooting, check that the first and last camera positions match up. A live view grid can be invaluable for this, as it helps keep the horizon consistent throughout the sequence.
How Night Mode Captures the Dark
You may want to see also
![]()
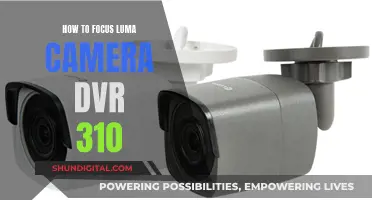
Adjust your camera angle until the on-screen graphic is level for in-camera levelling
In-camera levelling is a simple method to correct a persistent issue with wonky horizons. Most cameras will have an in-built feature that offers an on-screen graphic showing if the camera is tilted or level. This graphic will overlay the live view feed of the scene you are shooting.
To adjust your camera angle until the on-screen graphic is level, you will need to enable the feature. Each camera brand will have its own way of turning the feature on, but it usually involves cycling through the on-screen graphic options until you find the right one. Once you have enabled the feature, simply adjust the camera angle until the graphic is perfectly level.
For Canon cameras, the in-camera levelling system has been considered inaccurate in the past, but users have noted that this has improved over time, especially with the R series lineup. One user notes that they found it hard to get the graphic to line up on the RP, but easier on the R6. Another Canon user notes that the in-camera level is a great way to get "in the ballpark", but they often need to fine-tune the image after that.
For Nikon cameras, one user notes that they heavily rely on the in-camera level for real estate photography and have gotten significantly better results using it than with a bubble level.
Rapid Charging: Powering Your Camera in a Flash
You may want to see also
![]()
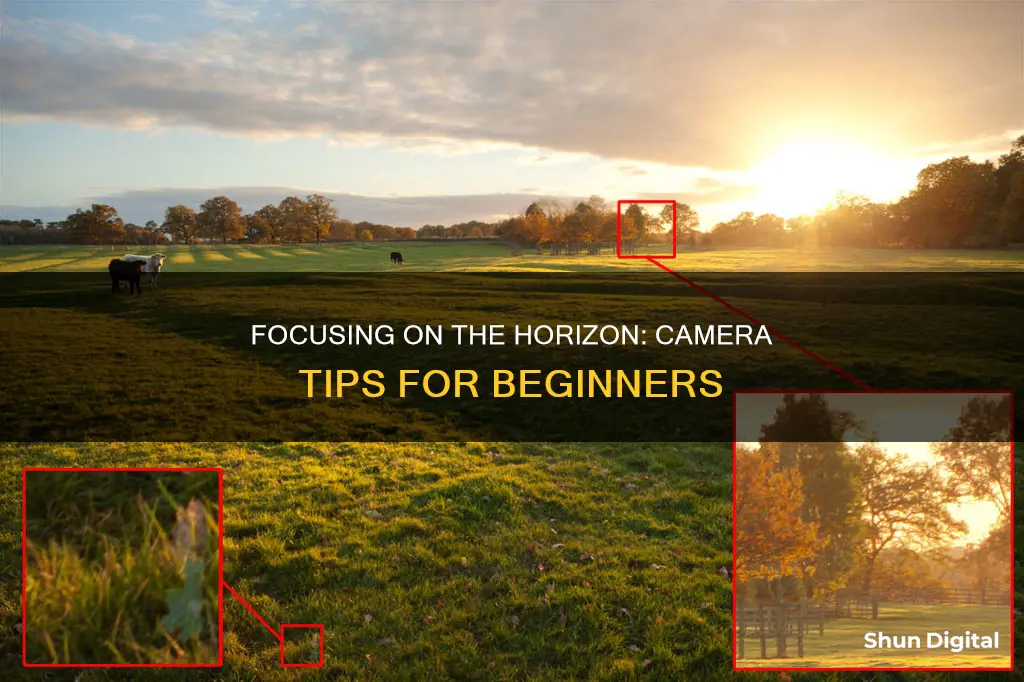
Use a tripod to fine-tune your camera angle and straighten your frame
Using a tripod is a great way to fine-tune your camera angle and straighten your frame when focusing on the horizon. Here are some detailed tips to help you get the most out of your tripod:
- Find your composition first: Before setting up your tripod, take the time to explore your subject from different angles. Look through your viewfinder to get a sense of the composition and determine the best placement for your tripod.
- Point one leg towards your subject: Positioning one of the tripod legs towards your subject will give you a comfortable space to stand between the other two legs. This helps prevent you from tripping over the tripod and provides additional stability.
- Keep the centre post vertical and perpendicular to the ground: Ensure the weight of your camera is evenly distributed to all three legs by keeping the centre post vertical. Use a bubble level attached to the centre post to help level the tripod precisely.
- Avoid extending the centre post: The centre post is less stable than the three legs. Only extend it as a last resort to achieve the desired height.
- Use an L-bracket for short lenses: An L-bracket allows you to mount your camera in portrait orientation while maintaining the centre of gravity at the centre of the tripod. This also provides extra height when shooting in portrait mode.
- Level the tripod: Use a built-in bubble level or a smartphone app to ensure that the centre column of your tripod is vertical and perpendicular to the ground. This is crucial for achieving a straight frame and stable shots.
By following these tips, you can effectively use a tripod to fine-tune your camera angle and straighten your frame when focusing on the horizon. Remember to take your time, find the right composition, and make any necessary adjustments to capture the perfect shot.
The Power of Battery Holders for Cameras
You may want to see also
![]()
Enable viewfinder grids for a less intrusive visual aid when composing your shot
When it comes to composing shots, grids on your viewfinder can be a helpful visual aid. They can guide you in keeping your horizons level and verticals straight. They can also help you with the placement of your subjects within the frame, allowing you to create more balanced and aesthetically pleasing compositions.
To enable viewfinder grids on your camera, you'll typically need to access the settings or custom menu. The specific steps may vary depending on your camera model. However, as an example, for the OM System OM-5 camera, you can enable and select viewfinder grids by going to Custom Menu (gear/cog icon) > tab D3 > Grid Settings > Displayed Grid.
There are several types of viewfinder grids available, each serving a slightly different purpose. Here are some common options:
- Simple block grids: These are typically composed of 3x3 or 4x5 squares or rectangles. They assist in aligning verticals and horizontals and are useful for creating symmetrical compositions.
- Golden ratio grid: This grid is based on the golden ratio of 1:0.618:1 and is useful for creating visually pleasing compositions.
- Rule of Thirds grid: A 3x3 grid that helps you place points of interest at the intersections of the grid lines, resulting in more balanced and dynamic images.
- Diagonal grid: Diagonal lines intersecting at the centre of the frame can be used to create a sense of movement or drama in your photos.
- Aspect ratio grid: This type of grid helps you frame your shots according to specific aspect ratios, such as 16:9 for widescreen format.
By utilising these viewfinder grids, you can improve your shot composition and create more captivating photographs. Remember to experiment with different grid types to find the ones that best suit your creative needs.
The Evolution of Rechargeable Camera Batteries
You may want to see also
![]()
Modify the focus distance with tape to bring the focus closer
If you want to modify the focus distance of your camera to bring the focus closer, you can use an extension tube. An extension tube is a hollow tube that extends the distance between the lens and the camera's sensor, allowing the lens to focus closer. They come in various sizes, ranging from 12mm to 50mm, with 25mm being the most commonly used. By attaching a 25mm extension tube to a Canon 70-200 F/4L lens, for instance, you can reduce the minimum focusing distance from 4.9 ft to 4 ft, which can be quite advantageous for close-up photography.
It is also beneficial to have a set of extension tubes of varying sizes, as they can be stacked together to achieve even closer focusing distances. For instance, you could stack a 36mm tube with a 20mm tube to achieve extremely close focusing distances, allowing you to fill the frame with small subjects like wildflowers or insects. When stacking tubes, remember to attach the teleconverter to your camera first, followed by the extension tube(s), and finally the lens.
When purchasing extension tubes, it is important to note that cheaper options may not retain autofocus functionality with your lens. Therefore, carefully read the product descriptions and reviews before making a purchase. Additionally, consider buying off-brand tubes to save money, as they serve the same purpose and work just as well.
How Camera Tickets Affect Your Credit Score
You may want to see also
Frequently asked questions
The Horizon is a mechanical swing-lens panoramic camera manufactured by Krasnogorsky Mechanicheskiy Zavod (KMZ) in Krasnogorsk, Russia. It has a rotating lens that captures a 120-degree panorama when the shutter button is pressed.
The Horizon camera has a fixed focus lens, which means you cannot adjust the focus distance. The lens is set to focus on objects at the hyperfocal distance, allowing a depth of field from approximately 5.5 metres to infinity.
To prevent blurry photos, ensure that you are holding the camera steady when capturing images. You can also use a tripod to stabilise the camera and adjust the camera angle until the on-screen graphic or viewfinder grid lines up with the horizon.