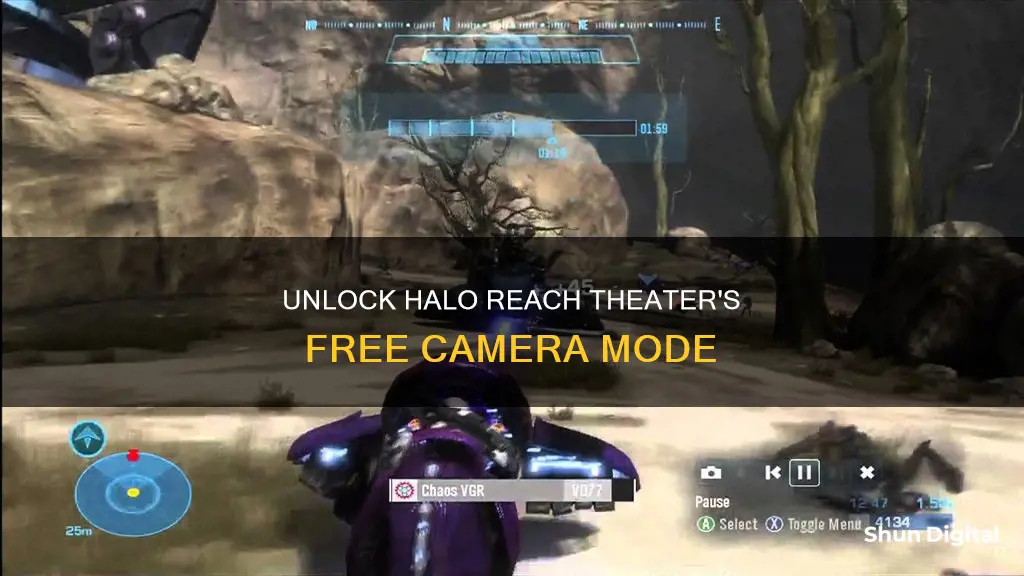
Halo: Reach players can use the Panoramic Camera Mode, or Pan Cam, to force the camera out of any map in Theater Mode. This feature was added by Bungie to Halo: Reach, as well as Halo 3 and Halo 3: ODST. To enter Pan Cam, players must first start a local custom game or campaign match. Then, they must press and hold a specific button combination: LB + RB + LS + A + D-Pad UP. The exact buttons pressed may vary depending on the controller settings. Once in Pan Cam, players can explore beyond the boundaries of the map and access areas that Bungie never intended for them to see.
What You'll Learn

Press Y to enter free camera mode
The Panoramic Camera Mode, or Pan Cam, is a feature that Bungie added to Halo 3, Halo 3: ODST, and Halo: Reach. It allows players to see things far outside the playable area of the game maps. It can be used to explore the detailed worlds that Bungie has created, but which are cut off by multiple kill barriers and invisible walls.
To enter Pan Cam mode, you must first enable Coordinates mode. To do this, start a local custom game or a campaign match (not on Xbox Live, as this will disable the feature). Then, go to Theater Mode and press and hold the following buttons simultaneously: LB + RB + LS + A + D-Pad UP. On other controller settings, do the same sequence with the corresponding buttons.
Once Coordinates mode is enabled, you will see a line of white text appear in the upper-left corner of your screen, displaying the exact location of the camera, its rotation, speed, and the current camera mode. With Coordinates enabled, you can now activate Pan Cam. To do this, press and hold LB + RB + LS + RS + D-Pad LEFT. The text in the upper-left corner should now read " [pan-cam]."
With Pan Cam enabled, you can now explore the map freely. The controls in this mode are slightly different: the bumpers on the controller are now used to descend and ascend, while the left stick controls movement. You can increase and decrease your speed using the Up and Down buttons on the D-Pad.
It's worth noting that while in Pan Cam mode, you can glitch the camera out of the level's boundaries. To do this, approach a "target" boundary and increase your speed to a high value, such as 50,000.000. Then, quickly flick the left stick towards the boundary or press the appropriate trigger to clip through the wall.
Keep in mind that there are some caveats and issues when working outside of the level boundaries. For example, saving a film clip while outside the boundaries can glitch the camera. Additionally, there may be "hard" barriers that require some ingenuity to get around.
By pressing Y to enter free camera mode, you can explore the world of Halo: Reach beyond the confines of the playable area and discover hidden details and easter eggs.
Wireless Surveillance Cameras: How Long Do Batteries Really Last?
You may want to see also

Press Y twice to detach camera from character
To enter free camera mode in Halo: Reach Theater, you must first start a local Custom or Campaign game. To do this, press the 'Y' button in the lobby and select 'My Xbox 360 Console'. Once you have assumed control of your character, you can proceed to the next steps.
Press and hold your Reload and Switch Grenades buttons, your Right Stick, and UP on the D-Pad for a few seconds. If successful, a line of white text will appear in the top left corner of your screen, including the word "NORMAL". If the text does not appear, repeat the previous step.
Now, hold down the two sticks and LEFT on the D-Pad. If done correctly, the word "NORMAL" will change to "PANCAM". If it doesn't, repeat this step.
At this point, you can activate pan-cam, reach a checkpoint, save and quit the game, and then resume from the last checkpoint. The pan-cam should still be active and immediately work in Theater mode.
Now, you will need to die in-game. Choose a method where your body is removed from the playable space, such as jumping from a cliff or dying as the Monitor in Forge. After saving and quitting, go to the Theater Lobby and load the saved film.
If you are using a campaign film where your body remains in the playable area, press pause, open the Menu by pressing 'X', and use the 'BACK' option to rewind to the start of the game. You should now find the camera outside of the map.
Now, you can press the 'Y' button twice to detach the camera from your character and enable free roam. It is important to note that you cannot record films using this method. With these steps, you can explore areas outside the playable space and uncover hidden details in the game world.
Testing Camera Batteries: A Step-by-Step Guide
You may want to see also

Press Up on the D-pad to increase camera speed
To enter free camera mode in Halo Reach Theater, you must first activate the Panoramic Camera Mode, or Pan Cam. This is a feature that Bungie added to Halo: Reach, which allows players to force the camera out of any map while in the Theater.
To activate Pan Cam, you must first start a local custom game or a campaign match. Then, go to Theater Mode. On default controller settings, press and hold the following buttons at the same time: LB + RB + LS + A + D-Pad UP. On other controller settings, do the same sequence with the corresponding buttons.
Once you have activated Pan Cam, you can adjust the camera speed. The camera speed is the third number in the coordinates that appear on your screen. You can increase the camera speed by pressing Up on the D-pad. This will allow you to move the camera faster when exploring outside the map boundaries.
It is important to note that the camera speed in Halo Reach's Pan Cam cannot be increased to the same high amounts as in Halo 3. However, activating Pan Cam automatically disables the 'soft' barriers that Bungie put up around their maps.
By following these steps and adjusting the camera speed, you can explore the maps in Halo Reach Theater Mode with greater freedom and flexibility.
Camera B500 Charging: Cable or No Cable?
You may want to see also

Press the right stick to zoom in
To enter free camera mode in Halo Reach Theater, you must first press Y to go into free camera. Then, you can press the right stick to zoom in. This will allow you to focus on specific details in the scene, such as a character's face.
The right stick is located in the centre of your controller, just above the D-pad and below the face buttons. When you press it, you will see the camera zoom in, making objects and details in the scene appear larger and closer. This can be useful for getting a clearer view of the action or focusing on specific visual elements.
It is important to note that the controls may vary depending on the control scheme you are using. The method described above is for the Green Thumb control scheme. Other control schemes may have different button configurations, so you may need to refer to the control settings or try different buttons to find the correct one for zooming in.
Additionally, to enter free camera mode, you must be in Theater Mode. To do this, start a local custom game or a campaign match, as matches on Xbox LIVE will disable this feature. Once you are done with your session, go to Theater Mode, and then you can follow the steps to enter free camera mode and zoom in.
Charging Camera Batteries: Power Bank Essentials
You may want to see also

Use the triggers to control the camera's altitude
To enter free camera mode in Halo Reach Theater, you must first start a local custom or campaign game. Once you have assumed control of your character, press and hold down the reload and switch grenade buttons, the right stick, and the up arrow on the D-pad for a few seconds. If done correctly, a line of white text will appear in the top left corner of your screen, which will include the word "NORMAL".
Now, to control the camera's altitude, use the triggers on your controller. The right trigger will make the camera ascend, and the left trigger will make the camera descend. You can also adjust the camera speed using the D-pad. Pressing up on the D-pad will increase the speed, and pressing down will decrease it.
It's important to note that the controls in Pan Cam mode are different from the default controls. The bumpers on the controller are now useless, and the triggers control the altitude instead of the bumpers. Additionally, there is no way to fast-forward in Pan Cam mode.
With these controls, you can explore the maps in Halo Reach Theater and see things that Bungie never intended for players to see!
Revitalizing Lithium-Ion Camera Batteries: Pro Tips for Photographers
You may want to see also
Frequently asked questions
To enter free camera mode in Halo Reach Theater, you must first start a local custom or campaign game. Then, press and hold the reload, switch grenades, right stick, and up on the D-pad. A white text will appear on the top left corner of the screen, which will include the word "NORMAL". Next, hold the two sticks and left on the D-pad. The word "NORMAL" should now change to "PANCAM". You can now activate pan-cam, reach a checkpoint, save and quit the game, and resume from the last checkpoint. The pan-cam should still be active and immediately work in Theater mode.
In free camera mode, the triggers control the altitude instead of the bumpers, and there is no way to fast-forward. You can increase or decrease the camera speed by holding the up or down button on the D-pad, respectively.
To exit free camera mode, simply press and hold the two sticks and left on the D-pad again. The word "PANCAM" should now change back to "NORMAL".


