If you have an old LCD panel lying around, you can convert it into a monitor with a few simple steps. This is a great DIY project to create a sleek, secondary monitor for your computer or laptop. You'll need some basic tools and equipment, such as a screwdriver, a drill, and a new controller board for the LCD screen. You'll also need to be careful when disassembling and reassembling the monitor, as there are delicate components involved. The process involves removing the LCD panel, adding a new controller board, and reassembling the frame. You can then connect your new monitor to a computer and enjoy your handiwork!
| Characteristics | Values |
|---|---|
| Required tools | Flat-head screwdriver, Phillips-head screwdriver, glue gun, drill, jigsaw, 3D printer |
| Required parts | LCD panel, V59 universal board/inverter/LVD cable, TV base stand, screws, black spray paint, isopropyl alcohol, black filament |
| Steps | Disassemble monitor, remove LCD panel, remove cables, buy and install LCD controller board, assemble stand, assemble LCD control board, reassemble LCD screen |
What You'll Learn

Disassemble the LCD panel
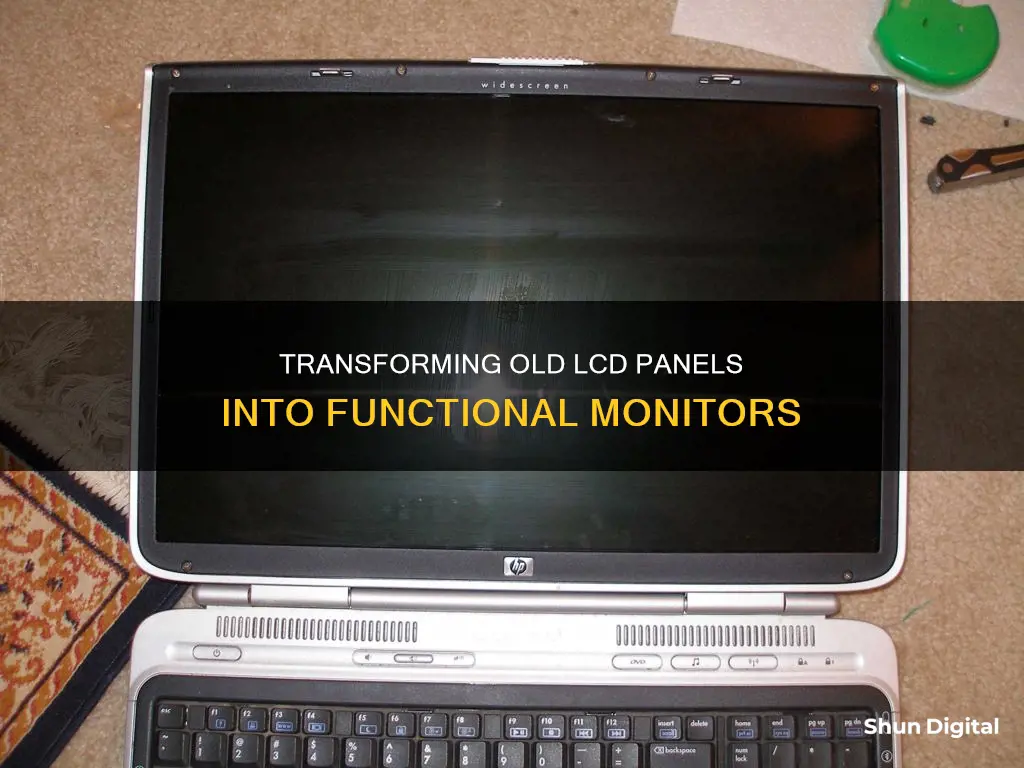
To convert an old LCD panel into a monitor, you will need to disassemble the LCD panel from your dead laptop. Here is a step-by-step guide:
Step 1: Unplug and Remove the Battery
Start by unplugging the dead laptop from any power source and removing the battery. The laptop battery is usually located on the bottom and can be removed by sliding a release lever.
Step 2: Remove the Screws
To remove the LCD screen from the laptop, you will need to remove the screws holding the front plastic frame in place. There are rubber pads on the front of the LCD screen, and behind these pads are the screws. Keep track of the pads and screws, as you will need them later for reassembly.
Step 3: Remove the Frame
Carefully pry loose and remove the plastic frame from the LCD screen. Be gentle and careful, as the frame is snapped into place. Try to keep it as close as possible to the LCD panel while prying it loose, and you may need to slide it to the left or right to completely detach it from the laptop.
Step 4: Remove the LCD
Locate and remove the screws holding the LCD panel to the laptop. These are typically located on the bottom and attached to a small metal hinge connected to the keyboard frame. Now, carefully remove the LCD screen. Note that there is a cable attached, which is the LVDS cable.
Step 5: Remove the Cables
Once the LCD panel is removed, you can disconnect the LVDS cable and unplug the inverter at the bottom. Be sure to unplug the inverter from both ends without cutting it. The LVDS cable is taped to the back of the LCD screen at the top, so remove the tape and slide the cable down.
At this point, you should have an LCD screen with just a pair of wires coming out of it. Keep the plastic front frame and backing safe, as you will need them later.
Now that you have successfully disassembled the LCD panel, you can move on to the next steps of your project, such as buying and installing a controller board to convert the LCD panel into a functional monitor.
Registering Your ASUS Monitor: A Step-by-Step Guide
You may want to see also

Remove the LCD panel
To remove the LCD panel from a laptop, you will need to take the following steps:
Firstly, make sure the laptop is unplugged and the battery has been removed. The battery is usually located at the bottom of the laptop and can be removed by sliding a release lever.
Next, you will need to remove the screws holding the front bezel in place. The front bezel is the protective plastic material around the edges of the screen. There may be rubber screw covers along the front bezel of the screen assembly, which can be removed with a hobby knife or box cutter. Place the rubber covers and screws somewhere safe. Once these are removed, gently pry the front bezel away from the screen by holding the edge of one side and applying pressure down onto the screen with your thumbs.
Now, you will need to locate the bracket screws that hold the laptop screen in place. These are usually found on the sides of the screen. Unscrew these and place the screws somewhere safe.
Place a soft cloth or tissue on your laptop keyboard to protect the screen when you remove it. Gently remove the screen and place it facedown on the cloth or tissue.
At this point, you will need to remove the video connector. This is a strip of cable at the back of the screen. Peel off any tape attaching the cable to the screen and gently pull it out. On some laptop models, there may be a locking mechanism on the video connector, so make sure to flip this open before removing the cable.
Finally, disconnect the inverter, which provides power to the screen's backlight. This is usually located at the bottom of the screen. Gently pull the screen cable and video connector out of the inverter. With these cables disconnected, you can now completely remove the LCD panel from the laptop.
Please note that this is a general guide and the process may vary slightly depending on your laptop model. Always take care when removing components from electronic devices to avoid damage.
Understanding Monitor Measurements: Physical Size Explained
You may want to see also

Reassemble the frame
Now that you have removed the LCD panel and the circuit board, it's time to put the frame back together.
First, put the metal frame back on, bending any metal back into place and replacing any screws. Make sure that the clips are back in place. Check that the wires connecting the backlight to the power supply are connected.
Next, place the assembly back into the plastic shell, clipping it together and screwing it in place. Power it on and test to see if it works.
If it does, great! You've successfully converted an old LCD panel into a monitor. If not, check your connections and try again.
You can now use your new monitor as a secondary display, or for any other purpose you see fit. You could even try converting another old panel!
Remember, if you're not confident in your ability to perform these steps safely, it's best to leave it to the experts.
Is Your App Usage Being Monitored? Here's How to Know
You may want to see also

Buy a controller board
To convert an old LCD panel into a monitor, you will need to buy an LCD controller board. A standalone LCD screen cannot process a signal via an HDMI or VGA input directly, so a controller board is required to interface the LCD screen with your computer.
You can find controller boards on eBay, Amazon, and AliExpress. A controller board with VGA input will be cheaper than one with HDMI input. For example, a controller board with VGA input costs around $42 on eBay, excluding shipping and tax.
To ensure you purchase the correct controller board, you will need the model number of your LCD screen. The model number can be found on the back of the LCD screen.
When purchasing a controller board, make sure to buy one with a power cord. The controller board should have a VGA input connection, which will allow you to connect it to another computer and use it as a second monitor.
In addition to the controller board, you will also need to purchase a VGA cable separately, as most controller boards do not include this cable.
If you are using a laptop LCD screen, you will also need a 40-pin cable to connect the screen to the controller board. You can find a suitable cable by searching online, with prices as low as £16.26 on AliExpress.
It is important to note that if you are using an old laptop screen, the backlighting may be very poor, and you may have difficulty seeing the display even on the brightest setting.
Electricity Usage Monitoring: What UK Energy Companies Can See
You may want to see also

Attach a stand
Now that you have your LCD panel, it's time to think about how you're going to use it. If you plan on using it as a desktop monitor, you'll need to attach a stand to prop it up. Here are a few ways you can do this:
- Use an existing stand: You can scavenge a stand from another device, such as an old TV or a broken desk lamp. Just make sure that the stand is sturdy enough to support the weight of the LCD panel.
- Build a wooden stand: If you're handy with wood, you can create a custom stand that fits the exact dimensions of your LCD panel. This option gives you more control over the height and angle of the stand.
- Use a TV base stand: You can buy a ready-made TV base stand that is designed to hold LCD panels. This is a quick and easy solution, but it may not be as customizable as building your own stand.
- Attach to a wall mount: If you want to save desk space, you can attach your LCD panel to a wall mount. This option will require some drilling and careful measuring to ensure that the panel is securely attached to the wall.
Once you've chosen your stand, it's time to attach it to the LCD panel. Here are the general steps:
- Measure and mark the attachment points: Carefully measure and mark the spots on the LCD panel where you will attach the stand. Make sure these points are level and aligned correctly.
- Drill pilot holes: Using a drill bit appropriate for the size of your screws, drill pilot holes at the attachment points. This will make it easier to screw in the stand and reduce the risk of cracking the LCD panel.
- Attach the stand: Line up the stand with the pilot holes and screw it into place. Make sure the screws are tight and secure.
- Test the stability: Once the stand is attached, test the stability of the LCD panel by gently pushing it from different angles. Make sure it doesn't wobble or tip over.
By following these steps, you can securely attach a stand to your LCD panel, creating a functional and stable monitor.
Monitoring Data Usage: Vivo's In-Built Data Manager
You may want to see also
Frequently asked questions
You will need a dead laptop with a working LCD screen, an LCD controller board, a hobby electronics screwdriver, wire cutters, a 5-inch section of wood, two 3-inch sections of wood, self-tapping wood screws, a cordless drill, a drill bit for drilling metal, and a Dremel and cutting disk (optional).
The first step is to unplug the dead laptop from any power source and remove the battery.
To remove the LCD screen from the laptop, you will need to remove the screws. There are rubber pads on the front of the LCD screen that protect it when the laptop lid is closed. Behind these rubber pads are the screws you need to remove.
Once you have removed the LCD screen, you will need to remove the plastic frame from the LCD screen. Be careful, as the plastic frame is snapped into place. Gently pry loose the frame from the LCD screen, trying to keep it as close as possible to the LCD panel.


