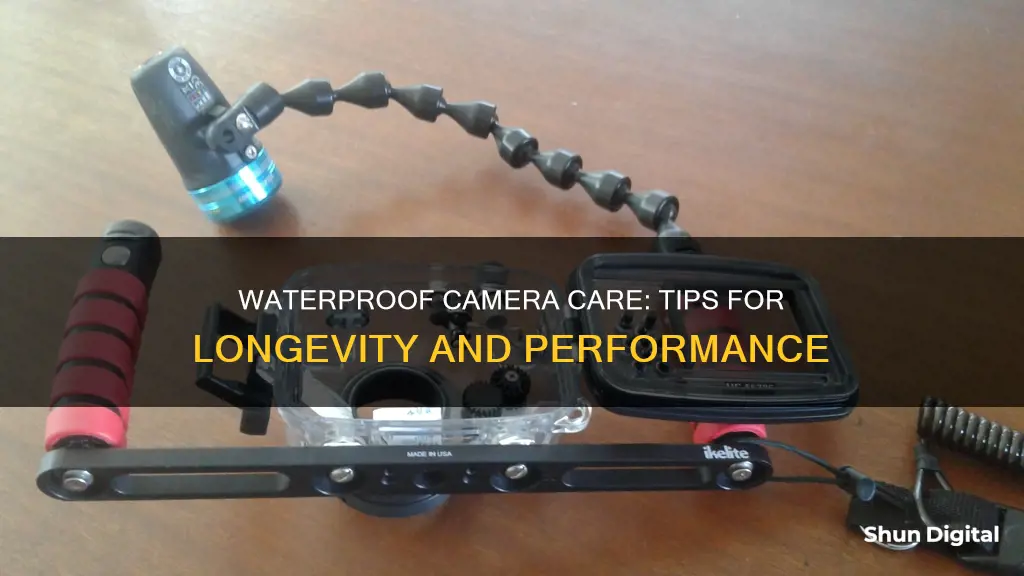
Waterproof cameras are designed to be used in wet conditions, but they still require proper care to ensure their longevity. Proper camera and housing maintenance are essential, especially if you want your equipment to last for years. This includes regular cleaning and lubrication of the O-ring, as well as thorough rinsing and drying of the camera housing after each use. Additionally, it is crucial to perform a pre-dive check for any leaks by placing tissue or silica gel inside the housing. When it comes to storage and transportation, a waterproof camera bag or dry bag is essential, especially in salty environments, to prevent invisible damage from salt residue.
How to Care for a Waterproof Camera
| Characteristics | Values |
|---|---|
| Waterproofing | Purchase a waterproof case for your camera, or select a water-resistant camera with an IP rating of at least IP65. |
| Camera Care | If your camera gets wet, switch it off, remove memory cards and batteries, and dry it thoroughly. Rinse salt water off to avoid corrosion. |
| Storage | Store your camera in a cool, dry place, such as a waterproof camera bag or dry bag. |
| Maintenance | Regularly clean and lubricate the O-ring, check for leaks, and replace the O-ring if damaged. |
What You'll Learn

Switch it off
Switching off your camera is an important step in maintaining your equipment, especially when it comes to underwater photography. Here are some detailed instructions on how to properly switch off your camera to ensure its longevity:
Before Your First Dive:
- Start by removing the housing O-ring from your camera housing using a blunt object, such as the rounded corner of a credit card. Avoid using sharp objects like knives or scissors to prevent damaging the rubber.
- Once the O-ring is removed, use a lint-free cloth to wipe clean the groove where it sits. You can also use tissue, but a lint-free cloth is preferable. Perform this task under a bright light to carefully inspect the groove for any debris, such as grit, sand, or hair, and remove it.
- Now, it's time to inspect the O-ring itself. Using your index finger and thumb, pinch the O-ring and slide your grip around its entire circumference, feeling for any foreign matter. You can use a tissue to remove any debris as you go.
- Once the O-ring is clean and free of debris, apply a small amount of silicone grease along its entire length. This helps keep the O-ring in good condition.
- Place the O-ring back into its correct position on the housing. Remember, the purpose of the silicone grease is not to create a seal but to maintain the O-ring.
- Take a piece of tissue or kitchen roll and fold it into a small square. Place this inside the housing and seal it shut.
- Now, it's time to test your setup. Place the housing in a wash tank and check for any bubbles. If no bubbles appear, you're good to go for your first dive. Please note that for this test, you are only diving with the tissue inside, not your camera.
After Your Dive:
- When you return from your dive, open the housing and carefully check the tissue for any signs of moisture. If it remains dry, you can be confident that your housing is sealed properly.
- Even if your tissue is dry, it's crucial to rinse your camera housing thoroughly in fresh water after each dive. This will help remove any salt residue that may have accumulated.
- After rinsing, dry the housing with a towel or an air gun if one is available.
During Your Trip:
- Between dives, it's important to store your camera properly. Always place your camera in a rinse tank, bucket of fresh water, or bottle of drinking water to prevent dry salt residue from forming. If using a bucket, make sure it's on the boat with you.
- After rinsing and before opening the housing, ensure that you towel dry or blow-dry the housing to prevent any water droplets from entering the camera.
- Before every dive, repeat the process of removing and cleaning the O-ring and groove, just like you did before your first dive. Re-apply silicone gel to the O-ring before replacing it on the housing.
- Insert the camera and a fresh piece of tissue or a silica gel sachet into the housing. The tissue or silica gel will absorb any water droplets in case of a small leak.
- Test the seal before each dive by holding your camera in water and checking for bubbles.
After Your Last Dive:
- After your final dive, thoroughly rinse your camera, paying extra attention to buttons, dials, and controls. Ensure there are no salt crystals remaining.
- Dry your camera and housing thoroughly before opening the housing and removing your camera.
- Remove the main O-ring with a blunt instrument and clean both the O-ring and the groove it sits in with a lint-free cloth. Remove any grit, sand, salt, hair, or foreign matter.
- Apply a small amount of silicone grease to the O-ring and fold it into a figure-eight shape. Place the O-ring in a zip-lock bag to protect it from drying out and cracking when not in use.
- Store the zip-lock bag with the O-ring inside your housing and seal it closed. This ensures that your O-ring and housing stay together, so you don't misplace them.
- Store your housing in a cool, safe place until your next adventure!
The Evolution of Cameras: A Historical Timeline
You may want to see also

Remove memory card and batteries
Removing the memory card and battery from your camera is an important step in maintaining your equipment. While it may seem unnecessary, this simple task can help prevent leaks and flooding, and ensure your camera's longevity.
Firstly, removing the memory card and battery is crucial for preventing leaks. Before your first dive, it is essential to test your equipment without the camera inside. By placing tissue or a silica gel sachet inside the housing and sealing it, you can check for any signs of leakage. This simple step can save your camera from water damage.
Secondly, removing these components is essential for proper maintenance and storage. After each dive, rinse your camera housing in fresh water and dry it thoroughly. Open the housing and remove the memory card and battery. This step allows you to clean the groove in which the O-ring sits, removing any grit, sand, or hair that could cause damage. It is also important to clean the O-ring itself, ensuring it is free of any foreign matter. Lubricate the O-ring with silicone grease and store it in a zip-lock bag to prevent drying and cracking.
Additionally, removing the memory card and battery is crucial for data protection. Before removing or inserting a memory card, always ensure that the camera is turned off. Failing to do so may result in data loss or damage to the memory card. Always back up your data to a computer or external storage device to protect your valuable photos and videos.
Finally, consider the type of battery your camera uses. Rechargeable Li-Ion batteries do not typically require removal after each use, unless the camera will be stored for extended periods. However, alkaline or carbon batteries should be removed if the camera will not be used for more than a week, as they can leak and cause corrosion.
In summary, removing the memory card and battery from your waterproof camera is a crucial step in equipment care. By following these steps, you can help prevent leaks, maintain your camera properly, protect your data, and ensure the longevity of your camera's battery.
Fine-Tuning Your Camera Focus: A Comprehensive Guide
You may want to see also

Clean the lens
Keeping your waterproof camera lens clean is essential for maintaining image quality. Here are some detailed tips for cleaning the lens of your waterproof camera:
Use a blower: Start by using a blower to remove dust and residue from the lens. Avoid blowing on the lens with your breath, as this can increase condensation and cause potential damage. A blower is the safest method to initially clean your lens.
Brush the lens: If there are still some specs of dust or dirt on the lens, you can use a lens brush. It is recommended to use a brush with camel hair as it is thin and less likely to harm the lens. Be cautious not to touch the brush with your hands, as the oils from your skin can transfer to the lens and cause damage.
Apply lens cleaning solution: As a last resort, you can use a camera lens cleaning solution. These solutions are typically alcohol-based, so use sparingly to avoid leaving streaks on the lens. Do not spray the cleaner directly onto the lens. Instead, apply a drop or two of the solution to a lens cleaning cloth or tissue.
Wipe the lens: Using a microfiber lens cloth or specific lens cleaning tissue, gently wipe the lens in a circular motion, working from the centre outwards. Ensure you only use a light touch, applying just enough pressure to remove any smudges or dirt. Do not use regular tissues as these can scratch the lens.
Remember to clean your lens as little as possible. Only clean it when necessary, as excessive cleaning can lead to scratches and other types of damage. Always use a lens cap when the camera is not in use, and store your camera and lenses in a clean, dry place to minimise dust build-up.
Charging Camera Batteries: A Universal Guide to Powering Your Device
You may want to see also

Rinse the camera
Rinsing your camera is an important step in the maintenance of your waterproof camera. It is imperative that you care for your camera correctly if you want to avoid leaks and flooding and ensure that it lasts for years to come. Here is a detailed guide on how to properly rinse your camera:
Step 1: Prepare a Controlled Environment
Create a controlled environment by filling a large bowl with fresh water. This will be used to rinse off any salt or other residue from your camera. Ensure that you have a clean towel ready to pat your camera dry immediately after rinsing. Alternatively, you can use a wet cloth to gently wipe down your camera and lift off any residue.
Step 2: Rinse the Camera
If you have dropped your camera in salt water, it is crucial to rinse it off as soon as possible to avoid rust or corrosion. Carefully dip your camera into the bowl of fresh water for no more than 5 seconds. Make sure that you do not submerge it for too long, as this could cause water damage. Gently pat the camera dry with a towel or use a wet cloth to wipe it down.
Step 3: Dry the Camera
After rinsing, make sure that your camera is thoroughly dried. Use a towel to absorb any remaining water droplets on the camera's surface. You can also use a blow dryer on a low setting to speed up the drying process, but be careful not to direct the airflow too close to the camera to avoid potential damage.
Step 4: Check for Water Damage
Once the camera is dry, carefully inspect it for any signs of water damage. Look for any visible droplets of water inside the housing or around the seals, buttons, and dials. If you notice any water residue, repeat the rinsing and drying process to ensure that all salt and residue are removed.
Step 5: Regular Maintenance
To maintain your waterproof camera and prevent future issues, it is recommended to rinse and dry your camera after each use, especially if you have been in salt water or a dusty environment. Regularly check the housing and O-ring for any debris, sand, or hair, and clean it with a lint-free cloth. Apply a small amount of silicone grease to the O-ring to keep it lubricated and in good condition.
By following these steps and maintaining your camera properly, you will be able to enjoy years of dives and capture amazing underwater images without worrying about leaks or damage to your equipment.
History of Pentax 6x7: A Camera Classic
You may want to see also

Use a waterproof case
Using a waterproof case is an effective way to protect your camera from water damage. Whether you're diving, snorkelling, or simply want to safeguard your device from rain or sea spray, a waterproof case will provide that extra layer of defence. Here are some tips for utilising a waterproof case to care for your camera:
Choose the Right Case
Select a case that is specifically designed for your camera model. This ensures a perfect fit and allows access to camera controls. Generic cases may be more affordable but offer limited functionality. If you're an avid diver, consider investing in a professional-grade case like those offered by Ikelite, which provide exceptional underwater protection.
Prepare the Case and Camera
Before placing your camera in the case, ensure the O-ring is clean and lubricated. The O-ring creates a seal to prevent leaks. Use a blunt object like a credit card to remove it, then wipe the groove clean with a lint-free cloth. Apply a small amount of silicone grease to the O-ring, then place it back into the housing. Check for any foreign matter inside the case, using a tissue to remove it.
Test the Seal
Once your camera is inside the case, test the seal before taking it on its first dive. Place a tissue or piece of kitchen roll inside the sealed case and submerge it in a wash tank. If no bubbles appear, your seal is intact. If bubbles are present, recheck the O-ring and housing for any debris or issues.
Rinse and Dry
After each dive, rinse your camera housing in fresh water, paying attention to the seal, buttons, and crevices to remove any salt residue. Dry the housing with a towel or air gun. Keep the housing closed when not in use to prevent dust or moisture from accumulating on the O-ring or seal.
Store Properly
After your final dive, thoroughly rinse and dry your camera and housing. Remove the O-ring, clean it, and apply silicone grease before storing it in a zip-lock bag. This will keep the O-ring from drying out and ensure it doesn't separate from the housing. Store your housing in a cool, safe place until your next adventure.
The Ultimate Guide to NVR Camera Battery Replacement
You may want to see also
Frequently asked questions
You can buy a waterproof camera bag or dry bag. You can also use a lens hood, a shower cap, or a disposable waterproof camera cover.
Saltwater will eventually kill a camera, so it's important to keep your camera dry in salt environments. Rinse your camera thoroughly after use, paying extra attention to buttons, dials, and controls to ensure no salt crystals remain. Dry thoroughly before opening.
Rinse your camera in a controlled environment by filling a large bowl with fresh water. Dip your camera in the water for no more than 5 seconds and then place on a towel and pat dry immediately. Alternatively, wet a cloth and wipe it over the camera to remove any salty residue.
Store your camera in a cool, safe place until your next trip. If you're storing it for a long period, remove the main O-ring, clean the groove with a lint-free cloth, and rub a small amount of silicone grease into the O-ring before storing it in a zip-lock bag.
If your camera gets wet, don't panic. Most cameras have some level of waterproofing or an outer barrier that will protect them. Turn off the camera, remove the memory card and batteries, and dry them. Clean the lens as quickly as possible, especially if it has come into contact with saltwater.


