Calibrating your camera lenses is an important step to ensure that your images are sharp and clear. While autofocus should theoretically always produce images with the chosen subject in focus, there is room for miscommunication between the lens, the camera's autofocus chip, and the camera's sensor, resulting in blurry images. This issue is more common in DSLR cameras, which have separate sensors for autofocusing and imaging. By calibrating your lenses, you can fine-tune the focus point and correct any misalignment between the camera and lens. This process involves taking a series of controlled photos and making adjustments to your camera settings until you achieve the desired focus. It is recommended to calibrate your lenses when you notice consistent autofocus issues or when using older lenses with new camera bodies.
| Characteristics | Values |
|---|---|
| When to calibrate | When you notice your camera's autofocus isn't producing clear photos with a certain lens |
| How often to calibrate | Every six months to two years for each camera and lens combination |
| What you need | Well-lit environment, tripod, flat surface, subject with easily measurable markings |
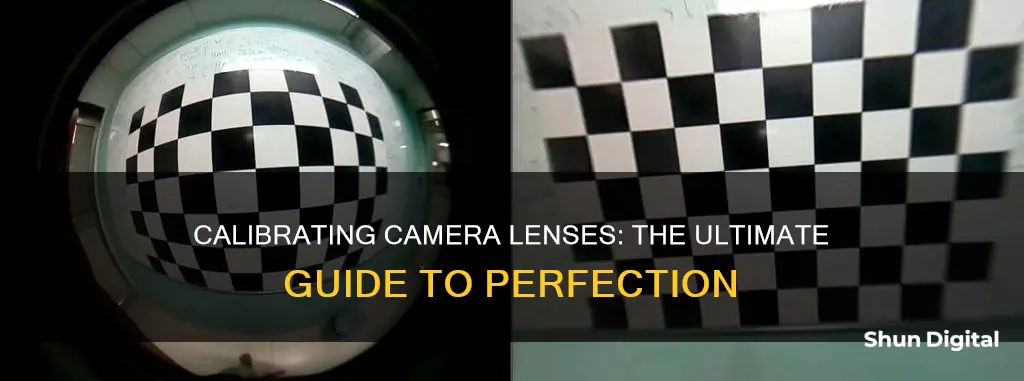
| Calibration tools | Calibration chart, focus pyramid, hardcover book and ruler, or a commercial tool like Reikan FoCal |
| Calibration setup | Set up camera on tripod, place subject a few feet away, set lens to widest aperture, use autofocus, take photo |
| How to fix focus problems | Use autofocus micro-adjustment parameters in camera settings |
What You'll Learn
![]()
When to calibrate your camera lens
You should calibrate your camera lens if you notice consistent issues with your autofocus. This could be with a specific lens or all lenses. It's more likely that you'll need to calibrate if you're using older lenses with a new camera body, or vice versa, or if you've purchased your gear second-hand.
You should also check the calibration of your lens and camera if you drop them, as internal components may have become misaligned.
If you've recently bought a new camera, it's a good idea to calibrate your lenses again. The new camera won't be familiar with the optical lens adjustments you made previously.
It's worth noting that you'll only need to calibrate your lenses if you have a DSLR camera. Mirrorless cameras don't usually require calibration as they don't use an autofocus chip.
EF Lenses: Compatible with Crop Sensor Cameras?
You may want to see also
![]()
How to calibrate a Nikon camera lens
Even a brand-new lens may not be perfectly calibrated with your camera body, resulting in blurry images. This is especially true for DSLR cameras, which use a combination of mirrors to perform autofocus. If you are using a mirrorless camera, you likely won't need to calibrate your lens.
Calibration is only necessary if you notice that your camera's autofocus is not producing clear photos with a certain lens. This could be due to wear on the equipment or slight margins of error in how the components are positioned.
What You'll Need
- Well-lit environment
- Calibration chart, focus pyramid, or DIY equivalent (e.g., a hardcover book and a ruler)
- Tripod
- Flat surface
Steps to Calibrate Your Lens:
- Set up your tripod in a well-lit environment.
- Attach your camera to the tripod and use a timer to take test photos to avoid camera shake.
- Place your calibration subject (e.g., a book with a ruler) on a flat surface in front of the camera.
- Shoot at the shallowest depth of field or the widest aperture possible with your lens.
- Set your shutter speed to the fastest speed your lighting situation allows to ensure a crisp image.
- Turn on autofocus and take a photo so that the middle of your calibration subject is in focus.
- Compare your shot with how it looked in the viewfinder. If your final image is blurry, determine whether it is back-focused or front-focused.
- Open your camera's autofocus settings ("AF Fine-Tune" for Nikon cameras) and adjust accordingly:
- If your focus is falling slightly farther away from the center (back focus), add a positive correction (+1–15).
- If your focus is falling in front of where you want it (front focus), add a negative correction (-1–15).
Continue to take test shots and adjust your correction amount until your center focus point is crisp both in your viewfinder and in your final image.
Tips:
- Adjust your autofocus slowly—take it step by step.
- Watch online videos for help.
- Calibrate using exported RAW image files.
The Magic of Camera Lenses: How They Attach
You may want to see also
![]()
How to calibrate a Canon camera lens
Even new cameras and lenses may have slight margins of error in how their components are positioned, and over time, inner components can shift, causing your photos to be blurry.
You only need to calibrate your Canon camera lens if and when you notice that your camera's autofocus isn't producing a clear photo with a certain lens. This can depend on how much wear your equipment gets, but for some, this may occur about every six months to two years for each camera and lens combination.
What You'll Need
- A well-lit environment
- A tripod
- A flat surface
- A subject to photograph with easily measurable markings
You can purchase special objects to use as the subject of your test photos, such as focus pyramids or calibration charts, or you can create your own setup using a hardcover book and a 12-inch ruler with clear markings.
Step-by-Step Guide to Calibrating Your Canon Camera Lens
- Set up your tripod in a well-lit environment.
- Attach your camera to the tripod and use a timer to take your test photos to avoid camera shake.
- If you have a vibration reduction setting on your camera, turn it off for this process.
- Place your calibration subject on the flat surface in front of your camera. You want your subject as close as your type of lens allows while still being able to focus on it.
- Shoot at the shallowest depth of field or the widest aperture possible with your lens.
- Set your shutter speed to the fastest your lighting situation allows to ensure your picture is as crisp as possible.
- Turn on autofocus and take a photo so that the middle of your calibration subject is in focus.
- Compare your shot with how it looked in the viewfinder. If your final image is back-focused or front-focused, you'll be able to tell by seeing at what point on your calibration subject the focus is falling.
- Open your camera's autofocus settings. For Canon cameras, this is done in the Function then Auto Focus settings.
- If your focus is falling slightly farther away from your centre (back focus), add a positive correction (+1-15). If your focus is falling in front of where you want it (front focus), add a negative correction (-1-15).
- Continue to take test shots and adjust your correction amount until your centre focus point is crisp both in your viewfinder and in your final image.
Tips for Successful Calibration
- Take it slow – don't go from 1 to 15 on your correction right away, instead, go from 1 to 2.
- Leverage online resources – watch videos of somebody else doing it.
- Calibrate using exported RAW image files – don't trust what you're seeing on the back of your camera, use a RAW file to show the true sharpness of your image.
- Review your images as you calibrate with Adobe Photoshop Lightroom.
Pentax Lenses: Compatibility with Pentax Cameras
You may want to see also
![]()
How to calibrate a Sony camera lens
Even a brand-new lens may not be perfectly calibrated to your camera body, resulting in blurry images. This is especially common with DSLR cameras, which use a combination of mirrors to bounce light onto a separate phase-detect autofocus (AF) module. If any of these parts are misaligned, your images may be blurry even if your AF thinks it nailed the focus.
You only need to calibrate your Sony camera lens if you notice that your camera's AF isn't producing clear photos. This could happen every six months to two years, depending on how much wear your equipment gets.
Calibration Tools and Setup
To calibrate your Sony camera lens, you will need:
- A well-lit environment
- A tripod
- A flat surface
- A subject to photograph with easily measurable markings
You can purchase objects specifically designed for this purpose, such as focus pyramids or calibration charts. Alternatively, you can create your own setup using a hardcover book and a 12-inch ruler with clear markings.
Steps to Calibrate Your Sony Camera Lens:
- Set up your tripod in a well-lit environment.
- Attach your camera to the tripod and use a timer to take test photos to avoid camera shake.
- If your camera has a vibration reduction setting, turn it off.
- Place your calibration subject on the flat surface in front of the camera.
- Shoot at the shallowest depth of field or the widest aperture possible with your lens.
- Set your shutter speed to the fastest your lighting situation allows for a crisp picture.
- Turn on autofocus and take a photo so that the middle of your calibration subject is in focus.
- Compare your shot with how it looked in the viewfinder.
- If your final image is blurry, determine whether your camera is back focusing (focus falls behind the subject) or front focusing (focus falls in front of the subject).
- Open your camera's autofocus settings and make the necessary adjustments. Sony cameras typically refer to this setting as "AF Micro-Adjustment."
- For back focusing, select positive correction values (+1–15).
- For front focusing, select negative correction values (-1–15).
- Continue taking test shots and adjusting your correction amount until your center focus point is crisp both in your viewfinder and in your final image.
Tips for Successful Calibration:
- Adjust your autofocus slowly.
- Watch online videos for help.
- Calibrate using exported RAW image files and post-production software to see the true sharpness of your image.
Exploring the Intricacies of 35mm Camera Lenses
You may want to see also
![]()
How to calibrate a Pentax camera lens
Even when you buy a brand-new lens, sometimes the DSLR body and lens just aren't perfectly calibrated to each other. This can result in blurry images, with the autofocus thinking it nailed the focus when it didn't.
You only need to calibrate if and when you notice that your camera's autofocus isn't producing a clear photo with a certain lens. It depends on how much wear your equipment gets, but this may occur about every six months to two years for each camera and lens combination.
The calibration process involves taking a series of photos in a controlled way, so you can see exactly how your focus is off. You can then correct it using your camera settings.
Firstly, set up your camera on a tripod in a well-lit environment. You will also need a flat surface and a subject to photograph that has easily measurable markings. You can purchase special objects to use as the subject of your test photos, such as focus pyramids or calibration charts, or you can create your own.
One method is to use a hardcover book and a 12-inch ruler with clear markings. Stand the book up on its bottom edge so that the cover is facing the camera. Tape a small piece of paper with an "X" drawn on it to the front cover at the centre line. Then balance the ruler against an object, like a coffee mug, so it's at a 30-degree angle. You want the ruler placed right beside the book, with the top end tilting away from the camera, and the middle 6-inch point lining up against the centre of the book cover where you've taped the paper.
Attach your camera to a tripod and use a timer to take your test photos to avoid camera shake. If you can, use a level to ensure that your camera isn't tilting to one side.
Place your subject on the surface with your camera pointed at it. You want your subject as close as your type of lens allows while still being able to focus on it. Shoot at the shallowest depth of field that you can or the widest aperture possible with your lens.
Set your shutter speed to the fastest your lighting situation allows to ensure your picture is as crisp as possible. Turn on autofocus and take a photo so the middle of your calibration chart, or your book cover, is in focus. Then compare your shot with how it looked in the viewfinder. If your final image is back focused or front focused, you'll be able to tell by seeing at what point on your calibration chart or ruler the focus is falling.
Open your camera's autofocus settings. On a Pentax camera, this is called the AF Adjustment function. If your focus is falling slightly farther away from your centre (back focus), you'll want to add a positive correction (+1-15). If your focus is falling in front of where you want it (front focus), add a negative correction (-1-15).
Continue to take test shots and adjust your correction amount until your centre focus point is crisp both in your viewfinder and in your final image.
Tips for Successful Calibration
- Adjust your autofocus slowly
- Watch videos for help
- Calibrate using exported RAW image files
Building Custom Camera Lenses: A Step-by-Step Guide
You may want to see also
Frequently asked questions
Lens calibration, also known as autofocus calibration, is a method of fine-tuning where the focus point falls in your image when you are autofocusing.
Lens calibration is needed when your camera's autofocus isn't producing clear photos with a certain lens. This could be due to a number of factors, including manufacturer defects, sample variation, insufficient quality assurance testing/tuning, and improper shipping and handling.
You only need to calibrate your lenses if and when you notice autofocus issues. This could occur every six months to two years for each camera and lens combination, depending on how much wear your equipment gets.
No, lens calibration is generally not needed for mirrorless cameras as they do not use an autofocus chip. Instead, the camera's sensor handles both the focusing and imaging, reducing the potential for miscommunication.
The calibration process involves taking a series of photos in a controlled way to identify and correct any focus issues. You will need a well-lit environment, a tripod, a flat surface, and a subject with easily measurable markings. You can purchase special objects for this purpose, such as focus pyramids or calibration charts, or create your own setup using household items.