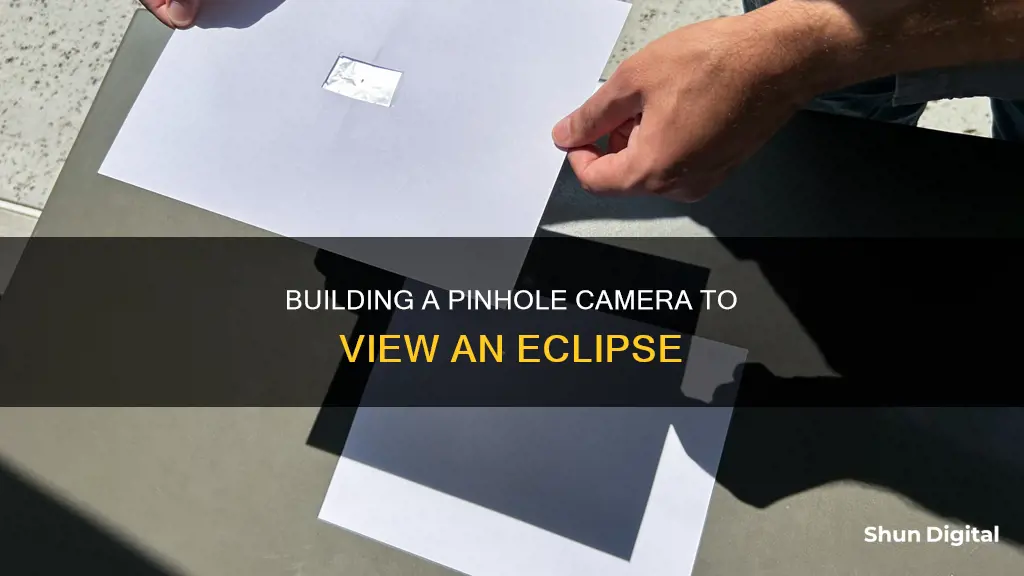
Solar eclipses are incredibly cool, but staring at the sun is not a good idea. The sun can burn your retina with UV rays, so it's important to protect your eyes with the right equipment. If you can't get your hands on a pair of solar eclipse glasses, you can make a pinhole camera. This DIY projector is easy to build and will allow you to safely watch the eclipse. All you need are a few simple supplies, such as a box, some tape, and a piece of aluminum foil. By pokING a small hole in the foil, you can create a pinhole camera that projects an image of the sun, allowing you to observe the eclipse without damaging your eyes.
| Characteristics | Values |
|---|---|
| Purpose | To watch a solar eclipse safely |
| Materials | Cardboard box, white card stock, duct tape (or electrical tape), aluminum foil, pin, paper clip, or pencil |
| Size | Box: at least 18 inches long; Pinhole: 0.2mm wide |
| Procedure | 1. Light-proof the box. 2. Cover one small end with white paper. 3. Cut a hole in the other end and cover with aluminum foil. 4. Poke a pinhole in the foil. 5. Face away from the sun and project the image onto a piece of paper or card stock. |
What You'll Learn

Choose your box
The first step to building your pinhole camera is to choose a box. You can use a wide range of box sizes for your pinhole camera, but cereal and shoe boxes work exceptionally well. The box should be at least 18 inches long, as using a box shorter than this will result in the projected image of the eclipse or sun being too small.
Once you have your box, you need to light-proof it. Leaving one side open, use duct tape or electrical tape to seal the box and prevent any light rays from getting in. Pay close attention to the corners and wherever two pieces of cardboard meet. The pinhole will only allow a few rays of light into your box, so the projection of the sun will be dim. That means the darker your camera, the easier it will be to see the image.
Covering the openings and corners with duct tape is the easiest way to light-proof your box, but electrical tape will also work. You can also use any tape that will block light, such as dark washi tape or masking tape, but you may need to apply multiple layers to achieve total darkness inside your box.
To check that your box is light-proof, hold it up to a light and look inside. If you still see light coming through, apply another layer of tape. You can also hold your box against a window or a lamp to see where the light comes through. The corners are often problematic spots that you'll need to cover.
After your box is light-proof, you can move on to the next step of making your pinhole camera: determining the location of the pinhole and covering the inside of the opposite face with white paper.
The FBI and Cameras: Spying on Citizens?
You may want to see also

Light-proof your box
Light-proofing your box is a crucial step in building a pinhole camera to watch an eclipse. Leaving one side open, seal the box with duct tape or electrical tape to prevent any light rays from entering. The pinhole will only allow a few rays of light into your box, so the projection of the sun will be dim. That means the darker your camera, the clearer the image will be.
When light-proofing your box, pay special attention to the corners and wherever two pieces of cardboard meet. Covering the openings and corners with duct tape is the easiest way to light-proof your box. However, electrical tape or any other tape that blocks light, such as dark washi tape or masking tape, can also be used. Just be aware that you may need to apply multiple layers of tape to achieve total darkness inside the box.
Before moving on to the next step, it is a good idea to check your work. Hold your box up to a light source, such as a window or a lamp, and look inside. If you still see light coming through, apply another layer of tape to the affected areas.
By light-proofing your box effectively, you ensure that your pinhole camera provides the best possible viewing experience for the eclipse.
Cromebook Camera: Is Your Privacy at Risk?
You may want to see also

Prepare the pinhole
The pinhole is the most important part of your camera, as it will determine how much light gets into the box and whether the image you see is clear or blurry.
First, you need to cut out a piece of aluminium foil. The size of the foil will depend on the size of your box, but it should be big enough to cover the opening you've cut out, with some excess to allow you to tape it securely. The foil should be smooth to prevent sunlight from being redirected, so try to avoid creases. If there are any creases, you can try to smooth them out by softly rubbing the top of your fingernail over the foil in a small, circular motion.
Next, you need to make the pinhole. Take a pin, thumbtack, sharp pencil, toothpick or embroidery needle and carefully poke a hole in the centre of the foil. The hole should be clean and round, with no ragged edges, and about 0.2mm wide. If the hole is too big, you'll lose the pinhole camera effect and just see a blob, so take care not to make it too large.
Check the hole by holding your box up to a light and looking inside – if you see light coming through, your pinhole is too big, and you'll need to start again with a new piece of foil.
Are Gas Stations Closely Monitoring You?
You may want to see also

Prepare the viewing hole
The viewing hole is the most important part of your pinhole camera. It is what will allow you to see the eclipse safely and clearly. Here is a step-by-step guide to preparing the viewing hole:
First, decide on the size and shape of your viewing hole. A circle with a diameter of about 1 to 2 inches is a good size. You can use a quarter to trace a circle on your cardboard if you want a neat circle. If you don't have a quarter, that's okay! You can cut a square or rectangle, or even freehand a circle. The most important thing is that the hole is not too big, or it will let in too much light and your image will be blurry.
Next, carefully cut out the hole with a sharp knife or scissors. Be very careful with the sharp tools and make sure to cut away from yourself. If you are supervising children, you may want to do this step for them. It is important to remember that the hole does not have to be perfect. It can even be a little bit ragged or uneven, as long as it is not too big.
Now it's time to cover the hole with aluminium foil. Cut a piece of foil that is big enough to cover the hole completely. Tape the foil over the hole, making sure it is smooth and tight with no creases. You may need to use a small piece of tape in the middle of the foil to hold it in place.
Finally, use a pin, thumbtack, toothpick, or embroidery needle to poke a small hole in the centre of the foil. This is your viewing hole! It should be very small, about 0.2 millimetres wide. If you are using a pin or toothpick, simply push it through the foil and then remove it, so that you are left with a clean, round hole. If you are using an embroidery needle, gently push it through and then pull it back out. Again, you want a neat hole with no ragged edges.
And that's it! You have prepared the viewing hole for your pinhole camera. Now you can move on to assembling the rest of the camera and getting ready to view the eclipse safely. Remember to never look directly at the sun without proper eye protection, and enjoy the show!
Apple Watch Series 5: Camera Expectations Explained
You may want to see also

Test your pinhole camera
Now that you've built your pinhole camera, it's time to test it out and see how it works! Here's a step-by-step guide to testing your pinhole camera:
- Stand with your back to the sun: Position yourself so that your back is facing the sun. This will ensure that the light from the sun enters the pinhole camera correctly.
- Block out extra light: Use your hands or any other object to block out as much extra light as possible. This will help you see the projection more clearly.
- Look into the viewport: Peer into the viewing hole that you created in your pinhole camera. Adjust your position and the angle of the camera until you find the sweet spot where sunlight enters through the pinhole.
- Observe the projection: Once you have the correct angle, you should see a small projection of the sun's shape on the white paper inside your box. This projection will be dim, but it should be visible in the right lighting conditions.
- Adjust as needed: If you don't see a clear projection, don't worry. Try adjusting the position of your camera, the angle of the sunlight, or even the size of the pinhole. Remember, the weather and lighting conditions will also affect the quality of the projection.
- Experiment: Try moving your pinhole camera around, changing its distance from the ground or the surface you're projecting onto. You can also experiment with different types of boxes and pinhole sizes to see how it affects the projection.
- Enjoy the eclipse: Once you've got your pinhole camera working, you can use it to safely observe the solar eclipse. Remember, never look directly at the sun without proper protection, but with your pinhole camera, you can enjoy this celestial event safely.
Testing your pinhole camera is a fun and educational activity. It might take a bit of adjustment to get the perfect projection, but with patience and experimentation, you'll be able to observe the sun and the eclipse in a whole new way. Enjoy your DIY pinhole camera, and happy sky-gazing!
How ADT Monitors Your Security Cameras
You may want to see also
Frequently asked questions
A pinhole camera is a projector that allows you to safely watch a solar eclipse. It is a simple DIY device that can be made with everyday items, such as a box, aluminium foil, tape, and card stock.
Looking directly at the sun, even during an eclipse, can damage your vision. A pinhole camera allows you to observe the eclipse without risking your eyesight.
You will need a box (a cereal box or shoe box works well), aluminium foil, tape (duct tape or electrical tape is recommended), scissors or a box cutter, and white card stock or paper.
First, light-proof your box, leaving one side open. Cover the openings and corners with tape to prevent light rays from entering. Then, cut out a small pinhole in the aluminium foil and tape the foil over one of the open ends of the box. Finally, place a piece of white paper or card stock inside the box, opposite the pinhole, and seal the box.
Stand with your back to the sun and hold the pinhole camera so that the sunlight passes through the pinhole. You should see a projection of the eclipse on the white paper or card stock inside the box.


