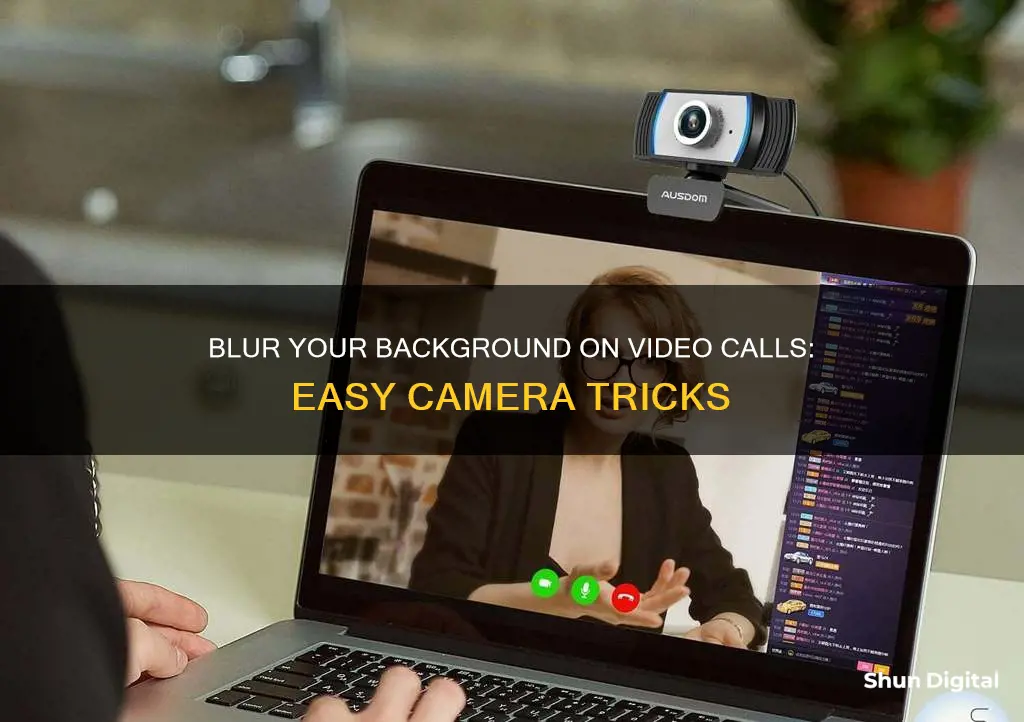
With the rise of remote working and video conferencing, it's become increasingly important to maintain professionalism and privacy during virtual meetings. Many video conferencing platforms now offer the option to blur your background, helping to obscure your surroundings and ensure the focus remains on you. In this article, we will explore the steps to blur your background on popular platforms such as Zoom, Microsoft Teams, and Skype, as well as discuss alternative methods to achieve a blurred background.
How to blur the background on your computer camera
| Characteristics | Values |
|---|---|
| Platforms | Microsoft Teams, Zoom, Skype, Google Meet |
| Software | XSplit VCam, NVIDIA Broadcast App, Snapcamera, ChromaCam |
| Hardware | Advanced Vector Extension 2 (AVX2) graphics, post-Haswell chipset |
| Steps | Start/join a meeting, access meeting controls, open camera settings, select blur effect, apply blur effect |
What You'll Learn
![]()
How to blur your background on Microsoft Teams
Working remotely has become the new norm, and with it comes the need to maintain professionalism during virtual meetings. Microsoft Teams is a platform that offers a Background Blur option, allowing users to obscure their surroundings and ensure the focus remains on them. This feature is available for Windows, Mac, iPhone, and Android users. Here is a step-by-step guide on how to blur your background in Microsoft Teams:
Before the Meeting:
- Launch Microsoft Teams.
- Turn on your camera to enable video effects.
- Look for the 'Effects and avatars' button, which may vary depending on your device.
- Go to 'Video effects' and then to the 'Backgrounds' section.
- Choose 'Standard blur' or ''Portrait blur' to create a soft-focus background. 'Portrait Blur' offers a sharper focus on you and a more subtle blur.
- You can edit your background blur settings by opening your device settings and adjusting the 'Soft focus' option.
- To deactivate the blur, simply choose the 'None' button.
During the Meeting:
- Navigate to your meeting controls, usually found at the top or bottom of the screen.
- Click on 'More actions', represented by three dots.
- Choose 'Effects and avatars'.
- Select 'Standard blur' or 'Portrait blur' to blur your background.
- Click 'Preview' to see how it will look.
- Click 'Apply' to confirm the effect.
- To deactivate the blur during the meeting, go back to the background effects menu, select 'None', and click 'Apply'.
The background blur feature in Microsoft Teams is a powerful tool that can significantly improve your virtual meeting experience by creating a professional and focused environment.
Mastering Focus Peaking: A Photographer's Guide to Sharpness
You may want to see also
![]()
How to blur your background on Zoom
Blurring your background on Zoom can help you maintain your privacy and minimize distractions for yourself and others. It can also help you appear more professional, no matter your location. Here is a step-by-step guide on how to blur your background on Zoom.
What You Need to Know Before You Blur Your Background on Zoom:
Firstly, ensure you meet the following prerequisites:
- The latest version of the Zoom desktop client for Windows or macOS (version 5.5.0 or higher)
- Zoom mobile app for Android or iOS (version 5.6.6 or higher)
- A processor with a minimum of a quad-core or higher
Step-by-Step Guide to Blurring Your Background on Zoom:
- Launch the Zoom app and sign in to your account.
- Navigate to the 'Settings' icon in the top right corner by clicking on your profile picture.
- From the list that opens, select the 'Background & Filters' or 'Background & Effects' tab.
- Here, you will see an option for 'Blur'. Select this option to instantly blur your background.
- Once you are in a Zoom call, you will notice an arrow next to the 'Stop Video' button on the toolbar. Click on this arrow.
- From the menu that appears, select 'Blur My Background'.
- If you are using the Zoom app on your mobile device, tap 'More' (three horizontal dots) at the bottom right of the home screen.
- Under 'Settings', tap 'Meetings', then 'Backgrounds & Effects'.
- If you are already in a meeting, tap to see the options along the bottom and scroll to the right. Click 'More'.
- Tap 'Backgrounds & Effects' and then the minimize icon in the top left to return to the meeting.
Troubleshooting:
If your blurred Zoom background isn't showing up, try the following steps:
- Update Zoom to the latest version.
- Check your hardware requirements to ensure your device meets the necessary specifications. You will need an Intel processor from the 6th generation or newer to use the blur background feature.
- Restart the Zoom application.
- Reinstall the application if the issue persists.
- Contact Zoom's support team for further assistance if needed.
The Evolution of Surveillance: 1080p Cameras' Arrival
You may want to see also
![]()
How to blur your background on Skype
Skype's background blur feature is a useful tool to hide your surroundings and ensure you remain the main focus during video calls. It can help to obscure any distractions or private information in your environment, making it ideal for both business and casual conversations.
To blur your background on Skype, follow these steps:
Step 1: Open Skype on Your Computer
The background blur feature is available on both Mac and Windows operating systems. Ensure you have the latest version of Skype installed on your device.
Step 2: Start a Video Call
Initiate a video call with your desired contact. During the call, the background blur option will become available.
Step 3: Access the "Blur My Background" Option
Hover your mouse over the video window during the call. This will bring up the "Blur my background" option.
Step 4: Enable Background Blur
Simply select the "Blur my background" option to activate it. The background behind you will now appear blurred, allowing you to have a more focused and private conversation.
It is important to note that Skype's background blur feature relies on artificial intelligence to detect and blur the background while keeping you in focus. It should also detect your hands, arms, and hair to avoid blurring those parts of the video.
Additionally, the background blur feature requires your computer processor to support Advanced Vector Extensions 2 (AVX2). If your device does not meet this requirement, you may not see the "Blur my background" option.
If you are using an older version of Skype, you may need to update to version 8.46.0.60 or higher to access the background blur feature.
By following these steps, you can easily blur your background on Skype and maintain a professional and private video call experience.
Uploading Raw Camera Files: A Step-by-Step Guide
You may want to see also
![]()
How to blur your background on Skype for Business
Step 1: Check Your Device Compatibility
Before attempting to blur your background on Skype, ensure your device supports this feature. Skype's background blur option is available for most desktop machines and laptops equipped with an up-to-date version of the software. It is not supported on Linux. Additionally, your computer processor needs to support Advanced Vector Extensions 2 (AVX2) for background blurring to work.
Step 2: Access Meeting Controls
Once you're in a Skype video call, look for the meeting controls toolbar, usually found at the top or bottom of the screen. This toolbar contains various options like mute, camera, and more.
Step 3: Open Camera Settings
Click on the "More actions" ellipsis (three dots) in the meeting controls toolbar. From the dropdown menu, select "Choose background" or "Blur my background," depending on your Skype version.
Step 4: Select Blur Effect
A panel will appear with various background options. Scroll to find the "Blur" option, which may be listed after the "No background" choice. Click on "Blur" to preview the effect.
Step 5: Apply the Blur Effect
Once you've selected "Blur," click "Apply" and ensure your video is turned on to activate the blurred background.
Alternative Methods:
If you're using an older device or your computer processor doesn't support AVX2, you can explore alternative methods to blur your background:
- Third-Party Tools: Use external applications like Snapcamera or ChromaCam, which offer background blur and virtual green screen effects.
- Predefined Images: If you're unable to blur your background, you can choose predefined images, the Microsoft Bing Daily Image, or add your own custom image as your background during Skype calls.
By following these steps and alternatives, you can effectively blur your background on Skype for Business, ensuring your video calls remain professional and distraction-free.
Traffic Camera Tickets in Diabol Texas: Enforceable or Not?
You may want to see also
![]()
Third-party tools to blur your background
There are several third-party tools available to blur your background on a computer camera. Here are some of the popular options:
Fineshare FineCam
Fineshare FineCam is a powerful AI webcam software that allows you to remove, change, and blur your webcam background automatically. It enables you to adjust the degree of background blur and is compatible with Windows 8 or later, and macOS 11 or later. Here's how to use it:
- Install and run FineCam on your computer.
- Create a scene and add your webcam.
- Click on the Background icon on the right sidebar, then select the Blur option under the Virtual Background.
- Move your mouse over your video to adjust the blur amount using the Blur Bar.
XSplit VCam
XSplit VCam is a webcam background removal software that supports various image formats and even full web pages. It offers a customizable blur effect to ensure your privacy. It is available for Windows and can be used with popular streaming software like Open Broadcaster Software (OBS). Here's how to use it:
- Open XSplit VCam and ensure that "Original" is selected from the Background option.
- Move the slider to adjust the blur level while keeping yourself in focus.
- Save the file.
ChromaCam
ChromaCam is a simple yet powerful virtual background application for Windows and macOS. It offers a free "lite" edition that lets you replace your background with a standard image or virtual green screen. The Pro version provides additional features, such as custom backgrounds, logo customization, and using PowerPoint content as a dynamic background. Here's how to use the blur feature:
- Join a video call or enter a stream.
- Click on the three dots or the hamburger menu in the streaming platform.
- Go to Preferences and select the Webcam category.
- Click on the drop-down menu and select ChromaCam as your camera.
- Adjust the blur intensity slider to your desired level.
- Close the ChromaCam window and click OK in the Preferences menu.
- Return to your video call or stream and select "Share my Camera."
PerfectCam
PerfectCam is a webcam streaming software designed by CyberLink and is commonly used by content creators and YouTube streamers. It offers a background blur feature that can be adjusted to your preferred level. Here's how to use it:
- Launch the software and open your desired video or start a stream.
- Navigate to the Webcam Effects Selection panel and click on Background Blur.
- Move the slider to adjust the blur level to your liking.
ManyCam
ManyCam is a versatile application for Windows and macOS that enables users to add multiple video sources, such as webcams, prerecorded videos, images, and mobile devices, to live streams and video calls. It offers a range of features, including 3D masks, virtual objects, digital props, backdrops, effects, and fun filters. ManyCam is particularly useful for creating professional-looking webinars and live streams.
Snap Camera
Snap Camera is a free desktop application for Windows and macOS created by the makers of Snapchat. It offers a wide range of prebuilt lenses, filters, and backgrounds to enhance your video calls. You can choose from thousands of virtual backgrounds and lenses, including classics from Snapchat and designs created by the Snap Camera community. When activated during a call, Snap Camera replaces your webcam input with the selected lens or background.
CamTwist
CamTwist is a Mac-only application that adds special effects and filters to live video feeds. It acts as a broadcast-quality video switcher, allowing you to create different setups or scenes that you can switch between during a live call. CamTwist includes a variety of premade effects, and you also have the option to create your own custom elements.
Apple's Surveillance Camera Mystery: Fact or Fiction?
You may want to see also