Tethering your camera to your computer can be a great way to instantly improve your workflow. It allows you to see your images displayed on a larger screen, which can be beneficial for checking focus, composition, and exposure. It also enables you to make adjustments and apply presets to your files. However, tethering can also come with some downsides, such as increased battery consumption and the need for additional equipment. To tether your camera to Lightworks, you will need a compatible camera, a long USB cable, and possibly a tethered capture software. The specific steps may vary depending on your camera model and the software you are using, but the general process involves connecting your camera to the computer, opening the tethered capture feature in your software, and configuring the settings according to your preferences.
| Characteristics | Values |
|---|---|
| What is tethering? | Attaching your camera directly to your computer using a cable. |
| Why use tethering? | To see photographs on a larger screen while shooting. |
| What are the benefits of tethering? | You can quickly preview each photo on a large monitor, check for perfect composition, focus, exposure, and subject blemishes. |
| What are the downsides of tethering? | Tethering can cause problems such as getting too caught up in little details, draining battery life, and requiring extra equipment. |
| What equipment do you need for tethering? | An extra-long USB cable, tethering software, a portable table to hold your laptop, and a Jerkstopper to prevent your USB cable from being yanked out. |
| How do you set up tethering? | Connect your camera to the computer, open Lightroom, go to File > Tethered Capture > Start Tethered Capture, and choose your settings. |
| Can you wirelessly tether your camera to Lightroom? | Yes, by using a device like the CamRanger. |
What You'll Learn
![]()
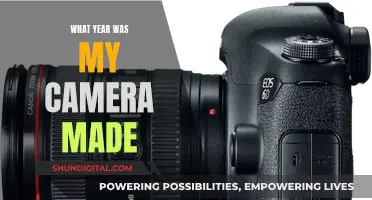
Tethering your camera to Lightroom during a studio shoot
Tethering is the process of connecting your camera directly to your computer, usually with a cable. This allows you to see your photographs on a larger screen as you shoot. It gives you the ability to zoom in, check details, and see where your lighting is falling, rather than squinting at the small screen on the back of your camera.
Benefits of Tethering:
- Larger Display: You can see your images on a bigger screen, making it easier to check focus, composition, and details.
- Model Confidence: The model can see the photos as you shoot, giving them more confidence and allowing them to adjust their poses.
- Instant Review: You can quickly preview each photo, make adjustments, and apply presets.
- Organise Images: You can add notes, ratings, and keywords to each photo as you shoot, keeping your file management efficient.
Downsides of Tethering:
- Pace: Tethering can slow down your workflow, especially if you're shooting rapidly.
- Battery Drain: It can drain the battery of both your camera and computer, so carry extra batteries and shoot near a power source.
- Software Issues: Tethering software can be finicky and stop working, so always test before a shoot and have a backup plan.
- Extra Equipment: It requires additional gear, like long cables and a laptop, which can be cumbersome and expensive.
Essential Equipment:
- Long USB Cable: You'll need a cable long enough to connect your camera to your computer comfortably, usually about 15 feet.
- Tethering Software: Adobe Lightroom is a popular choice, but there are also options like Capture One and Canon EOS Utility.
- Laptop Stand: A portable table or stand to hold your laptop, like the Tether Tools Aero Table.
- Cable Stabiliser: A Jerkstopper or similar device to prevent your USB cable from being accidentally yanked out.
Step-by-Step Instructions:
- Connect your camera to the computer with the USB cable.
- Open Lightroom and go to File > Tethered Capture > Start Tethered Capture.
- Set your tethered capture settings, including session name, file naming, destination folder, and metadata.
- Turn on your camera. Lightroom should automatically detect it.
- When you take a picture, it will appear in Lightroom, and you can apply processing presets.
- You can control your camera settings and even fire the shutter from Lightroom.
- End the session by closing the Tethered Capture window or choosing Stop Tethered Capture.
Wireless Tethering:
If you want to avoid cables, wireless tethering is possible with additional equipment like the CamRanger device. This allows you to connect your camera to a computer or iPad wirelessly, giving you the freedom to move around without tripping over cables.
Tethering your camera to Lightroom can be a powerful tool for studio photography, giving you greater control and the ability to fine-tune your images as you shoot. However, it also has its drawbacks, so consider your specific needs and choose the setup that works best for you.
Fight Back: Beat Camera Tickets with These Tips
You may want to see also
![]()
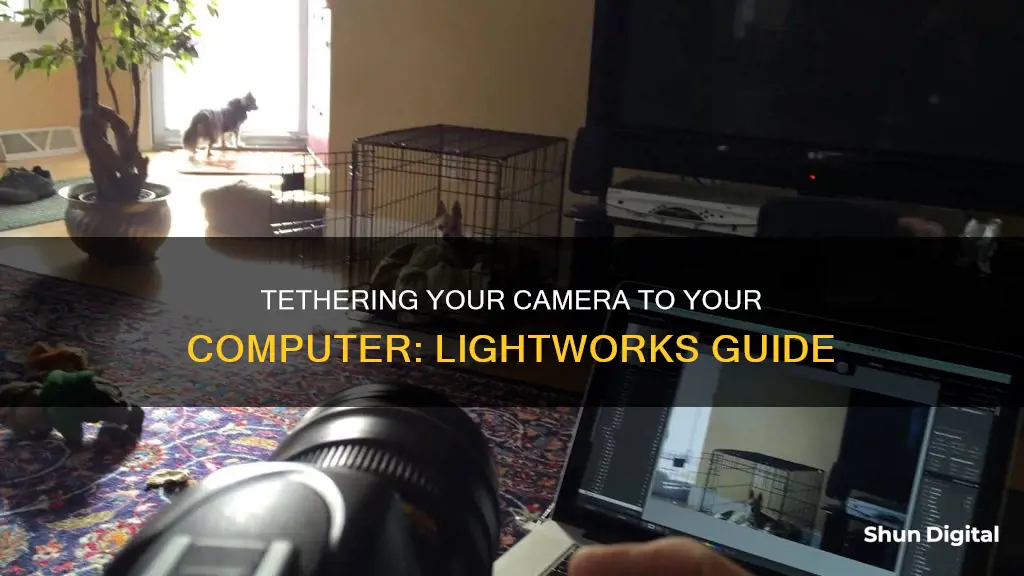
The advantages of tethering your camera
Tethering your camera to your computer has many advantages, especially if you are in a studio setting. Firstly, it allows you and your clients to see photos on a larger screen in high resolution as you take them. This means that you can spot issues with focus, lighting, posing, composition, and other details much more easily and make any necessary changes without having to retake the photo. This results in less time spent editing and greater client satisfaction as they can let you know when you've captured the desired shot.
Another benefit of tethering is that it enables better organisation and management of your images. With tethering software, you can add notes, star ratings, keywords, and more to each photo as you go along, helping you stay on top of your file management and ensuring that key information is recorded while it's still fresh in your mind.
Tethering also offers the ability to edit photos on-the-fly. You can make changes to crop, exposure, colour, and other aspects of your images right in the studio, and these edits can be kept and moved to another computer for further editing if needed.
Additionally, tethering allows for stable, hands-free shooting and gives you greater control over your camera settings. You can quickly adjust settings such as ISO, aperture, and shutter speed remotely from your computer until you achieve the desired results. This is especially useful for food photography, product sales and marketing, and portrait photography.
Surveillance Capital: Which City Watches the Most?
You may want to see also
![]()
The equipment you need to tether your camera
Tethered photography is the process of connecting your camera to a computer, tablet, or smartphone. This can be done via a cable or wireless app. An example of a wireless app is the Lightroom Tethered Capture feature.
The traditional and most reliable way to tether your camera is with a cable. There are a variety of different cables and ports available, so the specifics will depend on your exact devices. If you plan to tether with a cable, you will need:
- An extra-long (e.g. 15 feet) USB cable to connect your camera to your computer
- Tethering software, such as Adobe Lightroom (paid), Capture One (paid), or Canon EOS Utility (free)
- A portable table to hold your laptop, such as the Tether Tools Aero Table
- A Jerkstopper to prevent your USB cable from being yanked from your camera
If you’d prefer to tether wirelessly, then you can forgo the cable and the Jerkstopper – but you’ll still need the laptop, the table, and the tethering software.
Additionally, you may want to consider the following:
- A tripod to hold your camera at the right angle while keeping it still
- A lens that is specific to your needs, such as a wide-angle lens for landscape and architectural photography, or a narrower lens for shooting portraiture
- A power supply, such as the Tether Tools Case Relay, which can provide power from a standard USB battery pack
Can the FBI Access Your Webcam?
You may want to see also
![]()
A step-by-step guide to tethering your camera
Tethered photography is a process of connecting your camera to a computer, tablet, or smartphone via a cable or wireless app. This guide will take you through the steps to connect your camera to a computer.
Step 1: Get the Right Equipment
You will need a long USB cable (around 15 feet) to connect your camera to your computer. You may also need a portable table to hold your laptop and a Jerkstopper to prevent your USB cable from being pulled out of your camera.
Step 2: Connect Your Camera to Your Computer
Turn off your camera and connect one end of the cable to your camera and the other end to your computer. Then turn on your camera.
Step 3: Open Lightroom and Start Tethered Capture
Open Lightroom and select File > Tethered Capture > Start Tethered Capture.
Step 4: Choose Your Tethered Settings
In the Tethered Capture Settings box, enter a session name, select a file naming template, pick a file destination, and apply metadata and keywords. Pay careful attention to where the photos will be saved.
Step 5: Check Your Camera is Detected
Once you have clicked "OK", Lightroom should detect your camera. If you get a No Camera Detected message, check that your version of Lightroom and your camera's firmware are up to date and that your camera can do tethered capture in Lightroom. Try using different USB cables to make sure they are working.
Step 6: Take a Photo
When you take a photo, it will appear on your computer screen. You can now view your photos on a larger screen and make adjustments to your files.
Wireless Tethering
If you want to wirelessly tether your camera to Lightroom, you can use a device such as a CamRanger. You will need to set up "Auto-Import" in Lightroom and define your "Watched Folder".
Switching Default Computer Camera: Windows 10 Guide
You may want to see also
![]()
Wireless tethering
There are a few options for wireless tethering. One option is to use the CamRanger device, which allows you to connect your camera directly to an iPad or a computer. The CamRanger offers features such as live view and camera controls, and it is compatible with Nikon and Canon cameras. However, it is a bit pricey at $300.
Another option is to use wireless tethering software. This method can be slower than a cabled connection, but it eliminates the need for a cord. You will still need a laptop or tablet and tethering software. Some software options include Adobe Lightroom, Capture One (paid), and Canon EOS Utility (free).
To set up wireless tethering, follow these steps:
- Ensure your camera is compatible with your chosen software.
- Download and install the tethering software on your device.
- Connect your camera to the software by following the specific instructions for your chosen program.
- Adjust your camera settings to transfer files effectively. For example, you might choose to transfer RAW+JPG files or just RAW files, depending on your camera and preferences.
- Set up auto-import in your software to specify where the transferred files will be saved.
Baldur's Gate 3: Exploring the Camera Mode Feature
You may want to see also