The Camera Raw filter in Photoshop is a powerful tool that allows users to access the features of Adobe Camera Raw (ACR) during their Photoshop workflow. It offers the ability to make adjustments to images, such as correcting lens distortions, fine-tuning colours, and enhancing details. One of the key features of the Camera Raw filter is the ability to defringe, which helps remove colour fringes that appear around specular highlights, such as reflections off water or polished metal. These fringes are a result of chromatic aberration caused by the lens failing to focus different colours to the same spot. The defringe tool allows users to manually adjust and remove these colour fringes, improving the overall quality of the image.
| Characteristics | Values |
|---|---|
| Purpose | Remove purple and green color fringes |
| Tool | Eyedropper tool |
| Action | Click on purple/green fringe colors |
| Result | Purple/green Defringe sliders are automatically adjusted for that color |
What You'll Learn
![]()
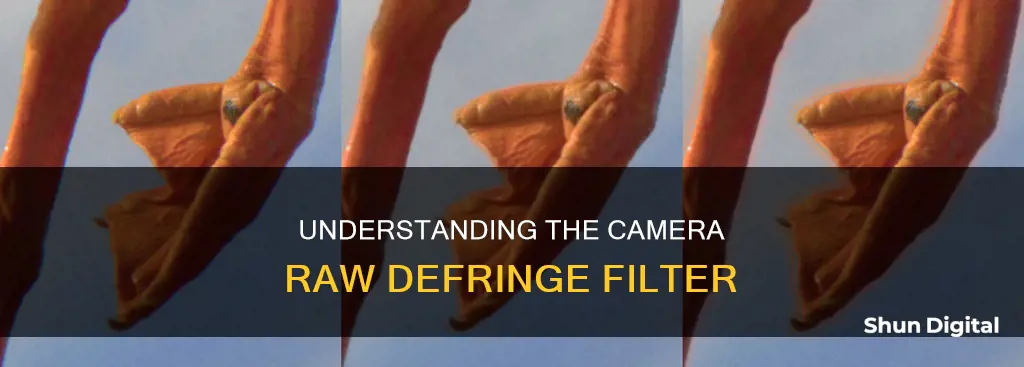
Correct chromatic aberration
Chromatic aberration is a defect that occurs in camera lenses at certain focal lengths, f-stops, and focus distances. It is caused by the lens's failure to focus different colours to the same spot, resulting in a colour fringe around the edges of objects in photos. This fringe can be red, green, purple, blue, etc.
To correct chromatic aberration in Adobe Camera Raw (ACR), follow these steps:
- Open your image in ACR.
- Zoom in on the area where the fringe is most obvious.
- Navigate to the "Lens Corrections" tab and select "Colour".
- First, select the "Remove Chromatic Aberration" box. Then, pan around the image to locate any purple or green fringes.
- Drag the corresponding slider to resolve the issue. For example, if you see a purple fringe, drag the Purple Amount slider to the right to remove the reddish hue.
- If your image contains a high volume of aberration, you may need to create a new layer and mask the changes in selectively using Photoshop.
Alternatively, you can correct chromatic aberration manually using the Defringe tool in the Manual tab of the Lens Corrections tab. Here are the steps:
- Zoom into the fringe area for more accurate colour picking.
- Press and hold Command (Mac) or Control (Win) to show the Eyedropper tool on the image.
- Use the Eyedropper tool to click on the purple or green fringe colours.
- Adjust the Purple/Green Defringe sliders automatically for the selected colour.
- If you click on an area that is too neutral, you will see an error message.
Olympus Camera Battery Encoding: What's the Deal?
You may want to see also
![]()
Remove purple and green fringes
Purple and green fringes are chromatic aberrations that can appear in your photographs. They are caused by the lens failing to focus different colours to the same spot.
To remove purple and green fringes in Adobe Camera Raw, follow these steps:
- Go to the Camera Raw dialog box.
- Click on the Lens Corrections tab.
- Select the Manual tab.
- Use the Eyedropper tool to select the purple or green fringe colours.
- Adjust the Purple Amount/Green Amount sliders to specify the amount of defringing applied.
- Adjust the Purple Hue/Green Hue sliders to apply defringing to the selected hue range.
Alternatively, you can use the Remove Chromatic Aberration option in the Profile tab of the Lens Corrections panel to automatically remove chromatic aberrations.
You can also remove purple and green fringes in Lightroom and Photoshop using similar tools and sliders.
Charging Camera Batteries: Using the Right Charger
You may want to see also
![]()
Adjust the hue range
When you're in the Defringe section of the Camera Raw filter, you'll see the Hue Range slider, which is a crucial tool for fine-tuning the defringing effect. This slider allows you to specify the range of hues that the defringing process will target. By adjusting this slider, you can ensure that only the color fringes are removed, while the rest of the image remains unaffected.
Here's a step-by-step guide on how to adjust the Hue Range slider effectively:
- First, make sure you have opened your image in Photoshop and have accessed the Camera Raw filter by choosing Filter > Camera Raw Filter.
- In the Camera Raw dialog box, go to the "Tools" tab and select the "Basic" tool. This will give you access to the Defringe option in the "Lens Corrections" section.
- Click on the "Defringe" slider to activate the Hue Range controls. You will see a new set of sliders appear below the Defringe slider. These are the Hue Range sliders.
- The Hue Range sliders are composed of two parts: the left slider (From) and the right slider (To). These sliders define the range of hues that will be affected by the defringing process.
- To adjust the hue range, simply drag the left and right sliders to encompass the colors you want to target. For example, if you have purple fringing, you would move the left slider to the left until it reaches the purple hues, and then move the right slider to the right to capture the full range of purple colors.
- As you adjust the Hue Range sliders, pay attention to the image preview. You should see the defringing effect update in real-time, so you can immediately see the impact of your adjustments.
- Fine-tune the sliders until only the color fringes are affected, being careful not to overlap with other colors in the image that you want to preserve.
- You can also use the eyedropper tools next to the Hue Range sliders to sample specific colors in your image. This can help you quickly target the exact hue you want to remove. Simply click on the eyedropper and then click on the color in your image that you want to include in the hue range.
- Once you're happy with the hue range, you can further refine the defringing effect by adjusting the "Amount" slider. This slider controls the intensity of the defringing within the selected hue range.
- Experiment with different hue ranges and amounts until you achieve the desired result, effectively removing the color fringes without impacting the rest of the image.
By carefully adjusting the Hue Range sliders in the Defringe section of the Camera Raw filter, you can precisely target and remove unwanted color fringes, improving the overall quality and accuracy of your images.
Charging Yi 4K Action Camera: A Step-by-Step Guide
You may want to see also
![]()
Protect edges of coloured objects
When you're editing photos, chromatic aberration can be a problem, causing a thin line of coloured fringe to appear around the edges of objects in your images. This can be purple, green, red, blue, or any colour really, but it's always unwelcome. Luckily, Camera Raw has a built-in fix.
Chromatic aberration is caused by the failure of the lens to focus different colours to the same spot. This can result in a purple fringe around specular highlights, such as those found when light reflects off water or polished metal.
To protect the edges of coloured objects in your images, you can use the Defringe tool in Camera Raw. Here's how:
First, open your image in Camera Raw and zoom in on the area where you want to remove the fringe. Then, click on the Lens Corrections icon and select the Colour tab.
Next, select the 'Remove Chromatic Aberration' checkbox. Camera Raw will then use the metadata embedded in your image to remove the colour fringe based on your lens' make and model.
If this doesn't completely remove the fringe, you can try getting rid of it manually by clicking on the Manual tab and using the sliders in the Defringe section. Drag the Purple Amount slider to the right to remove any red lines, and the Purple Hue slider to the right to fine-tune the adjustment. You can do the same with the Green Amount and Green Hue sliders for green aberrations.
You can also use the Eyedropper tool to remove purple and green fringes. Zoom into the fringe area, press and hold Command (Mac) or Control (Windows) to show the Eyedropper tool, and then click on the fringe colour. The Defringe sliders will automatically adjust for that colour.
By using the Defringe tool in Camera Raw, you can protect the edges of coloured objects in your images and remove unwanted colour fringes.
Topping Off Camera Batteries: Is It Safe?
You may want to see also
![]()
Remove local colour fringes
To remove local colour fringes, you can use a chromatic aberration software tool. This is a common issue in astrophotography, where slight colour-fringing occurs around stars. It can also be caused by changes in temperature or focus slippage.
To remove colour fringes, you can use image-processing software such as PaintShop Pro 2019, which has a 'Chromatic Aberration Removal' tool. You can also use Adobe Camera Raw, which has a Remove Chromatic Aberration option in the Lens Corrections tab. This can be used to manually correct purple and green colour fringes using the defringing controls provided in the Manual tab.
In Photoshop, there are several ways to remove edge fringes, including using levels to clean a mask edge, the Minimum filter, and selectively cleaning the edge.
Charging Your Spy Pen Camera: A Quick Guide
You may want to see also
Frequently asked questions
The Camera Raw filter is a tool that offers access to the features of Adobe Camera Raw (ACR) in your Photoshop workflow. It allows you to make adjustments within ACR at any time during your workflow, rather than limiting its usage to the RAW processing stage only.
To access the Camera Raw filter, go to the Filter menu in Photoshop and select "Filter > Camera Raw Filter".
The Camera Raw filter does not include certain tools or features that modify document properties, such as the Crop and Rotate tools, the ability to change Camera Raw Preferences, create Snapshots, or save in different formats. It also has reduced functionality for white balance adjustments compared to working directly in ACR.
The Camera Raw filter is packed with tools and offers a wide range of adjustments, including exposure, contrast, vibrancy, clarity, and vignettes. It also allows you to fine-tune adjustments after RAW processing, apply local adjustments, and make final tweaks to your images.
The Camera Raw filter provides manual chromatic aberration correction by allowing you to increase the Purple Amount and/or Green Amount sliders in the Defringe section of the Optics panel. This reduces the appearance of purple and green color fringing, which occurs due to the lens's failure to focus different colors to the same spot.