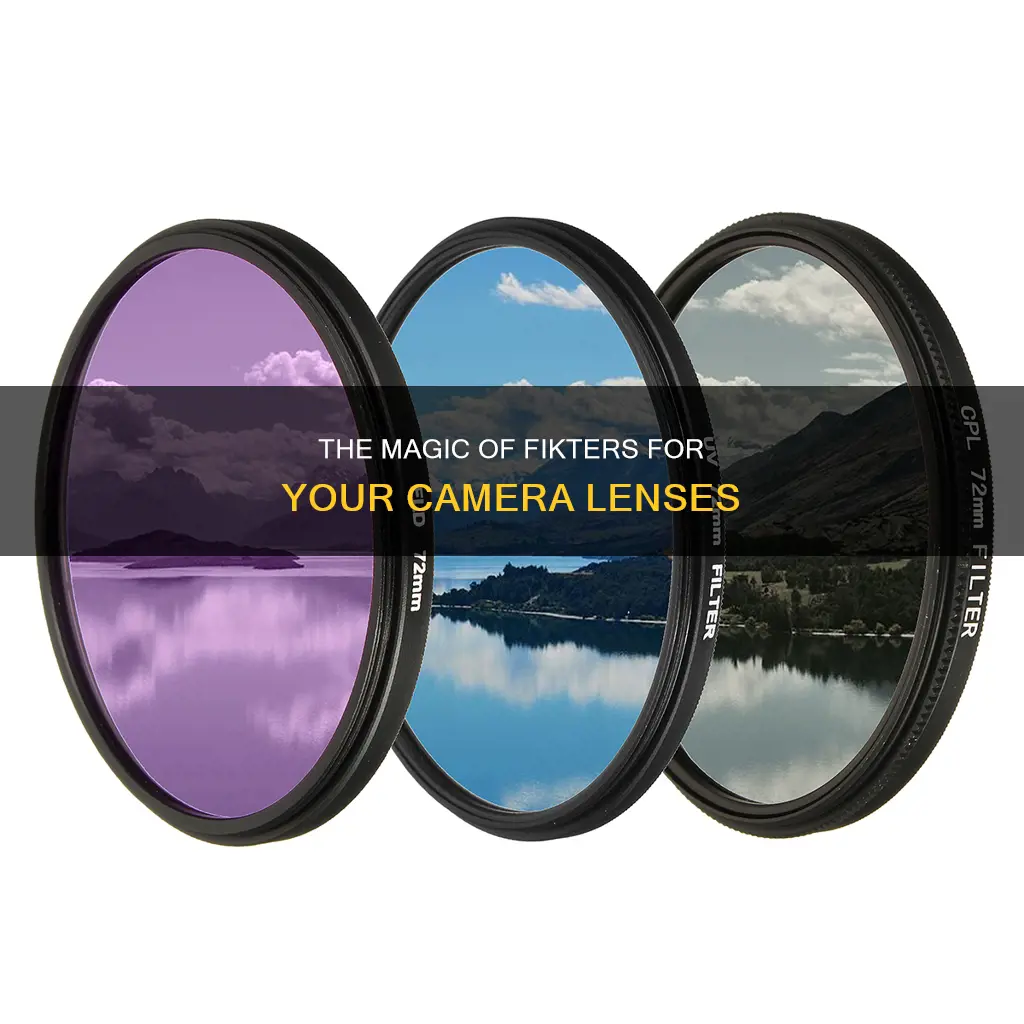
Filters are pieces of glass or resin that attach to the front of a camera lens. They are used to block or reduce the intensity of certain colours or types of light coming into the camera. Some filters are designed to reduce the overall light intensity, while others are used to enhance colours or reduce reflections. Filters can also be used to protect the camera lens from dust, scratches, and other potential damage.
| Characteristics | Values |
|---|---|
| Purpose | Protection, light manipulation, colour correction, adding in-camera effects, removing unwanted reflections |
| Forms | Circular screw-on, square, rectangular, drop-in, sensor clip-in |
| Types | Protection, UV, IR, ND, GND, CPL, light pollution, coloured, diffusion, close-up, star |
What You'll Learn

Protective filters
UV filters, also known as haze filters, are a type of protective filter that can be used to mitigate the effects of ultraviolet light, which can cause a blue tint in your images. They are especially useful when photographing in areas with intense ambient ultraviolet light, such as near large bodies of water, at higher altitudes, or in snowy conditions.
Skylight filters are another type of protective filter. They have a magenta tint and can be useful when photographing skin tones or using colour slide film. Their magenta colouring can counterbalance the blue bias found in certain film stocks. Like UV filters, skylight filters can also cut through atmospheric haze, but they do not impact your camera exposure.
When choosing a protective filter, it is important to consider the quality of the glass and the coatings used. Pricier filters tend to use optically purer and thinner glass that interferes less with the front element of your lens. It is also recommended to look for filters with brass retaining rings instead of aluminum, as brass is less prone to denting and jamming.
Compatibility of Pentax Lenses with Fujica Cameras
You may want to see also

Colour filters
There are various types of colour filters available, including red, orange, yellow, green, blue, purple, pink, brown, and grey. Each colour filter has a specific effect on the image. For example, the yellow filter darkens the sky and makes clouds stand out, while the orange and red filters intensify this effect. The green filter improves skin tones in outdoor portraits, and the blue filter increases the light-darkening contrast in black-and-white photos. The purple filter removes the green tint caused by fluorescent lighting, and the brown filter adds a nostalgic feel to images. The grey filter simply reduces the light intensity without altering the colour.
When choosing colour filters, it is essential to consider the desired effect, compatibility with the lens, and budget. Additionally, it is worth noting that stacking multiple filters on top of each other can reduce image quality.
EF-S Lenses: Full-Frame Camera Compatibility Explored
You may want to see also

Polarising filters
Polarizing filters are a type of camera lens filter that can be attached to the front of a lens to block polarised light, such as light reflecting off water, windows, or other reflective surfaces. They are often used to enhance colour saturation, making skies bluer, clouds more vibrant, and water and shadows deeper. They also help to reduce haze in landscapes and eliminate unwanted reflections and glare, making them useful for shooting through glass or water.
Polarizing filters consist of two sheets of glass with a thin layer of polarizing material in between. The outer sheet rotates to alter the level of filtration. In higher-end filters, the polarizing film layer is bonded to the glass, resulting in a tighter fit and higher optical purity.
There are two main types of polarizing filters: circular and linear. Circular polarizing filters (CPF) screw onto lenses, while linear filters fit into holders and require adapter rings to attach to lenses. CPFs are better suited for autofocus lenses, while linear filters are more suitable for manual focus lenses.
When using a polarizing filter, it's important to remember that they reduce the amount of light passing into the camera, so you may need to adjust your aperture or shutter speed to compensate. This is worth getting right, as the effect of a polarizer is difficult to replicate via editing.
Polarizing filters are a valuable tool for any photographer, especially those who enjoy shooting landscapes, as they can help to create vibrant and dramatic images.
CCD Camera Lenses: Color Corrected or Not?
You may want to see also

Neutral density filters
Neutral density (ND) filters are a powerful tool for photographers, allowing them to reduce the amount of light entering the camera lens and thus helping to avoid overexposed images. They are available in circular and square types and come in various sizes to fit different lenses. ND filters are particularly useful when a longer shutter speed is required during the daytime, such as when creating long exposures of flowing water or capturing the movement of clouds. They can also be used to achieve a shallow depth of field in bright lighting conditions by allowing wider apertures without overexposing the image.
ND filters are typically made of clear or grey-tinted glass and are placed in front of the lens to block some of the incoming light. They are similar to sunglasses in that respect, but unlike sunglasses, ND filters aim to block light evenly across all wavelengths, without affecting the colours in the scene. This is why they are called "neutral".
ND filters are available in different strengths, from a 2-stop ND filter that blocks a smaller amount of light, to a 10-stop ND filter that blocks a significant amount of light. The more stops of light blocked, the longer the shutter speed that can be used without overexposing the image. Some ND filters are variable, allowing photographers to adjust the amount of light blocked by rotating the filter.
When using an ND filter, it is important to adjust the exposure settings accordingly to compensate for the reduced light. This can be done by increasing the shutter speed, aperture, or ISO. For example, if your initial exposure without the filter was 1/400 at f/8 and ISO 64, and you are using a 10-stop ND filter, your new exposure settings should be approximately 2.5 seconds at f/8 and ISO 64.
ND filters are useful in a variety of photography situations, particularly in landscape and nature photography. They can help to create motion blur effects, such as blurring flowing water or clouds, and can also be used to reduce the brightness of the sky while maintaining a correct exposure for the land or water. Additionally, ND filters can enable the use of wider apertures in bright conditions, allowing for a shallower depth of field and selective focus effects.
It is recommended to invest in high-quality ND filters to avoid negatively impacting image quality. Lower-quality filters may introduce optical aberrations, flare, or colour shifts that can be difficult to fix in post-processing.
Understanding Camera Focal Lengths: A Beginner's Guide
You may want to see also

Graduated neutral density filters
GND filters have a vertical transition between dark and clear to balance the exposure between the sky and the foreground. They come in different strengths, which are measured in "stops" of light, and vary in the rate of transition from dark to clear. The number of stops of light determines how much the filter will darken the scene.
There are three common types of GND filter:
- Hard-edged: Has a neutral grey half that sharply transitions to clear in the centre. This type of filter is used to balance out high-contrast scenes, such as a flat horizon with bright skies and a dark foreground, to create an evenly exposed image.
- Soft-edged: More commonly preferred for its smoother gradient between the dark and clear areas. This type of filter is best used if the horizon is not perfectly straight or flat, or if the hard-edged filter creates a noticeable midline in the scene.
- Reverse: A special filter used by landscape photographers to capture beautiful sunrises and sunsets when the sun is close to the horizon. This type of filter changes from dark to darker on the top half, and then transitions to clear on the lower half, for the foreground.
GND filters can be applied physically, by placing one in front of the lens, or digitally, by applying an exposure gradient in RAW development or using multiple exposures and combining them using photo editing software.
Removing Plastic: Camera Lens Cleaning Tips
You may want to see also
Frequently asked questions
Camera lens filters are mostly made of high-quality glass or resin and are attached to the front of a lens to block or filter certain colours or types of light coming into the camera.
The most common types of camera lens filters include polarizing filters, UV/haze filters, neutral density filters, graduated neutral density filters, and warming/cooling or colour filters.
Camera lens filters can help enhance your photography in many ways. They can protect your lenses, enhance colours, handle difficult lighting situations, and add creative effects to your images.
Be selective in your filter use and maintain image quality. Avoid stacking filters on top of each other unless necessary as this can reduce image quality. Be wary of vignetting when using wide-angle lenses.


