Laptop cameras often have low resolution, which is why many users opt for an external webcam. Switching from a laptop camera to a webcam is a straightforward process. This article will guide you through the steps to make the switch on both Windows and Mac devices.
To switch to an external webcam on a Windows PC, you must first disable your laptop's built-in webcam. You can do this by accessing the Device Manager and selecting Disable device. Once disabled, connect your external webcam via USB or Bluetooth, and wait for your computer to recognise the new hardware.
On a Mac, connect your external webcam via USB or Bluetooth. Open the Photo Booth software, and select Camera from the menu bar. From the drop-down list, choose your external webcam, and your laptop will switch from the regular iSight webcam.
| Characteristics | Values |
|---|---|
| Switching process | Straightforward |
| Windows PC | Turn off the built-in webcam and configure the external webcam as the primary webcam |
| Windows PC steps | Open the Run dialog, access Control Panel, set the "View by" option, choose "Devices and Printers", find the external webcam, right-click on it, and click "Set as Default Device" |
| If the webcam doesn't appear in "Devices and printers" | Disable the laptop camera by opening the Run dialog box, accessing "Device Manager", selecting "Imaging Devices", and choosing "Disable" for the internal webcam |
| Windows 10 | Disable the laptop camera by pressing Windows + X, selecting "Device Manager", choosing "Disable" for the internal webcam, and observing if the issue remains |
| Windows 10 alternative | Set the webcam as the default device by pressing Windows + S, typing "Control Panel", choosing "View Devices and Printers" under "Hardware and Sound", right-clicking on the webcam, and selecting "Set this device as the default" |
| Mac | Connect the camera via USB or Bluetooth, wait for the computer to recognize the webcam, select "Photo Booth" software, go to "Camera" in the menu bar, and select the external webcam from the drop-down list |
| Troubleshooting | Try connecting the camera to another computer to determine if the issue is with the webcam |
| External webcam advantages | Panning, automated tracking, better video resolution, and improved video chat and recording experience |
What You'll Learn
![]()
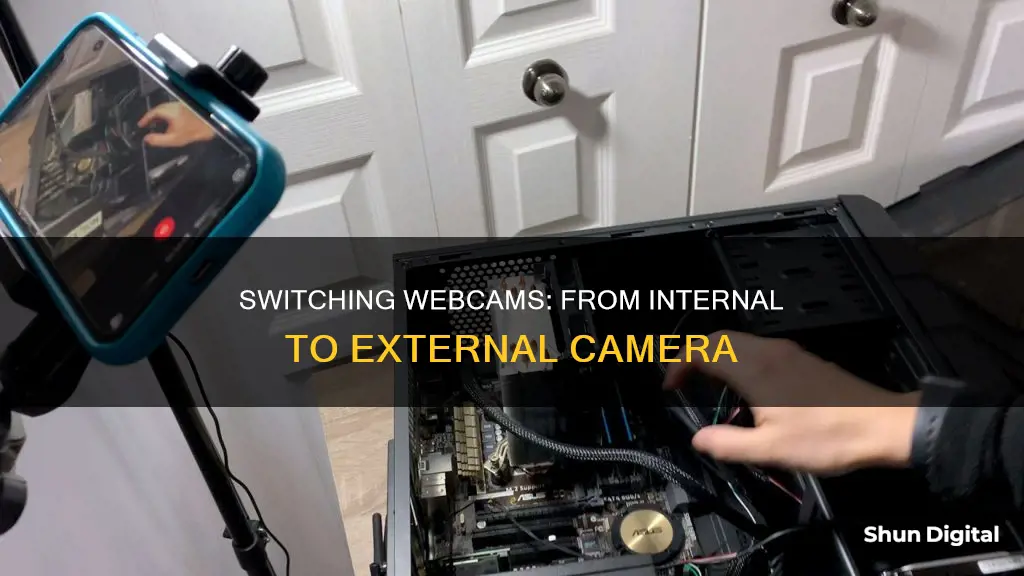
Connecting an external webcam to your computer
An external webcam is a great alternative to a low-resolution internal webcam. It can also be useful if your laptop's built-in camera has stopped working. Before you can use your new external webcam, you'll need to connect it to your computer and disable the internal camera.
Connect your external webcam
Most external webcams connect to your computer via a USB cable. Simply plug the USB cable into your computer's USB port. If you have a Mac, you may need a USB-to-USB-C adapter. Some webcams may also connect via Bluetooth.
Disable your internal webcam
On a Windows PC, you can disable your internal webcam by opening the Device Manager. Right-click on your webcam under "Imaging Devices" and select "Disable". On a Mac, go to System Preferences > Security & Privacy > Privacy > Camera and select your external camera.
Set your external webcam as the default
Once your external webcam is connected and your internal webcam is disabled, you'll need to set the external webcam as the default device. On Windows, go to Control Panel > Hardware and Sound > View Devices and Printers. Right-click on your external webcam and select "Set this device as the default". On a Mac, the external webcam will automatically be used by all apps once selected from the dropdown list in Photo Booth.
Test your external webcam
It's a good idea to test your external webcam once it's connected to ensure it's working correctly. Most video conferencing software, like Skype or Zoom, provide a test mode to check that your camera, microphone, and speakers are functioning properly.
Surveillance Camera Setup: Internet Connection Guide
You may want to see also
![]()
Disabling the internal camera on Windows
Disabling the internal camera on a Windows device can be done through a variety of methods, depending on the version of Windows and the hardware of the device. Here is a detailed guide on how to disable the internal camera on Windows:
Using the Device Manager:
- Press the "Windows key + X" simultaneously to open the system menu and select "Device Manager" from the options.
- Locate and click on "Cameras" or "Imaging Devices".
- Right-click on the integrated webcam and select "Disable device".
- Confirm the action by clicking "Yes" if prompted.
Using the Control Panel:
- Press the "Windows key + R" to open the Run dialog box.
- Type "control" in the box and press "Enter".
- Set the "View by" option to "Large icons" or "Small icons" in the top-right corner of the window.
- Choose "Devices and Printers".
- Right-click on the internal webcam and select "Set as Default Device".
Using the Settings App:
- Open the Settings app and click on the "Privacy" or "Privacy & Security" option.
- In the "Camera" section, turn on "Allow apps to access your camera" or "Camera Access".
- Toggle the slider next to each app or service to allow or block access to the webcam.
Using the BIOS:
This method is ideal as it disables the webcam at a hardware level. However, it is relatively rare and usually found on business laptops from vendors like Dell and Lenovo.
- Reboot your computer and enter the BIOS by following the on-screen instructions, typically by pressing "F2", "DEL", or a function key combination.
- Look for an entry related to the webcam, such as "Webcam", "Integrated Camera", or "CMOS camera".
- Disable or lock the webcam using the available options.
It is important to note that disabling the internal camera may also disable the built-in microphone, as they are usually part of the same module. Additionally, some newer laptops have a physical switch or "kill switch" that turns off the camera.
Adjusting Your Camera: Master Similar Modes
You may want to see also
![]()
Disabling the internal camera on Mac
Disabling the internal camera on a Mac can be done in several ways. Firstly, a simple non-technical solution is to cover the camera with thick masking tape, scotch tape, or even the sticky part of Post-It notes. This method is effective and cheap, but it may leave marks or scratches on your Mac or damage the lens.
Another way to disable the internal camera is by revoking app permissions and restricting browser access. Here are the steps:
- Click the Apple logo on the top right corner of the menu bar.
- Select the System Settings option, then click on Privacy & Security.
- Choose the Camera option under the Privacy menu.
- Disable the toggles for apps that you do not want to access your Mac's camera.
- If you disable the toggle for an active app, a pop-up will appear. Click "Quit & Reopen" to save the changes immediately.
You can also restrict specific browsers from accessing the internal camera. For Safari, follow these steps:
- Open Safari and click on the Safari option in the top right corner of the menu bar.
- Select Settings, then click on Websites and choose Camera under the General window.
- Click on the drop-down menu to the right of any website and select "Deny".
- To disable camera access for all other websites, click the drop-down menu next to "When visiting other websites" and select "Deny".
For Google Chrome:
- Open Google Chrome and click on the Google Chrome option in the top right corner of the menu bar.
- Select Settings, then click on Privacy and Security in the sidebar.
- Click on Site Settings under the Privacy and Security menu.
- Scroll down and click on Camera under the Permissions menu.
- Select "Don't allow sites to use your camera" under the Default Behavior menu.
Additionally, you can disable Mac camera access through Content and Privacy Restrictions in Screen Time:
- Click on the Apple logo, then select System Settings and head to Screen Time.
- Click on Content & Privacy under the Restrictions menu.
- Enable the Content & Privacy toggle if it's not already enabled.
- Click on App Restrictions, then disable the "Allow Camera" toggle and tap "Done" to save the changes.
Lastly, if none of these methods are satisfactory, you can physically disable the webcam by blocking the camera lens with a piece of paper, tape, or a webcam cover slide. However, this method may scratch your display or camera, so use it at your own risk.
Galaxy S8 Camera Mode: Where Is It?
You may want to see also
![]()
Choosing the external webcam in software
If you're using a Mac computer and want to switch from the default, built-in camera, you don't need to disable the internal webcam before installing a USB webcam. Most programs allow you to choose which webcam to use from the software's settings.
For example, in Skype, go to "Options", then "Tools", and click on "Video Device Settings". Choose your preferred webcam from the drop-down list. Similar settings can be found in most programs that support webcams, including Google Hangouts, Apple's Facetime, and WebEx.
If you're using a Windows PC, you can change the default webcam in Windows on the fly, even in the middle of a video call. In Google Meet, click on the Video icon at the bottom of the screen to see the current webcam source, and then click the arrow next to the selected source to choose from the available webcam options.
You can also change the default webcam from the video calling app's settings. In Google Meet, go to the kebab menu (three-dot icon), click on "Settings", and select your default webcam under the "Camera" section under the "Video" tab.
For other video calling apps, look for the webcam icon, which usually has a similar UI to Google Meet.
The Ultimate Camera Bag for A-Mode Photography
You may want to see also
![]()
Uninstalling software linked to the internal camera
Step 1: Access the Device Manager
Use the Windows key + R key shortcut to open the Run dialog box. Then, type "devmgmt.msc" into the Run dialog box and press Enter. This will open the Device Manager, where you can manage all the devices connected to your computer.
Step 2: Locate the Internal Camera
In the Device Manager, scroll down to the "Imaging devices" or "Cameras" section. Here, you will find all the cameras installed on your system, including your internal camera.
Step 3: Uninstall the Internal Camera Driver
Right-click on the internal camera and select "Uninstall." This will initiate the uninstallation process. You may be prompted with a pop-up window asking if you want to delete the driver software from your system. Select the option to completely remove the driver.
Step 4: Restart Your Computer
Once the uninstallation is complete, restart your computer to ensure that the changes take effect.
Step 5: Check for Hardware Changes
After restarting, connect your external camera to your computer. Go back to the Device Manager and click on "Scan for hardware changes." This will allow your computer to detect the new external camera and install the necessary drivers.
Step 6: Update Driver Software (if needed)
If your external camera is not automatically detected, you may need to update the driver software manually. Right-click on the camera in the Device Manager and select "Update Driver Software." Follow the on-screen instructions to browse for the correct driver software and install it.
By following these steps, you will have successfully uninstalled the software linked to your internal camera and switched to using an external webcam on your computer.
Who Gets the Ticket? Speeding Camera Tickets Explained
You may want to see also