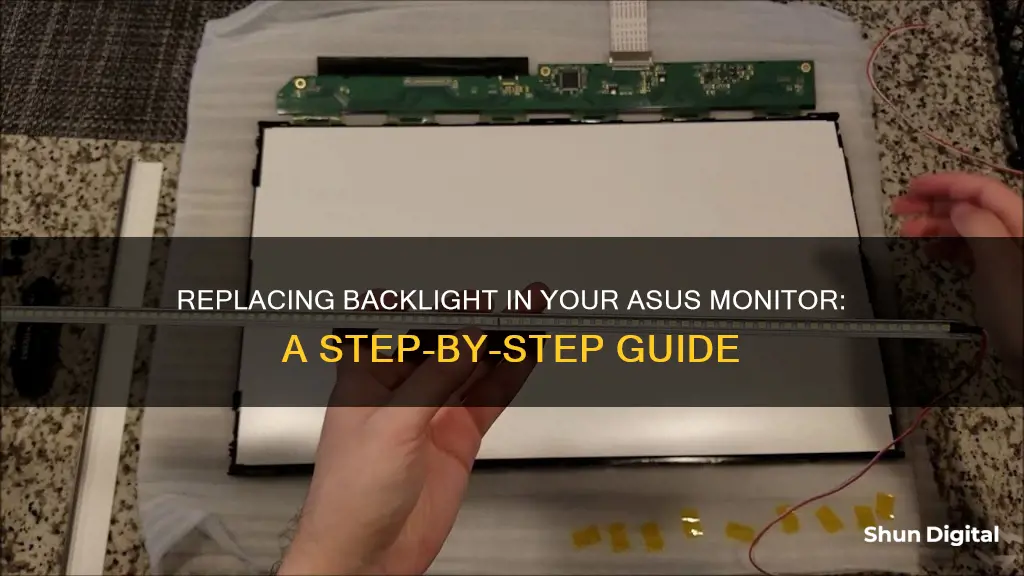
If your ASUS monitor's backlight is malfunctioning, there are several potential causes and fixes. First, you should check if the issue is with the monitor itself by connecting it to a different GPU card or computer. If the problem persists, it's likely an issue with the monitor. Next, try turning the monitor off and on again, as this has been known to fix backlight issues temporarily. If the problem is more severe, you may need to replace the backlight or other components. This will require disassembling the monitor, which will void the warranty, so be sure to research the process thoroughly and proceed with caution.
What You'll Learn

Diagnose the problem with your monitor's backlight
Diagnosing problems with your monitor's backlight can be a tricky process, but there are several steps you can take to identify the issue.
Firstly, check that your monitor is connected properly and receiving power. Look for the power light near the on/off switch when plugged in, and ensure that all cables are connected securely and without damage. If your monitor is not receiving power, try plugging in a different monitor to check if the issue is with the power supply or the monitor itself.
If your monitor is receiving power, the next step is to determine if the problem is with the backlight or another component. A failing backlight will typically cause the screen to dim, flicker, blink, or display an odd colour cast. If you are experiencing these issues, it is likely that your backlight is the culprit.
In some cases, the problem may lie with the high-voltage inverter circuitry, such as bad power transistors, capacitors, or thermal stress on the circuit board leading to broken solder joints. These issues can often be temporary solutions as the bulbs themselves have a limited lifespan, and high-voltage power supplies are prone to failure.
If you are comfortable opening your monitor, you can try testing the backlight bulb. Locate and remove the bulb, disconnect it from the inverter board, and connect a working replacement bulb. If the new bulb lights up, your old bulb was likely faulty. If it remains dark, the issue may lie with your inverter board.
It is important to note that opening your monitor can leave other parts vulnerable to unintentional damage. If you are unsure or uncomfortable with the process, it is best to seek the help of an experienced technician.
Understanding Vivid Pixels on ASUS Monitors: Feature or Flaw?
You may want to see also

Decide whether to repair or replace the monitor
Before deciding whether to repair or replace your monitor, it is important to identify the type and extent of the damage. Some common symptoms of computer screen damage include physical damage, such as cracks or chips in the screen, dead pixels, screen separation, swelling, display issues, and flickering or unresponsive touch screens.
If the damage is physical, such as cracks or chips, you may be able to repair or replace the screen yourself. This option is cost-effective and typically costs around $50-$100 for parts. However, it requires technical skills and confidence, and there is a risk of further damage if the repair is not done correctly.
If you are not comfortable with DIY repairs or suspect more complex issues, it is wise to seek professional help. Professional repairs typically cost between $100-$300 or more, depending on the issue. While this option can be more expensive and time-consuming, it offers expert diagnosis and repair and is suitable for complex issues.
In some cases, especially with older monitors or extensive damage, replacement might be the most practical option. Consider replacing your monitor if the repair costs are high, your monitor is several years old and showing signs of wear, or you need the improved performance offered by newer models. Additionally, if the monitor has recurring issues even after repairs, replacement may be the best option.
When deciding whether to repair or replace your monitor, consider factors such as the cost and availability of parts and services, the age and condition of your monitor, the difficulty and risk of the repair or replacement process, and the expected lifespan and performance of the repaired or replaced monitor. If the damage is minor, affordable, and easy to repair, and the monitor is still under warranty, repairing it may be the best option. However, if the damage is major, the repair is expensive and difficult, and the monitor is no longer under warranty, replacing it may be more cost-effective.
Internet Monitoring Software: Is Your Privacy at Risk?
You may want to see also

Order replacement parts
When your ASUS monitor's backlight stops working, you can opt to replace it with a new one rather than purchasing a new monitor. Here are the steps to order replacement parts for your ASUS monitor:
- Identify the Model of Your Monitor: Different ASUS monitor models have different types of backlights, so it is essential to know the exact model of your monitor before ordering replacement parts. You can usually find the model number on a sticker at the back of the monitor.
- Determine the Type of Backlight: ASUS monitors typically use either LED or CCFL backlights. LED backlights are more common in newer models, while older monitors may use CCFL backlights. Knowing the type of backlight will help you order the correct replacement.
- Visit Online Stores: There are several online stores that offer replacement parts for ASUS monitors. You can visit the official ASUS Accessories website, which provides original ASUS replacement parts for various monitor models. They offer fast delivery and product guarantees. Additionally, websites like Amazon and eBay also have a wide range of ASUS monitor replacement parts offered by different sellers.
- Compare Prices and Reviews: When ordering from online stores, it is essential to compare prices and read reviews from other buyers. This will help you get the best deal and ensure that you are purchasing high-quality parts. Look for sellers with positive feedback and a good return policy.
- Check Compatibility: Before placing your order, double-check that the replacement part is compatible with your specific ASUS monitor model. Pay attention to the size, connector type, and other specifications to ensure a proper fit.
- Consider Bundles: Sometimes, you may find bundles or kits that include multiple replacement parts together. For example, if you need to replace the backlight and some screws, look for bundles that offer both, as this may be more cost-effective than purchasing each item separately.
- Place Your Order: Once you have found the replacement part that matches your monitor model and has positive reviews, go ahead and place your order. Ensure that you provide the correct shipping address and choose a delivery option that suits your needs.
- Track Your Order: After placing the order, keep track of the shipping status and expected delivery date. Most online stores will provide a tracking number or delivery confirmation so you can stay updated on the progress of your shipment.
By following these steps, you can conveniently order replacement parts for your ASUS monitor and restore its backlight to proper functioning. Remember always to exercise caution when performing any repairs or replacements, and refer to reliable sources for guidance if needed.
Asus Monitors: Rapid Response Times Explored
You may want to see also

Disassemble the monitor
To disassemble the monitor, you will need to:
- Pry the panel out of the plastic frame with a tool.
- Detach the buttons' ribbon cable.
- Access the controller and G-SYNC module.
- Remove the panel from its solid metal frame (the inner black border).
It is important to note that disassembling the monitor will void the warranty. Therefore, it is recommended to research online and check for take-apart or teardown guides to see exactly which parts are used and how they are put together.
Additionally, if you are uncomfortable with disassembling the monitor, it is best to seek professional help or contact ASUS support for further assistance.
Governments' Internet Surveillance: Privacy and Security Concerns
You may want to see also

Install the new backlight
To install the new backlight, follow these steps:
- Purchase a replacement backlight: You can find replacement backlights online or at electronics stores. Ensure that the backlight is compatible with your specific Asus monitor model.
- Gather the necessary tools: Before beginning the installation, make sure you have the required tools, such as a screwdriver, pry tool, and any other relevant equipment. Power off the monitor and disconnect all cables before proceeding.
- Disassemble the monitor: Carefully disassemble your Asus monitor, following online guides or manuals to access the backlight component. Take note of the order in which you remove the parts to facilitate easier reassembly.
- Remove the old backlight: Gently remove the old backlight from its housing, being cautious of any delicate components or connections. Take note of how the backlight is positioned and secured for the installation of the new one.
- Install the new backlight: Place the new backlight into the designated housing, ensuring it is securely connected and positioned correctly. Refer to the manufacturer's instructions or online resources for specific installation steps for your monitor model.
- Reassemble the monitor: Carefully reassemble the monitor, following the reverse order of disassembly. Ensure that all components are properly connected and secured.
- Test the monitor: Once the new backlight is installed and the monitor is reassembled, reconnect the power and video cables. Power on the monitor and test its functionality to ensure the backlight is working correctly.
It is important to work carefully and follow safety precautions when working with electronic devices. If you are uncomfortable performing the installation yourself, consider seeking assistance from a professional or specialized repair service.
Easy Guide to Installing ASUS Monitor Driver
You may want to see also
Frequently asked questions
The issue could be due to a faulty backlight power inverter, faulty backlight power cable, faulty lid switch, faulty video cable, or faulty screen. If the screen is still under warranty, it is best to contact Asus support.
If your monitor is not lighting up properly, try turning the monitor off and on again. If that doesn't work, try changing the brightness settings. If the issue persists, the backlight may need replacing.
You can find official replacement parts for your Asus monitor on the Asus Accessories website. They offer various screen models and accessories such as screen stands and bases.
Yes, it is possible to replace the backlight yourself, but it will require disassembling the monitor, which will void the warranty. It is recommended to research online and refer to take-apart guides or videos to identify the specific parts required and the process for your particular monitor model.
Note: If you are unsure or uncomfortable with the process, it is best to seek the help of a professional or contact Asus support.


