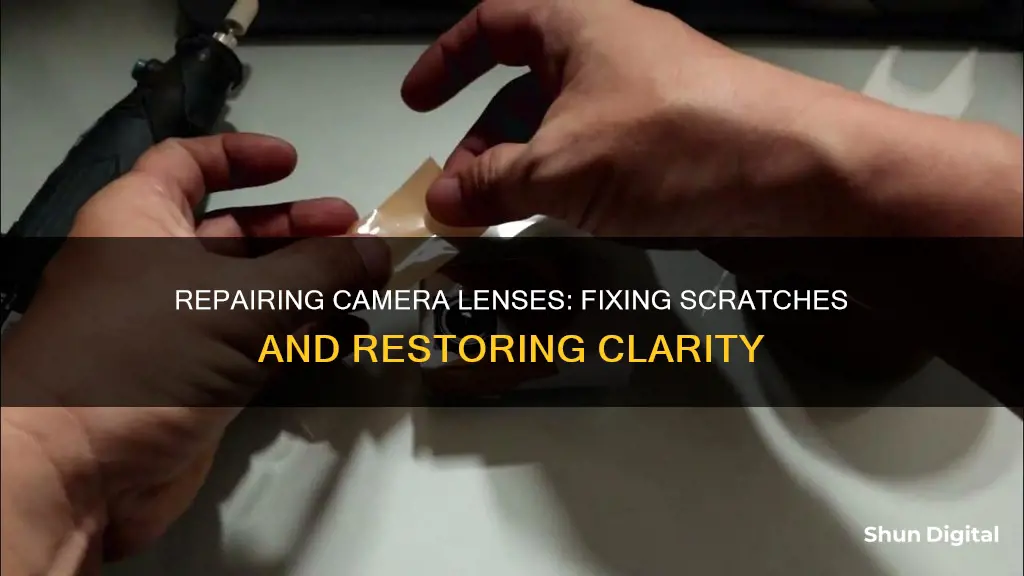
Scratches on camera lenses can be a nuisance, affecting image quality and causing blurring and distortion. Luckily, there are several DIY methods to repair scratched lenses, ranging from using household items like toothpaste, alcohol, and Vaseline to purchasing lens repair kits. Before attempting any repairs, it's important to carefully clean the lens to ensure that the imperfection is indeed a scratch. While some scratches may require professional expertise and specialized tools, many minor scratches can be effectively buffed out using these DIY techniques.
| Characteristics | Values |
|---|---|
| Clean the lens | Use a lens air duster, a cleaning pen, a microfiber cloth, or a mild liquid lens cleaner |
| Use rubbing alcohol | Dilute with water (1 part alcohol to 20 parts water) and apply with a microfiber cloth |
| Apply petroleum jelly | Apply with a microfiber cloth |
| Use a glass polish or scratch remover | Choose a polish with nano glass-coating protection and apply with a microfiber cloth |
| Use toothpaste | Massage onto the lens with a soft cloth or cotton swab |
| Use a soft, unused eraser | Move in the direction of the scratch with a soft, non-abrasive eraser |
| Apply a banana dipped in baking soda | Wipe the lens with the banana, then clean with a microfiber cloth |
| Implement a camera lens scratch-repair kit | Follow the instructions provided with the kit |
| Replace the front element | Send to a professional or buy a new lens |
| Send it to the manufacturer for repair | Call the manufacturer's hotline and check the warranty |
What You'll Learn

Cleaning the lens
Before attempting to repair a scratched camera lens, it's important to clean the lens carefully. This will help you determine whether the imperfection is a scratch or just dirt or a smudge.
Firstly, use a lens air duster to carefully remove any easily accessible dirt and dust. Then, use a cleaning pen or microfiber cloth to remove any remaining debris. If your lens is badly smudged, you can also use a mild liquid lens cleaner.
After cleaning your lens, check it again to determine whether the imperfection is a scratch. If it's a scratch, examine it carefully in different lighting situations to assess how deep it is and how much it will affect your photos. If the scratch is not very deep, you may want to leave it as attempting to repair it could risk damaging your lens or wearing off its protective coating.
If you decide to proceed with repairing the scratch, there are several DIY methods you can try. However, it's important to note that these methods may also carry a risk of damaging your lens or its protective coating, so proceed with caution.
Protect Your Gear: Packing Camera Lenses Efficiently and Safely
You may want to see also

Using rubbing alcohol
Using a microfiber cloth and rubbing alcohol is a popular method for repairing minor scratches on camera lenses. This method involves gently rubbing the affected area with a microfiber cloth that has been dampened with a diluted solution of rubbing alcohol. The alcohol helps to remove any dirt or debris that may be causing the scratch, while the microfiber cloth helps to buff out the scratch itself.
It is important to note that this method may not work for all types of scratches. If the scratch is too deep or has damaged the lens coating, it may require professional repair or replacement. Therefore, caution should be exercised when using this method to avoid causing further damage to the lens.
- Use a lens cleaning brush to remove any dust particles from the lens.
- Mix a solution of rubbing alcohol and water at a concentration of 3.5%: the ratio of water to alcohol should be 20 parts water to 1 part alcohol.
- Dampen a microfiber lens cleaning cloth with the alcohol solution. Be sure not to wet the cloth too much, as you do not want the alcohol to drip onto the lens.
- Gently rub the scratch with the damp cloth using a circular motion until the scratch disappears.
- Use a dry portion of the microfiber cloth or a new cloth to dry the lens.
While this method can be effective for minor scratches, it is important to use caution and avoid applying too much pressure or rubbing too vigorously, as this can cause further damage to the lens. Additionally, it is worth noting that rubbing alcohol may damage the lens coating, so it is important to weigh the risks before proceeding.
In conclusion, while using a microfiber cloth and rubbing alcohol can be a viable solution for minor scratches on camera lenses, it may not work for deeper scratches or those that have affected the lens coating. If you are unsure or uncomfortable with this method, it is recommended to consult a professional for lens repair or replacement.
Blurring Camera Lenses: Techniques for Creative Photography
You may want to see also

Applying petroleum jelly
Firstly, it is essential to clean and dry the camera lens before applying any substance. Use a microfiber cloth to wipe the lens gently, ensuring it is free of dust, dirt, or smudges. Once the lens is clean and dry, you can begin the process of scratch removal with petroleum jelly.
Take a small amount of petroleum jelly and apply it to the surface of the lens. Using the microfiber cloth, gently rub the jelly onto the lens, covering the scratched area. It is important to avoid using excessive force during this process to prevent any damage to the lens or the camera.
After applying the petroleum jelly, carefully wipe off the excess jelly from the lens. Examine the lens to observe the scratch and determine if the appearance of the scratch has improved. It is worth noting that petroleum jelly may not completely remove all scratches, but it can effectively minimise their visibility.
One advantage of using petroleum jelly is its low risk of damaging the camera lens. It is a gentle substance that can be safely applied without causing further harm. Additionally, it is easily accessible and affordable, making it a convenient option for scratch removal. However, it is important to note that the jelly layer may wear off over time, and reapplication may be necessary to maintain the desired results.
While petroleum jelly can be useful for minor scratches, deeper scratches may require alternative methods or professional assistance. It is always recommended to exercise caution and assess the severity of the scratch before proceeding with any scratch removal technique.
Interchangeable Lenses: Mirrorless Camera Flexibility Explored
You may want to see also

Using a glass polish or scratch remover
A scratched camera lens can be frustrating, but there are a few methods to repair it, depending on the severity of the scratch. While minor scratches can be buffed out with a soft cloth and a mild abrasive, deeper scratches may require a lens repair kit or professional service. Here's a step-by-step guide to using a glass polish or scratch remover to repair scratched camera lenses:
Step 1: Assess the Scratch
Before attempting any repair, it is important to assess the severity of the scratch. Minor scratches are those that are shallow and do not penetrate the lens coating. Deeper scratches may have damaged the lens coating and will require a different approach. If you are unsure, it is always best to consult a professional.
Step 2: Choose the Right Glass Polish or Scratch Remover
Not all glass polishes and scratch removers are created equal. For camera lenses, it is important to choose a product specifically designed for this purpose. Look for a glass polish with "advanced formula nano-coating protection." These products are designed to repair scratches and restore the lens coating.
Step 3: Gather Your Materials
In addition to the glass polish or scratch remover, you will need a few other materials. These include a microfiber cloth, soft eraser, and a bowl of water. The microfiber cloth should be clean and free of any debris that could cause further scratching.
Step 4: Prepare the Lens
Before applying any products, it is important to clean the lens and remove any dirt or debris. Use a soft cloth or lens cleaning brush to gently wipe away any dust or grime. It is important to be gentle during this step to avoid further damaging the lens.
Step 5: Apply the Glass Polish or Scratch Remover
Follow the instructions on the chosen product for proper application. Typically, you will apply a small amount of the product to the lens using a clean microfiber cloth. Use a consistent, circular motion and gentle pressure without pushing down too hard. Work the product into the scratch until it is no longer visible.
Step 6: Rinse and Dry the Lens
Once you have finished applying the glass polish or scratch remover, rinse the lens with clean water to remove any residual product. Use a soft, lint-free cloth to gently dry the lens. Be sure to inspect the lens to ensure the scratch has been removed. If the scratch is still visible, you may need to repeat the process or consult a professional.
Additional Tips:
- Always use a soft cloth when working on camera lenses to avoid further scratching.
- Avoid using too much pressure when applying the glass polish or scratch remover.
- Be cautious when using any product that contains abrasive materials, as they can further damage the lens.
- If the scratch is severe or you are unsure about the repair process, consult a professional camera repair service.
Understanding Camera Lenses: A Beginner's Guide to Reading Them
You may want to see also

Using a soft, unused eraser
If you have a scratched camera lens, there are a few methods you can use to try and repair it, depending on the severity of the scratch. However, it's important to exercise caution when attempting to repair a camera lens, as further damage can occur. One method is to use a soft, unused eraser to gently buff out the scratch. Here's a step-by-step guide:
- Ensure the eraser is soft and unused. A used eraser may contain particles of dirt or debris that could further scratch the lens.
- Clean the lens with a microfiber cloth and water to remove any dust or fingerprints. It is important to ensure the lens is clean before attempting to remove the scratch, as dirt or debris can cause further scratches during the buffing process.
- Gently rub the scratch with the eraser using a circular motion. Apply light pressure and avoid pressing too hard, as this can damage the lens coating or cause further scratches.
- Continue buffing the scratch for a few minutes, or until it is no longer visible. Take care not to over-polish the lens, as this can cause damage.
- After buffing, clean the lens again with a microfiber cloth and water to remove any residue from the eraser. Dry the lens with a clean, soft cloth.
While this method can be effective for minor scratches, it may not work for deeper scratches or those that have penetrated the lens coating. If the scratch is severe, it is recommended to seek professional repair services or consider replacing the lens. Additionally, some experts advise against using an eraser on camera lenses, as it may contain abrasive particles that can cause further scratches.
It is always important to exercise caution when attempting to repair a camera lens. Over-polishing or using too much pressure can further damage the lens. If you are unsure about the severity of the scratch or how to proceed, it is best to consult a professional lens repair service for advice.
Radioactive Camera Lenses: Are They Safe to Use?
You may want to see also
Frequently asked questions
There are several methods to repair a scratched camera lens, including using toothpaste, a pencil eraser, a glass windscreen polish, or a camera lens repair kit.
Household products that can be used to repair a scratched camera lens include rubbing alcohol, Vaseline, and baking soda and a banana.
Professional services that can repair a scratched camera lens include sending the lens to the manufacturer or a repair shop.
To prevent your camera lens from getting scratched, always keep your lens caps on, make sure your lens is clean and dry before capping, and use a soft cloth to clean.


