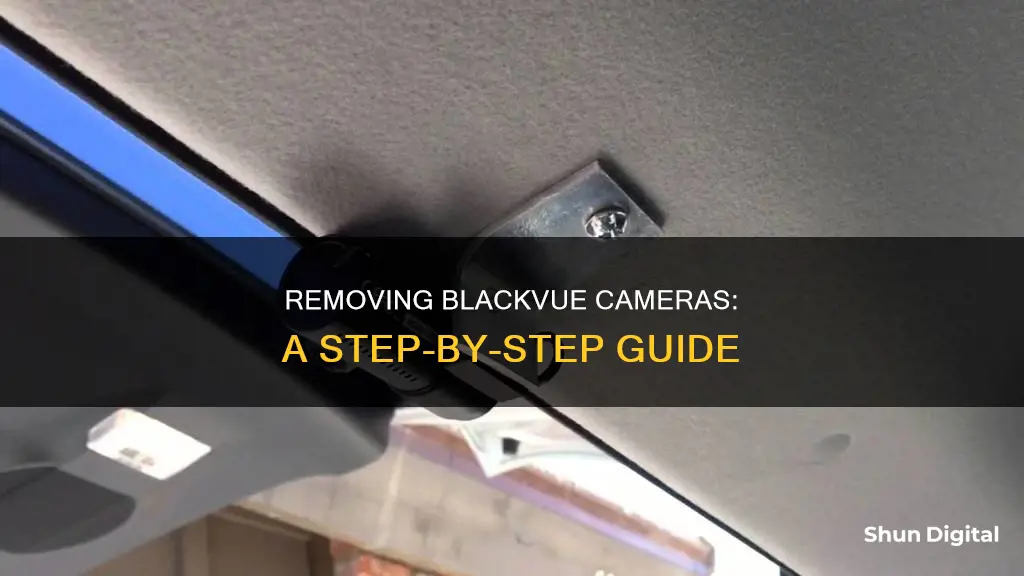
Removing a BlackVue camera from your vehicle can be a tricky process. The 3M Dual-locking adhesive on the mount is extremely strong and hard to remove with your fingers alone. The best tools to use are a pry tool or a heat gun, such as a blow dryer. You can insert the pry tool between the dash cam mount and the windshield, and peel the adhesive off with the mount. With a heat gun, you can heat up the adhesive and melt it off the windshield, then twist the mount back and forth to loosen it. If you are removing a camera from your BlackVue account, you will need to contact customer service and provide them with the camera's serial number.
| Characteristics | Values |
|---|---|
| Removing the dashcam from its bracket | Press the LOCK button and pull the dashcam out of the mounting bracket |
| Inserting the dashcam into its bracket | Push the dashcam into the mounting bracket until it "clicks" in |
| Removing the rear camera from its bracket | Hold the mounting bracket and pull the rear camera out |
| Inserting the rear camera into its bracket | Push the rear camera into the mounting bracket until it "clicks" in |
| Removing the dashcam from the mount holder | Remove the power cable jack from the BlackVue dashcam, remove the coaxial or video cable (if you have a two-channel dashcam), press the LOCK button on the mount holder to release the lock, and pull out the dashcam from the mount holder |
| Removing the dashcam from the windshield | Use a pry tool or a heat gun to remove the dashcam from the windshield |
What You'll Learn

Removing a BlackVue camera from your account
To remove a BlackVue camera from your account, you will need to first log in to your Cloud account. From there, you can follow these steps:
- Locate the camera you want to unregister and tap the options button.
- Select "Unregister camera".
- Check the guidance on the removing camera from the Cloud pop-up and tap the "Remove" button.
- Your camera will now be unregistered and can be set up with a new account.
If you are unable to locate the camera on your account, you may have two different emails registered with BlackVue and thus two separate accounts. Try logging in to the BlackVue app with any other email addresses you may have used, and perform any password resets necessary.
If this still doesn't work, you can contact BlackVue customer service by email and request they disassociate the camera from your account. You will likely need to provide them with the full serial number of the camera you want to have removed.
If you want to delete your entire BlackVue account, you can do so via the BlackVue Mobile App or the BlackVue Cloud Website.
Deleting your BlackVue account via the BlackVue Mobile App:
- Log in to your account and go to the Profile tab.
- Select the More tab.
- Click Delete account.
- Read the terms before deleting your account and click the "Delete account" button to proceed.
Deleting your BlackVue account via the BlackVue Cloud Website:
- Go to www.blackvuecloud.com and click the "Start Web Viewer" button on the upper right corner of the landing page.
- Enter your email and password to proceed with the login.
- Click the Account icon (Account profile picture) located on the top right corner of the page that appears and then click Account.
- Select Delete account on the left panel.
- Read the terms/conditions before deleting the account and then press the Delete account button if you agree to proceed.
Wyze Camera Privacy: Who Can See Your Footage?
You may want to see also

Removing the front camera
- Before you begin, ensure you have the necessary tools. A pry tool is typically provided with your dashcam kit, but if not, you can purchase one separately or use a trim tool, credit card, piano wire, or knife. Alternatively, a heat gun or blow dryer can be used to heat up and melt the adhesive.
- Begin by locating the lock button on the mounting bracket. This is usually labelled with a lock symbol or the word "LOCK".
- Press the lock button and simultaneously pull the dashcam out of the mounting bracket. You may need to apply some force, but be careful not to damage the camera or bracket.
- Once the camera is removed from the bracket, you can proceed to detach the power cable jack and any other cables connected to the camera. This may include a coaxial or video cable if you have a two-channel dashcam.
- If you are completely removing the dashcam from your vehicle, you will also need to deal with the adhesive mount still attached to your windshield.
- Using your pry tool, insert it between the dashcam mount and the windshield. You should aim to peel the adhesive off with the mount, as this will make cleanup easier.
- Gently twist and pry until the adhesive begins to separate from the windshield. This may take some time, but be careful not to damage the glass.
- Alternatively, you can use a heat gun or blow dryer to heat up the adhesive. Aim the heat source at the adhesive attachment for around 10 to 15 seconds, then softly twist the mount back and forth to loosen the adhesive.
- Once the dashcam and mount are completely removed, use a cleaning spray or wipe to remove any remaining residue from your windshield. Ensure that the cleaning products you use are safe for glass surfaces.
By following these steps, you should be able to successfully remove the front camera of your BlackVue dashcam without causing any damage to your vehicle or the camera itself.
Running from the Camera's Eye: A Private Runner's Tale
You may want to see also

Removing the rear camera
To remove the rear camera of a BlackVue dashcam, you will need to follow a specific set of steps to ensure the process is safe and effective. The following instructions will guide you through the removal procedure:
Firstly, locate the mounting bracket of the rear camera. This is the component that secures the camera in place. Hold onto this bracket firmly, as you will need to apply some force to remove the camera. Next, gently pull the rear camera out of the mounting bracket. Be careful not to pull too forcefully, as you do not want to damage the camera or any connected components. Once the camera is free, set it aside in a safe place where it will not be damaged.
Now, you will need to focus on the mounting bracket and any adhesive residue that may be left on the windshield. The adhesive used to secure dashcams is extremely strong, so removing it can be challenging. There are two recommended methods for this: using a pry tool or a heat gun. If you have access to a pry tool, carefully insert it between the mounting bracket and the windshield. You should aim to peel the adhesive off with the bracket, as this will make cleanup easier. Alternatively, a heat gun can be used to melt the adhesive. Please exercise caution when using a heat gun and always follow safety guidelines. Direct the heat towards the adhesive for around 10 to 15 seconds, and then gently twist the mounting bracket back and forth to loosen it.
After removing the mounting bracket, there may still be some residue left on the windshield. To remove this, you can use either a cleaning spray or cleaning wipes. For the spray method, apply the cleaning product to the residue and wipe it away thoroughly. Products such as Goo-Gone, Windex, or alcohol rubs are recommended for effective removal. If you opt for cleaning wipes, be sure to use ones that are suitable for glass surfaces to avoid causing any damage to your windshield.
If your car window is tinted, you will need to take extra care during the removal process. A heat gun is preferable in this case, but be sure not to hold it too close or for too long, as you do not want to damage the tint. Loosen the adhesive with the heat gun, and then slowly pull the mounting bracket away from the tint, holding the tint steady with your other hand. To make future removals easier, consider using a thin screen protector or static-cling film between the windshield and the camera's mount.
Vizio Smart TV Camera Hole Location Explained
You may want to see also

Removing the camera from the cloud
To remove your BlackVue camera from the cloud, you must first log in to your BlackVue Cloud account. From there, you can follow these steps:
- Tap the sub-menu button of the cloud-connected camera that you want to remove from your cloud slot.
- Tap "Remove from cloud".
- Check the warning message pop-up and tap the "Remove" button to confirm.
- Your camera will now be disconnected from the Cloud and can only be accessed via Wi-Fi.
If you want to completely remove the camera from your camera list, you can follow these additional steps:
- Tap the sub-menu button of the deleted camera from the Cloud.
- Tap the “Delete camera” button.
- Check the warning message pop-up and tap the “Delete” button to confirm.
- Your camera is now removed from your camera list.
Note that removing the camera from the Cloud also frees up a Cloud slot. For example, if you are a Free Plan user with one camera slot available and you want to add a new camera to the Cloud, you can simply remove the old camera to free up a slot for the new one.
If you are selling or buying a second-hand Cloud BlackVue, it is important to ensure that the previous owner has unregistered the dashcam. If the camera is still registered to the previous owner's account, you will not be able to register it under your own account.
Capturing Orbs: A Guide to Seeing Them Through Your Camera Lens
You may want to see also

Removing the camera from a group
To remove a camera from a group on the BlackVue app, you must be the fleet plan owner or admin with the right to delete the camera assigned to your group.
- Get into the group camera list.
- Activate the edit mode by tapping the multi-selection icon.
- Check the box that appears on the camera list.
- When the remove guidance modal pop-up is exposed, tap the "Remove" button.
If you are the owner of the fleet plan, you can check the removed camera from the group on your general camera list. The camera will be shown on the list but can only be accessed as a Wi-Fi camera.
If you are the administrator or driver, you cannot check the removed camera from the group that you were assigned.
If you are having trouble removing the camera from your account, you may have two different emails registered with BlackVue and thus two separate accounts. Try logging in to the BlackVue app with any other email addresses you may have used, and perform any password resets necessary. If this doesn't work, contact BlackVue customer service by email and request they disassociate the camera from your account. You will likely need to provide them with the full serial number of the camera you want to be removed.
Behind the Scenes: What the Camera Missed
You may want to see also
Frequently asked questions
To remove your dashcam from its bracket, press the LOCK button and pull the dashcam out of the mounting bracket.
Try logging in to the BlackVue app with any other email addresses you may have used, and perform any password resets necessary. If this doesn't work, contact BlackVue customer service by email and request they disassociate the camera from your account. You will likely need to provide them with the full serial number of the camera.
The 3M Dual-locking adhesive on the mount is extremely strong and very hard to remove with your fingers alone. The best method is to use a blow dryer or a heat gun to melt the adhesive. You can also use a pry tool, which is usually provided with your dash cam kit.


