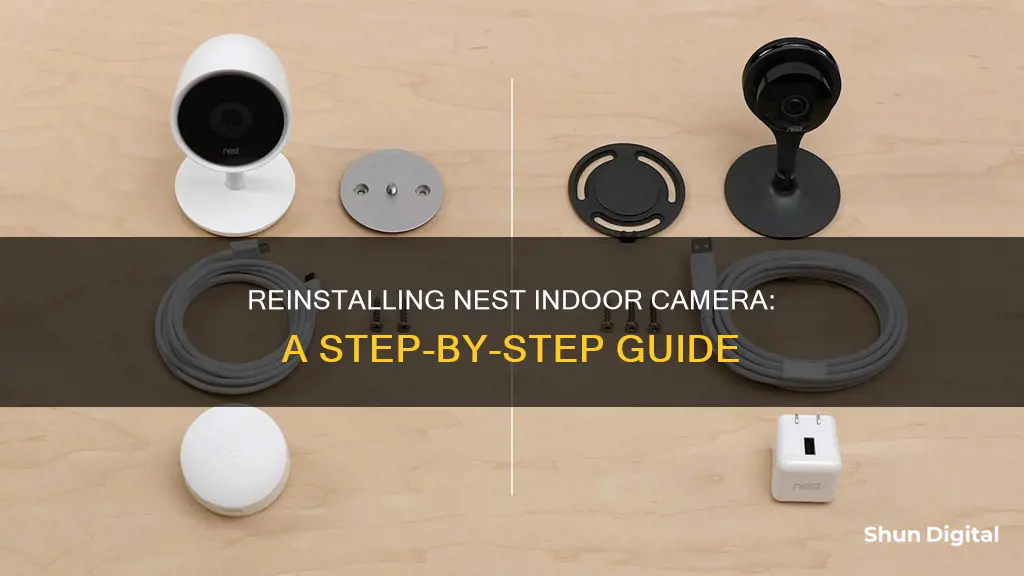
If you're looking to remove and reinstall your Nest indoor camera, you've come to the right place. This guide will walk you through the process step-by-step, covering everything from detaching the camera from its stand or mount to performing a factory reset and getting it back online.
First, let's talk about removing your Nest camera from its stand or mount. Depending on the model, the process will vary slightly. For the Nest Cam Indoor, simply grip the base of the camera and pull it away from the metal wall plate. If you have the Nest Cam IQ Indoor, the stand and base are not detachable, so no further action is needed. For other models, such as the Nest Cam Outdoor, you'll need to grip the camera and pull it away from the magnet or use the included hex key to detach it from the base.
Now, let's discuss reinstalling your Nest indoor camera. If you're experiencing issues with your camera, you may need to perform a reconnection or a full reset. For a simple reconnection, try cycling the power by unplugging the camera for about 10 seconds and then plugging it back in. This will usually resolve any minor issues.
If a simple reconnection doesn't work, you may need to perform a factory reset. This will wipe all your stored settings and data, returning the camera to its default factory settings. To do this, make sure your camera is plugged into an outlet and powered on, then press and hold the reset button on the back of the camera for about 5 seconds. The camera will begin its factory reset, and when it's complete, the light will glow white.
Keep in mind that performing a factory reset will delete all your camera's video history, so be sure to save any important footage before proceeding. Additionally, you'll need to set up the camera again as if it were new.
By following these steps, you should be able to successfully remove and reinstall your Nest indoor camera, troubleshooting any issues and getting it back online.
| Characteristics | Values |
|---|---|
| Restarting a Nest Cam | Unplugging the camera from power for 10 seconds |
| Factory reset | Press the reset button on the back of the camera for 5 seconds |
| Removing a Nest camera from its stand or mount | Grip the base of the camera and pull it away from the plate |
| Removing a Nest camera from the app | Open the Nest app, tap Settings, tap the camera, and tap Remove Camera |
What You'll Learn

Removing the Nest camera from its stand or mount
To remove your Nest camera from its stand or mount, you will need to identify which model you have.
Nest Cam (wired, indoor, 2nd gen)
Note: The Nest Cam (wired) cannot be detached from its stand.
To remove your camera from the wall plate, grab your camera from its base (not the camera head), and then turn it counterclockwise. Your camera will click as it detaches from the wall mount.
Nest Cam Indoor
The Nest Cam Indoor attaches to the metal wall plate with a strong magnet. To remove it from the wall plate, grip the base of the camera and pull it away from the metal plate.
Nest Cam IQ Indoor
If you placed your Nest Cam IQ Indoor on a surface like a shelf, you don’t need to do anything else. The stand and base are not detachable from the camera head.
If you installed your camera with the wall mount, rotate the camera’s base until it unscrews from the mount. Then you can remove the screws that hold the mount in place on your wall or ceiling.
Nest Cam Outdoor
Your Nest Cam Outdoor attaches to a metal plate with a strong magnet. To remove your camera from the base, simply grip the camera and pull it away from the magnet.
Nest Cam IQ Outdoor
Your Nest Cam IQ Outdoor uses a lock to securely attach to your wall. You’ll need to use the included 2.5 mm (3/32”) hex key to detach your camera from the base. Insert the hex key into the hole on your camera's base and turn it counterclockwise.
Simplisafe Camera Viewing: A Step-by-Step Guide
You may want to see also

Unplugging the camera from power for 10 seconds
Unplugging the camera from its power source for 10 seconds is a simple way to restart your Nest indoor camera. This can be done to re-establish the link to your Wi-Fi network and have the device show up in Google Home. It is a good first step to take if you are experiencing issues with your camera.
To do this, simply remove the plug from your power outlet and count slowly to 10. This ensures that all power is drained from any internal capacitors that might still have a charge. Once you've reached 10 seconds, plug the camera back in. The camera will then begin its startup processes and reconnect to your network.
If you are still experiencing issues, you may need to try a full factory reset. However, keep in mind that a factory reset will wipe all your stored settings and data, and your camera's entire video history will be deleted permanently.
Cameras: Always Watching, Always Listening?
You may want to see also

Using the Google Home app to reset the camera
To reset your Nest camera using the Google Home app, follow these steps:
Open the Google Home app and sign in:
If you don't already have the Google Home app, you can download it on your device. Open the app and sign in to your Google account.
Access your camera settings:
Tap the "Device" tab, then tap on the camera you want to reset. This will open the settings for that particular camera.
Remove the camera:
In the camera's settings, scroll to the bottom and tap "Remove [Camera Name]." You will then be asked to confirm your choice. Removing the camera from the app will permanently delete all of its recorded video history.
Confirm removal:
Tap "Confirm" to finalize the removal of the camera from the app.
Factory reset your camera:
If you want to perform a factory reset, make sure your camera is plugged into a power outlet and powered on. Then, locate the reset button on the back of the camera. Press and hold the button for about five seconds. The camera will then begin its factory reset, and when the process is complete, the light will glow solid white.
Set up your camera again:
To use the camera again, you will need to set it up as if it were a new camera. This can be done through the Google Home app or the Nest app, depending on the model of your camera.
Action Cameras: Witnessing Combat, Capturing Reality
You may want to see also

Removing the camera from the Google Home app
To remove your Nest camera from the Google Home app, you must first open the app and sign in to your Google account.
Then, follow these steps:
- Touch and hold the device listed on the Device tab.
- Tap "Settings".
- Tap "Remove device".
- Tap "Remove" again to confirm.
Your camera will now be removed from the app. Note that this will not perform a factory reset on your camera. If you wish to do that, you must press and hold the reset button on the back of the camera for 5 seconds.
Mastering the Art of Spy Camera Wristwatches
You may want to see also

Factory resetting the camera
Factory resetting your Nest indoor camera is a good way to remove a glitch or to ensure none of your personal data remains on the device before you sell it. It is a more serious procedure than simply restarting your camera, as it will remove any settings or connections you have made and return the camera to its factory settings.
Step 1: Ensure your camera is plugged into an outlet and powered on
It is important that your camera is connected to a power source throughout the factory reset process.
Step 2: Locate the reset button
The reset button is located on the back of the camera.
Step 3: Press and hold the reset button
Continue pressing and holding the button for a full five seconds.
Step 4: Wait for the camera to begin its factory reset
When the process is complete, the light on your camera will glow solid white.
Additional notes:
- Your camera's user-created settings will revert to default settings.
- Your camera's entire video history will be deleted permanently, so be sure to save any video footage you want to keep before performing the factory reset.
- Your camera will not automatically reconnect to Wi-Fi, and you will need to set it up again.
- If you are giving your camera to someone else, make sure to do a factory reset before handing it over.
- If you are having trouble with your Nest camera, it is recommended that you first try restarting it before attempting a factory reset.
Canada's Camera TV Show: How Long Did It Last?
You may want to see also
Frequently asked questions
This depends on the model of your Nest camera. For the Nest Cam Indoor, grip the base of the camera and pull it away from the metal plate. For the Nest Cam IQ Indoor, no additional steps are required as the stand and base are not detachable from the camera head. For the Nest Cam Outdoor, grip the camera and pull it away from the magnet. For the Nest Cam IQ Outdoor, use the included hex key and insert it into the hole on the camera's base, turning it counterclockwise to detach it from the wall.
Open the Google Home or Nest app and sign in to your Google account. Tap the camera you want to remove, then tap Settings. Scroll down and select "Remove [product name]". Confirm your choice when prompted.
Ensure your camera is plugged into an outlet and powered on. Press and hold the reset button on the back of the camera for 5 seconds. The camera will then begin its factory reset and the light will glow white when complete.
Reinstalling your Nest camera will depend on the model of your camera and whether you are using the Google Home or Nest app. For newer Nest cameras, open the Google Home app and sign in to your Google account. Tap the Device tab, followed by Add + > New device. Choose the home you want to add your camera to and select the camera model. Use your phone's camera to scan the device's QR code or enter the setup code. Follow the app instructions to complete the installation.
Restarting your Nest camera will keep all your settings and it should reconnect to the same Wi-Fi network. This is helpful if your camera is frozen, having trouble connecting to the internet, or isn't working normally. Factory resetting your Nest camera, on the other hand, will erase all your personalized settings, delete the entire video history, and restore the camera to its factory default settings. It will not automatically reconnect to Wi-Fi and you will need to set it up again.


