The Motorola Hasselblad True Zoom Camera for the Moto Z Droid is a great way to improve your mobile photography. With 10x optical zoom, you can capture detailed photos from a distance without affecting resolution. The camera also features a Xenon flash that lights up your subject evenly, giving you crisp, blur-free pictures in any environment. To focus the camera, simply drag the focus ring to the desired location. This Moto Mod is a must-have for any Moto Z Droid owner looking to enhance their mobile photography experience.
What You'll Learn
![]()
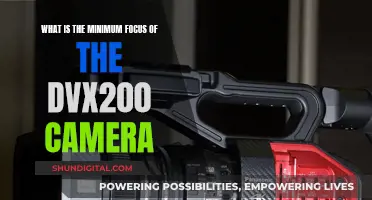
Using the Hasselblad True Zoom Camera Moto Mod
The Hasselblad True Zoom Camera Moto Mod is an add-on camera for the Motorola Moto Z Droid, Moto Z Force Droid, and Moto Z Play Droid. It features a 10x optical zoom, a physical shutter and zoom, and shoots in raw format. The mod is easy to attach and use, with a convenient, portable design. The Xenon flash provides even lighting, resulting in crisp, blur-free pictures even in low-light environments.
The True Zoom has a 12-megapixel 1/2.3-inch sensor and a 25-250mm-equivalent focal length range. It offers manual control over white balance, timer, ISO, and focus through its Professional Mode. The mod also enables raw+JPEG shooting and includes scene modes and black-and-white shooting in Auto.
The True Zoom only adds about 5 ounces (144g) and 0.6 inches (15mm) to the phone's dimensions. It is powered by the phone and can drain the battery quickly, so it is recommended to have a power bank when using the mod for extended periods.
The camera app can be frustrating to use as it always reverts to default settings, and the physical shutter button is too sensitive, making it challenging to frame shots precisely. The video quality is also not impressive, with HD videos exhibiting compression artifacts.
Overall, the Hasselblad True Zoom Camera Moto Mod is a great option for Moto Z owners who want the convenience of a zoom lens and are willing to sacrifice some image quality for the added flexibility in photo-framing.
Charging Your Kodak Camera: A Step-by-Step Guide
You may want to see also
![]()
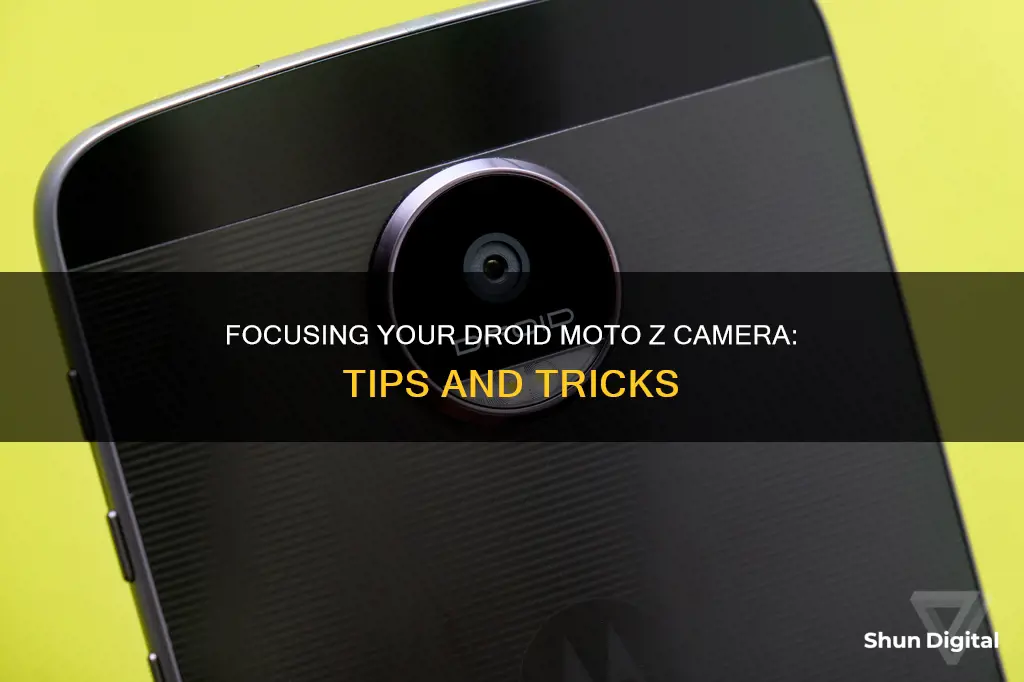
Adjusting the focus location
To adjust the focus location on your Moto Z Droid camera, you can use the focus ring. Here's a step-by-step guide:
- Open the camera app on your Moto Z Droid.
- Frame your subject by tapping on the screen to select the area you want to focus on.
- To change the focus location, simply drag the focus ring to the desired position. You can drag it up, down, left, or right to adjust the focus accordingly.
- Once you're happy with the focus, you can capture the photo by tapping the shutter button.
The focus ring also allows you to adjust the exposure of your shot. To do this, slide the control on the focus ring to the left or right to lighten or darken the image before capturing the photo.
Additionally, if you want to switch between the front-facing and back-facing cameras, you can do so by tapping the screen to toggle between the two lenses.
The First Camera: A Country's Legacy
You may want to see also
![]()
Changing the exposure
The Moto Z Droid has a native camera that is very impressive and outperforms the Apple iPhone 7. However, the Hasselblad True Zoom mod is a great addition to the phone's camera capabilities. This mod includes a physical shutter release button, a physical zoom switch, and an on/off button. The mod also switches the phone's stock camera app to "Professional mode", allowing for manual camera control via the touchscreen.
In Professional mode, you can adjust the ISO, capture mode, and choose to shoot in RAW or JPG format. You can also select the photo and video size in the settings. However, manual camera control is still limited as you cannot adjust the aperture or shutter speed.
- Utilize the physical shutter and zoom controls on the mod to have more precise control over your exposure. By adjusting the zoom and the amount of light entering the lens, you can change the exposure of your photos.
- Use Professional mode to manually adjust the ISO. A higher ISO will increase the sensitivity of your camera's image sensor, allowing more light to be captured and resulting in a brighter image. Conversely, a lower ISO will decrease the sensitivity and capture less light, resulting in a darker image.
- Experiment with different capture modes such as Action or Portrait mode to see how they affect the exposure of your photos. Each mode will have different default settings that can impact the exposure.
- Try shooting in RAW format instead of JPG. RAW format captures more data and gives you more flexibility when editing your photos, including adjusting the exposure during post-processing.
- If you are in a low-light environment, consider using the Xenon flash on the Hasselblad True Zoom mod. This will light up your subject evenly and help you achieve a well-exposed shot.
- If you are shooting in a bright environment, you may want to decrease the exposure compensation to avoid overexposing your photos. You can do this by tapping on a darker area of the scene in your viewfinder to adjust the camera's meter reading.
Exploring Adobe Camera Raw: Mastering the Undo Functionality
You may want to see also
![]()
Using the professional mode
The Moto Z Droid features a Professional Mode in its camera settings, which gives you more control over your photos by allowing you to change the White Balance, Timer, ISO and Focus. This mode is not the best when trying to quickly snap some pictures, but if you have time to capture a shot, this is the mode you'll want to be in.
To access Professional Mode, tap the camera icon above the shutter button to switch between the different modes.
In Professional Mode, you can adjust the following settings:
- Shutter speed: Control how long the shutter stays open, affecting how much light hits the camera sensor.
- Manual focus: Adjust the focus of the image to ensure your subject is sharp and in focus.
- ISO: Determine the sensitivity of the camera sensor to light, which can affect the brightness and noise of your image.
The Moto Z Droid's Professional Mode gives you the tools to capture more creative and technically proficient photographs. It is an excellent choice for photographers who want more control over their images and are willing to spend a bit of extra time adjusting settings to get the perfect shot.
The Evolution of Ricoh Cameras: A Global Manufacturing Journey
You may want to see also
![]()
Shooting in HDR mode
HDR mode on the Moto Z camera can be accessed by installing a third-party app such as Camera NX, which enables full HDR+ photography. HDR mode improves the dynamic range between the darkest and brightest colours in your photo.
HDR mode is best used when there is a lot of light and dark in the same image, such as in a photo with shadows. It is not recommended for pictures that are evenly lit or predominantly dark, as it can make the image look artificial. HDR mode is also not suitable for moving subjects, as it can cause blurring and ghosting.
When shooting in HDR mode, the camera takes multiple shots with different exposures and combines them. This process can cause a lag, resulting in blurry photos if the camera or subject moves during capture. It also increases the storage size of the image.
The Moto Z camera has a few different modes to capture your favourite moments, including Professional Mode, Slow Motion, Panorama, Video, and Photo.
Charging the iForce Camera: A Step-by-Step Guide
You may want to see also
Frequently asked questions
To change the focus location, drag the focus ring.
Slide the control on the focus ring to lighten or darken the shot.
Wipe the lens clean with a soft, dry cloth and retake the photo.