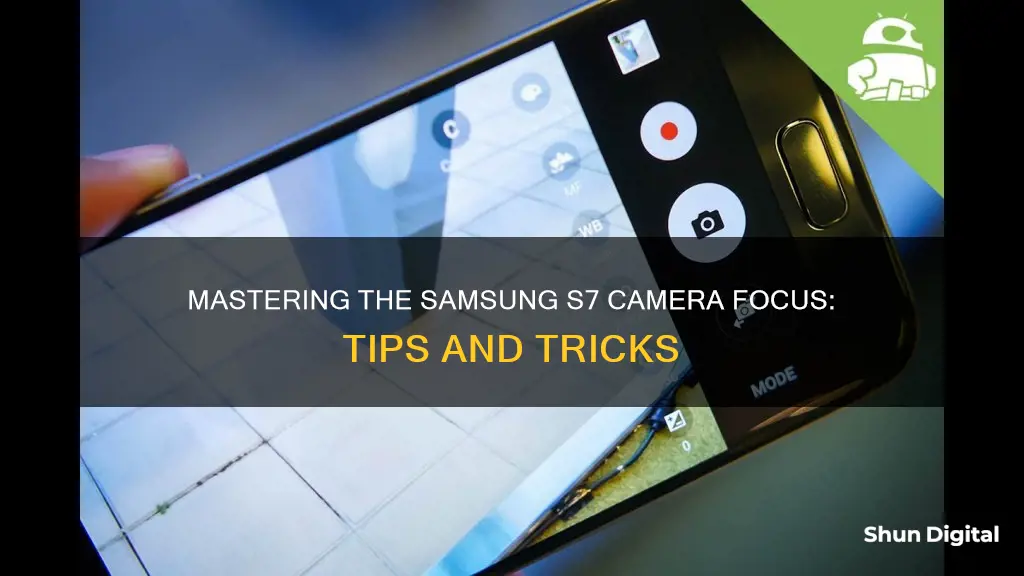
The Samsung Galaxy S7 is a highly-rated camera phone, packed with features and functionality. However, some users have reported issues with the camera, including problems with autofocus and focus. This can be particularly noticeable when filming moving objects or when using the front-facing camera. There are several ways to improve the focus of the S7 camera, including using Selective Focus mode, adjusting settings, and troubleshooting the device.
What You'll Learn

Using Selective Focus mode
The Selective Focus mode on the Samsung Galaxy S7 allows you to make specific objects or areas stand out in your photo and tweak the focus to your liking. The mode works by taking multiple photos of your subject at varying focus levels, and then letting you change the focus of your photo after it has been saved. This is a great way to avoid blurry images, although it does take a bit more time for the camera to snap multiple shots.
- From the front screen, choose "Apps".
- In the Galaxy S7 camera preview screen, choose "MODE".
- Choose "Selective focus".
- Select a location on the screen where you would like your camera to focus.
- Once the image has been taken, choose "Preview".
- Select the picture to change the focus according to your preference. You have three options: "Near focus" for objects in the foreground, "Far focus" for objects in the background, and "Pan focus" to make the entire picture in focus.
- Choose "Save" or "Save As" to keep your work.
The entire procedure is quite straightforward, and it gives you the flexibility to easily change the focus of your photo after capturing it. This can help you create interesting visual effects and ensure that your desired subject is in focus.
Land Camera's First Steps: What Made It So Popular?
You may want to see also

Adjusting exposure
Adjusting the exposure on your Samsung Galaxy S7 is simple. The S7 is equipped with a 12-megapixel camera that has brighter scenes and vibrant colours. The fast autofocus on the dual-pixel camera often removes the need to focus manually. However, tapping the display in the camera app will bring up the exposure slider. You can then swipe up or down anywhere on the screen to adjust the exposure of the picture.
You can also lock the exposure to a particular part of the scene by placing your fingertip on the screen and holding it there for a few seconds. This overrides your phone's automatic exposure settings without having to use the complex Pro camera mode.
The Pro mode does, however, give you DSLR-type manual control of exposure, ISO, white balance, and shutter speed. This allows you to capture more accurate photos and gives you the ability to take better photos in low-light conditions.
Remember that you can adjust the exposure whenever you want to ensure an important part of your photo is exposed correctly, or when the automatic exposure settings don't bring out the image as you would like.
Focusing Axis Communications Indoor Dome Cameras: A Step-by-Step Guide
You may want to see also

Using RAW capture
RAW capture is a feature that has been introduced to smartphones in recent years, and it is available on the Samsung Galaxy S7. RAW capture is a way of accessing the raw data from the sensor in a camera. Essentially, it allows you to access the raw files after you've taken a picture.
All digital cameras capture raw data and then process it to create a JPEG image file. The reason JPEGs are the standard is that raw data files are much larger—around 20MB compared to 2-3MB for a JPEG. When you enable RAW capture, you will usually end up with two files saved—the raw data file and the JPEG.
RAW shooting offers more editing power because you have access to a file with much more data. You can edit the images before any processing has taken place, lifting the shadows, changing the white balance, tweaking the contrast and saturation, and more.
To enable RAW capture on the Samsung Galaxy S7, you need to:
- Head into MODE and select the Pro mode.
- Tap the settings dial.
- Toggle on the "Save as RAW file" option.
It's worth noting that RAW files cannot be viewed on the S7 itself. You will need to download a separate viewer app, such as Adobe Lightroom, to view and edit the RAW files.
While RAW capture offers more control, it is not necessarily the best option for every situation. RAW files are very large and can take up a lot of space on your phone. It is recommended to move them to a computer for editing and storage. Additionally, RAW files often require more editing to get a good result, so unless you are planning to edit your photos, RAW capture may be unnecessary.
Kodak Camera Charging: How to Know It's Charging?
You may want to see also

Using Pro mode
The Pro mode on the Samsung Galaxy S7 gives you DSLR-style manual control over your photography. It allows you to adjust settings such as exposure, ISO, white balance, and shutter speed, and is particularly useful for improving night-time and low-light photography.
Filters
Filters are pretty self-explanatory. They let you alter the character of the shot, and you can use custom-made presets to create your own look.
Focusing
Focusing gives you greater control over zeroing in on a subject, which is particularly useful when shooting macro close-ups. You can use a slider to alter the focus, which is great for taking ultra-close macro shots. Set it as near as possible, then use the preview screen to determine the focus as you move the phone closer to the subject.
White Balance
White balance lets you adjust the colour temperature to suit different lighting conditions, or to create weird effects. There are a handful of different presets along a vertical line to help guide you.
ISO Sensitivity
ISO dictates the level of sensitivity to available light. Turning this up makes the S7 better equipped to deal with poor lighting, but it also introduces more noise. Keep it as low as possible unless you're after a grainy look.
Shutter Speed
Shutter speed determines how fast or how long the sensor takes in light. The longer it's open, the more light the S7 gets.
Exposure
Exposure adjusts the brightness and contrast of your photo.
Night and Low-Light Shooting
The S7's Pro mode is particularly good for night and low-light shooting, thanks to its wide aperture and larger micron pixels. The quick focusing and manual controls help to capture amazing images with less noise and blur.
When shooting in low light, you don't have to crank up the ISO. The higher the ISO level, the noisier the image, so try to find a happy medium between 600 and 1600, with 600-800 being the sweet spot. Focus on the shutter speed, bearing in mind that the lower you go, the steadier your hand needs to be. If you can, use a tripod or rest the phone on a flat surface and use the timer function.
White balancing can also be effective in low-light conditions. It can saturate an image with more of an incandescent yellow or orange, which is great for candlelit scenes. If you're shooting a building lit up with blue or purple light, try shifting the white balance to a bluer tone for softer contrast.
Shooting Action and Movement
Shooting action and movement can be tricky, as you need to balance light sensitivity with shutter speed. This is easier to do in broad daylight where the camera doesn't have to struggle with capturing a well-lit scene. When shooting from a distance, adjust the manual focus to go as far as it can, then tap on what you want to focus on before shooting. If you're closer to the action, you can try autofocus or manually adjust the focus yourself.
RAW vs JPEG
The S7 can shoot in both RAW and JPEG. RAW capture is only available in Pro mode and is greyed out in the settings menu if you try to access it in Auto mode. RAW files retain about 10 times the data of a JPEG, so the level of detail in the image is uncompromised. This gives you far more control over editing and processing afterward, but RAW files are large and will take up a lot of space on your phone, so it's advisable to move them to a computer for editing and storage.
The Evolution of First Disposable Camera
You may want to see also

Using the lens
The Samsung Galaxy S7 has a single, high-quality camera that can take shots that will beat some dedicated compact cameras in many conditions. The camera has an f/1.7 lens aperture, which gives it one of the best shallow depth of field effects seen on a phone.
The S7 has a "camera lens case" accessory that lets you attach two high-quality camera lenses—one wide-angle and one telephoto—to the phone for unique shooting possibilities. The lenses are attached to a case that you put on your phone. The case has threads around the hole that exposes the phone's camera lens, and the lenses screw into the case, ensuring a perfect fit.
The wide-angle lens is about twice the thickness of the Galaxy S7 itself. It's small enough to not be conspicuous when you're taking photos, and you can set your phone down on a table without it looking weird. The telephoto lens is roughly double the thickness of the wide-angle lens. It's too big to fit in your pocket, and it sticks out when you're using your phone normally.
The S7 also has a feature called Selective Focus, which is similar to the "fake blurry background" feature popular a few years ago. However, you can get better results by using the lens and composing your images more carefully. Make sure your subject is pretty close, and the lens will throw the background out of focus. This technique works better for nature close-ups than regular portraits.
Speco Cameras: Where Are They Manufactured?
You may want to see also


