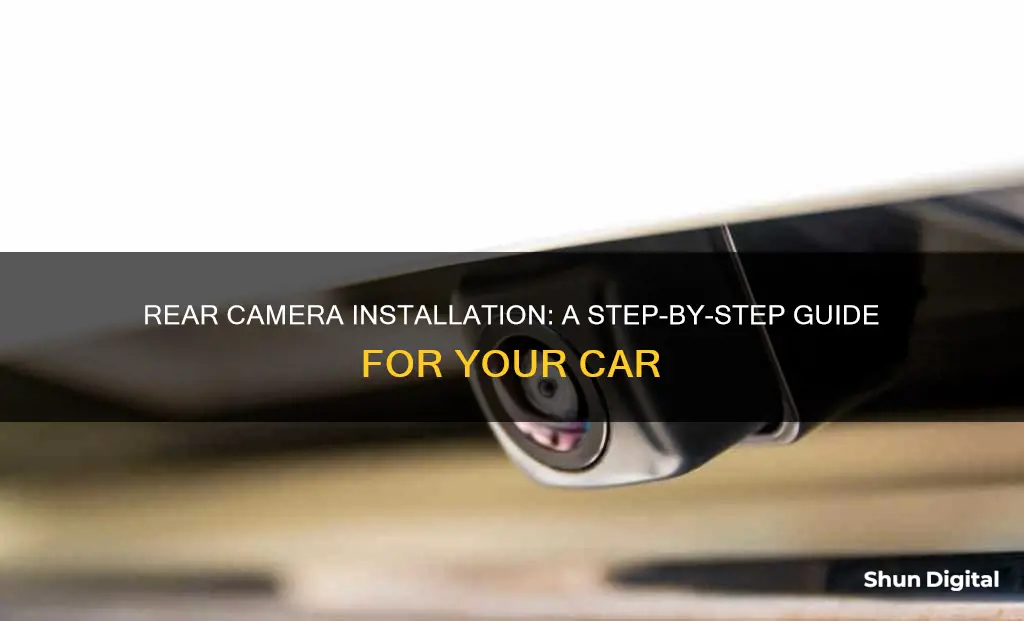
Adding a rear-view camera to your vehicle can be a great way to increase safety and prevent collisions when reversing. Also known as a backup camera, this device lets you see what's behind your car without having to turn your head. While some newer car models have these cameras as standard, they can also be installed in older vehicles. In this article, we'll guide you through the process of fitting a rear-view camera in your car, covering everything from purchasing the right equipment to the final installation and testing.
| Characteristics | Values |
|---|---|
| Purpose | To see what's behind your vehicle without having to look backwards |
| Installation | Can be complicated, especially for SUVs, hatchbacks, and crossovers |
| Camera mounting location | Behind the number plate, replacing the boot handle or reversing light, or a pedestal above the number plate |
| Screen mounting location | Dashboard, windscreen, rear-view mirror, or factory screen |
| Camera angle | A wider angle provides a better overview of what's behind and at the sides of the vehicle |
| Power source | Connection straight into the car's fuse box |
What You'll Learn

Choosing the right camera for your car
Next, you should consider whether you want a wired or wireless setup. Wireless systems are generally easier to install, but they may still require wiring the camera to the reversing light. Wired setups provide a more reliable image without the risk of interference from other wireless devices.
Another important factor is the mounting point of the camera. Cameras are typically mounted on the license plate or in the rear trim pieces, such as the bumper, trunk lid, or tailgate. Some cameras also offer universal mounts, allowing you to place them anywhere you prefer.
When choosing a backup camera, it's essential to consider the image quality, field of view, and additional features. Look for cameras with wide-angle lenses that provide a comprehensive view behind your car, eliminating blind spots. Some cameras offer on-screen guidelines and warning tones to help with parking and manoeuvring. You may also want to consider cameras with night-vision capability or high-resolution sensors for clearer footage.
Finally, think about the ease of installation. Some cameras can be mounted simply by clipping them onto the license plate, while others may require drilling holes and more complex wiring. If you're not comfortable with the installation process, you can always seek the help of a professional or refer to installation manuals and videos provided by the manufacturer.
Unlocking Creative Photography with the Sports Mode
You may want to see also

Removing the rear license plate
Firstly, examine the bolts holding the license plate to determine which tools you will need to remove them. You may need a wrench or a flathead or Phillips-head screwdriver.
If your license plate is held in place by screws, you can use a screwdriver to turn them counterclockwise and remove them. Place the screws in a safe place while you remove the old license plate.
If your license plate is held in place by bolts, you will need a wrench to loosen them by turning them counterclockwise. You may need an adjustable crescent wrench or a small wrench, depending on the size of the bolts. If the bolts are rusted, you may need to use penetrating oil, white vinegar, or an impact wrench to loosen them.
Once you have removed all the screws or bolts, carefully pull the license plate off and set it aside.
Focusing a Polaroid Land Camera 101: Tips and Tricks
You may want to see also

Drilling a hole for the camera cable
Drilling a hole for the rear-view camera cable is a crucial step in ensuring a clean installation. Here's a detailed guide on how to approach this task:
Identify the Cable Route:
Before drilling, determine the path of the camera cable. This typically involves locating the rear wiring chamber or hose by removing the trunk's interior panel or trim. Identify an unobstructed path for the cable to reach the license plate mounting area.
Choose the Right Drill Bit:
Select a high-speed twist drill bit that matches the diameter of the camera cable. For most installations, a drill bit with a diameter between 1/8 inch and 1/4 inch (0.32 cm to 0.64 cm) should be suitable. Ensure the drill bit is appropriate for drilling through the car's metal sheet or body panel.
Drill the Hole:
With the drill bit selected, carefully drill a hole in the license plate mounting area. Ensure the hole is positioned directly behind where the camera's power and video cable will be located. Make sure there are no obstructions, and the hole is large enough for the cable to fit snugly.
Use a Rubber Grommet:
To protect the cable and ensure a watertight seal, use a rubber grommet. Slip the rubber grommet onto the camera cable near the non-splitting end. Choose a grommet that fits just inside the drilled hole. This will keep the cable in place and prevent leaks.
Run the Camera Cable:
Pull the camera cable through the drilled hole into the trunk of the car. Ensure the cable is tight, and the rubber grommet is securely lodged in the hole. This will help to maintain a neat and tidy installation.
Seal and Secure the Hole:
After running the cable, you may want to consider sealing the drilled hole to prevent water ingress and corrosion. Automotive wiring grommets can be used, and it's recommended to spray the area with rust-preventative paint to inhibit rust formation.
By carefully following these steps, you can ensure that the hole drilled for the rear-view camera cable is precise, secure, and protected from the elements. This will contribute to a professional-looking installation and help maintain the integrity of your vehicle.
Activating Kingdom Hearts 3's Camera Mode: A Quick Guide
You may want to see also

Connecting the camera to the power source
Connecting the rear camera to a power source is a crucial step in ensuring its proper functioning. Here is a detailed guide on how to connect your rear camera to a power source:
Identify the Power Source:
Firstly, you need to identify a suitable power source for your rear camera. The tail lights or reverse lights of your car are a convenient option as they are already located at the rear and receive an electrical signal when the vehicle is put in reverse. This signal is essential to turn on the rear camera when reversing the car.
Understand the Camera's Electrical Needs:
Before establishing the connection, it is important to understand the electrical requirements of your specific rear camera. Some cameras have a composite video connection, requiring a separate input wire for the video signal. Others may have a multi-pin cable that combines both video and power into a single cord. Ensure you are aware of your camera's specifications to facilitate a smooth installation process.
Establish the Connection:
Now, you can proceed to connect the rear camera to the chosen power source. This typically involves running the camera's power cord into the vehicle by either drilling a hole or utilising an existing opening, such as a cable grommet. Ensure that you make your connections watertight to prevent any corrosion issues in the future.
If you are connecting to the reverse lights, you will need to strip and separate these wires. Use a screwdriver or a similar tool to expose the individual wire strands. Then, fuse the camera wires with the reverse light wires by twisting them together. Ensure that you match the positive and negative wires correctly. Wrap the connected wires with electrical tape for insulation and protection.
Test the Connection:
Before finalising the installation, it is crucial to test the power connection. Check if the camera turns on and functions as intended. Ensure that the camera's signal reaches the monitor or screen without any interference. This step helps to avoid having to redo the installation in case of any issues.
Additional Tips:
- Always refer to your camera manufacturer's instructions before establishing any electrical connections.
- Consider making the power connections inside the cabin to protect them from external elements such as rain, snow, and ice.
- If you are uncomfortable with splicing wires or altering your vehicle's electrical system, consult a professional for installation.
- Ensure a clean and well-lit workspace, and gather all the necessary tools and parts before beginning the installation process.
By following these steps and staying mindful of safety precautions, you can successfully connect your rear camera to a power source, ensuring its proper functionality and longevity.
Polaroid Camera Battery Requirements: What You Need to Know
You may want to see also

Testing the camera
Testing the rear camera is a crucial step to ensure it is functioning correctly and providing a clear view of the surroundings. Here are some detailed instructions on how to properly test the rear camera:
Step 1: Understand the Camera Functionality
Firstly, it is important to understand how the rear camera system works. The camera, mounted at the back of the car, sends a live feed to a monitor on the dashboard, providing a clear view of the area behind the vehicle when reversing.
Step 2: Inspect the Camera
Before conducting any tests, inspect the camera for any visible damage, such as cracks or tears, that could impact its performance. Ensure that the camera is securely and correctly mounted. If any issues are identified, address them before proceeding.
Step 3: Start the Engine and Engage Reverse
Turn on the car's engine and shift into reverse gear. This action should automatically activate the rear camera feed, displaying it on the dashboard monitor. If the feed does not appear, there may be an issue with the camera or its connection, and professional assistance may be required.
Step 4: Test the Camera Feed
With the engine running and the car in reverse, carefully back up and observe the monitor. Ensure that the camera feed is clear and provides a comprehensive view of the area behind the vehicle. Test the camera in various lighting and weather conditions to ensure optimal performance in all environments.
Step 5: Evaluate Additional Camera Features
Modern rear cameras often include additional features such as guiding lines, colour-coded distance indicators, and warning alerts for obstacles. Test these features to ensure they are functioning correctly and providing accurate information.
Step 6: Adjust the Camera for Optimal Performance
If the camera feed appears distorted or unclear, adjust the camera's angle and focus using its knob. This will help ensure the camera provides a precise and undistorted view of the surroundings.
Step 7: Seek Professional Assistance if Needed
If, after following these steps, the camera still does not function properly, it is advisable to consult a professional. Issues such as loose connections or faulty wiring may require specialised attention to resolve.
Polaroid Camera Battery Life: What You Need to Know
You may want to see also
Frequently asked questions
You should buy a mountable backup camera designed specifically for your vehicle. This will make it easier to install than a standard aftermarket camera.
The best place to put a reversing camera is in the middle of the vehicle, attached via a number plate bracket, or by replacing your existing boot handle or reversing light.
First, remove your rear license plate and interior trunk panel. Drill a small hole in the license plate mounting area and run your camera's power and video cable through it. Attach a bare wire power cable to your camera's power connector and strip your car's reverse light wires, splicing them with your bare wire power cable.
Before using your new camera on public roads, test it in a safe area like your driveway. If it turns on, place a large, durable object like a trash can behind the camera to see how distorted the image is.


