Copying and pasting adjustments in Camera Raw is a useful workflow hack when editing multiple photos at once. This can be done by first editing the photo inside Camera Raw and then right-clicking on the image to copy the edit settings. Next, select your next image, right-click, and paste the edit settings. This method only works if you are working with files from Adobe Bridge or if you are simultaneously opening multiple RAW files directly into Photoshop, as these processes bring up the filmstrip.
If you are working with individual images or layers in Photoshop without using the filmstrip in Camera Raw, you can still copy and paste Camera Raw settings. To do this, open the raw images you want to edit in Photoshop, edit one image as desired, and then right-click or Command + click the selected image thumbnail to copy the edit settings. Next, right-click or Command + click another image thumbnail and paste the edit settings. You can also use keyboard shortcuts to copy (Control + C on Windows or Command + C on Mac) and paste (Control + V on Windows or Command + V on Mac) the settings.
| Characteristics | Values |
|---|---|
| Software | Adobe Camera Raw, Adobe Lightroom, Adobe Photoshop |
| File Type | RAW, JPEG |
| Copy Method | Copy and Paste, Presets |
| Edit Method | Filmstrip, Individual Images or Layers |
| Edit Tools | Temperature Slider, Texture Slider, Clarity Slider, Adjustment Brush, Color Sliders |
What You'll Learn
![]()
Copying Camera Raw settings in Adobe Bridge
Adobe Bridge is a powerful tool that allows users to copy and paste Camera Raw settings from one image to another efficiently. Here is a step-by-step guide on how to copy and paste Camera Raw settings in Adobe Bridge:
- Open the raw images you want to edit in Photoshop. When you click "Open" on your file window, the Camera Raw window will open automatically.
- Edit one of the images as you would like to copy and paste to the other images.
- Ensure that the edited photo is selected – with multiple photos open, the thumbnail of the selected photo will have a white border around it.
- Now, copy the edit settings of your edited image. Right-click or Command + click on the selected image thumbnail and select "Copy Edit Settings." Alternatively, you can use the keyboard shortcut Control + C (Win) or Command + C (Mac).
- Next, select the image or images you want to paste the edited settings to by right-clicking or Command + clicking on their thumbnails. If you want to select multiple images, hold Control (Win) or Command (Mac) while clicking on the thumbnails.
- Once your selection is made, right-click or Command + click and choose "Paste Edit Settings." You can also use the keyboard shortcut Control + V (Win) or Command + V (Mac). The selected image(s) and their thumbnails will change to match the settings of the first edited image.
Additionally, Adobe Bridge offers a keyboard shortcut to copy and paste edit settings without opening Camera Raw. Here are the steps:
- In Adobe Bridge, click on a thumbnail that has had edits applied to it.
- Use the keyboard shortcut Alt+Ctrl+C (Windows) to copy the edit settings. Nothing visible will happen, but the previous photo's edit settings will be copied to the clipboard.
- Select the thumbnail image you want to paste the edits to.
- Use the keyboard shortcut Alt+Ctrl+V (Windows) to paste the edit settings. A dialog box will appear, allowing you to choose which specific edits to paste.
- In the dialog box, you can manually check and uncheck the boxes next to each attribute to refine your selection. Alternatively, use the "Subset" drop-down box to automatically select all attributes within a specific category.
- Once you have made your selections, click "OK" to apply the edits to the thumbnail.
Mounting a Battery Plate: A Guide for Cameramen
You may want to see also
![]()
Copying Camera Raw settings in Photoshop
Step 1: Open the Raw Images
Start by opening the raw images you want to edit in Photoshop. When you click "Open" in your file window, the Camera Raw window will automatically open.
Step 2: Edit an Image
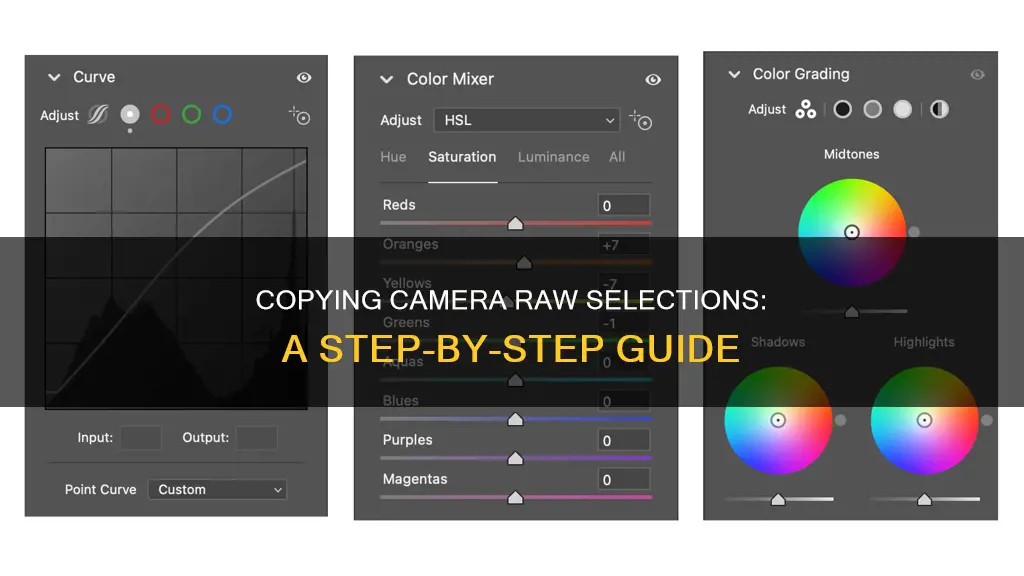
Select one of the images and make your desired edits using the various tools and tabs available in Camera Raw, such as the Tone Curve tab, Detail tab, HSL/Grayscale tab, Adjustment Brush tool, and more.
Step 3: Save the Settings as a Preset
Once you are happy with the edits, go to the "Camera Raw Settings" menu and choose "Save Settings." In the "Save Settings" dialog box, select the categories of settings you want to include in your preset. You can also choose a specific tab from the "Subset" menu to filter the options. Name your preset, keeping the location as the Settings folder, and click "Save."
Step 4: Apply the Preset to Other Images
Now that you have saved your settings as a preset, you can easily apply them to other images. Open the image in Camera Raw and go to the "Presets" tab. Click on the preset name you just created, and your saved settings will be applied to the new image.
Alternatively, you can apply the preset via the "Apply Preset" submenu in the Camera Raw Settings menu.
Copying and Pasting Camera Raw Settings
If you prefer to copy and paste Camera Raw settings instead of using presets, follow these steps:
- Open the desired images in Camera Raw.
- Edit one of the images as needed.
- Right-click or Command-click the edited image thumbnail and select "Copy Edit Settings." You can also use the keyboard shortcut Control + C (Windows) or Command + C (Mac).
- Right-click or Command-click another image thumbnail and select "Paste Edit Settings." Alternatively, use the keyboard shortcut Control + V (Windows) or Command + V (Mac).
You can also select multiple images at once by holding Control (Windows) or Command (Mac) and clicking the desired images before pasting the settings.
Copying Camera Raw Filter Between Layers
To copy the Camera Raw filter between layers, follow these steps:
- Convert the active layer to a Smart Object by going to "Layer" > "Smart Objects" > "Convert to Smart Object." Repeat this for each layer or separate image.
- Go to the Layers Panel and select the layer you want to apply the Camera Raw filter to. Then, navigate to "Filter" > "Camera Raw Filter."
- Make your desired edits in the Camera Raw window and click "OK."
- Hold Alt (Windows) or Option (Mac) and click on the Camera Raw Filter, then drag it to the new layer.
By understanding how to copy and paste Camera Raw settings, you can streamline your photo editing process and easily apply the same adjustments to multiple images in Photoshop.
Charging the Kami Doorbell Camera: A Step-by-Step Guide
You may want to see also
![]()
Copying Camera Raw settings in Lightroom
To copy Camera Raw settings in Lightroom, you can use the following keyboard shortcuts: SHIFT+CTRL+C to copy, and SHIFT+CTRL+V to paste.
- Open the raw images you want to edit in Lightroom.
- Edit one image and select it by clicking on the thumbnail, which will have a white border around it when selected.
- Copy the edit settings of your edited image by right-clicking on the selected image and choosing "Copy Edit Settings" or using the keyboard shortcut SHIFT+CTRL+C.
- Select the next image or images you want to paste the settings to by clicking on their thumbnails. You can select multiple images by holding CTRL (Windows) or CMD (Mac) while clicking.
- Paste the edit settings onto the selected image(s) by right-clicking and choosing "Paste Edit Settings" or using the keyboard shortcut SHIFT+CTRL+V.
Additionally, you can copy and paste Camera Raw settings in Adobe Bridge. Here are the steps:
- Open Adobe Bridge and select a file with the desired Camera Raw settings.
- Choose "Edit > Develop Settings > Copy Camera Raw Settings" from the menu bar or right-click on the image and select "Copy Camera Raw Settings" from the context menu.
- Select one or more files in Adobe Bridge that you want to paste the settings to.
- Choose "Edit > Develop Settings > Paste Camera Raw Settings" from the menu bar or right-click on the selected image(s) and select "Paste Camera Raw Settings" from the context menu.
- In the "Paste Camera Raw Settings" dialog box, choose which settings you want to apply.
Smoke Detector Camera Batteries: How Long Do They Really Last?
You may want to see also
![]()
Copying Camera Raw settings using the filmstrip
To copy Camera Raw settings using the filmstrip, you must first open the raw images you want to edit in Photoshop. This will automatically open the Camera Raw window. Next, edit an image in the way you would like to copy and paste to the other images. Once you are satisfied, select the photo by clicking on its thumbnail—you will know it is selected when you see a white border appear around it.
Now, right-click or Command + click the selected image thumbnail and select 'Copy Edit Settings'. Alternatively, you can use the keyboard shortcut Control + C (Win) or Command + C (Mac).
Then, right-click or Command + click another image thumbnail, and select 'Paste Edit Settings'. You can also use the keyboard shortcut Control + V (Win) or Command + V (Mac). You will notice that the image and its thumbnail will change to match the settings of the first image.
To select multiple images at once, hold Control (Win) or Command (Mac) and click the images you would like to paste the settings to before using Control + V (Win) or Command + V (Mac).
Camera Batteries: How Long Do They Really Last?
You may want to see also
![]()
Copying Camera Raw settings without using the filmstrip
To copy Camera Raw settings without using the filmstrip, you must first open the raw images you want to edit in Photoshop. Once the Camera Raw window opens, edit one image as you would like to copy and paste to the other images. Once you are satisfied, select the edited image by clicking on it – the selected photo will have a white border around it.
Next, copy the edit settings of your edited image by right-clicking or Command + clicking on the selected image thumbnail and choosing "Copy Edit Settings". You can also use the keyboard shortcut Control + C (Win) or Command + C (Mac).
Now, select the image or images you want to paste the edit settings onto by right-clicking or Command + clicking on the image thumbnail. Choose "Paste Edit Settings" to paste your copied settings. You can also use the keyboard shortcut Control + V (Win) or Command + V (Mac).
To select and paste to multiple images at once, hold Control (Win) or Command (Mac) and click the images you would like to paste the settings to before pasting.
Charging the Panasonic Lumix: How Long Does It Take?
You may want to see also
Frequently asked questions
First, edit the photo inside Camera Raw. Once edited, right-click on the image and choose "Copy Edit Settings." Now, select your next image, right-click, and choose "Paste Edit Settings" to apply the copied settings.
It is possible to save the masks and edits and then load them into a new image or layer. You can also create a custom preset in Lightroom for a similar effect.
You can copy and paste to individual images or create a preset in Adobe Camera Raw or Lightroom. The mask will adapt to the new image, allowing you to apply the same settings to any number of images.