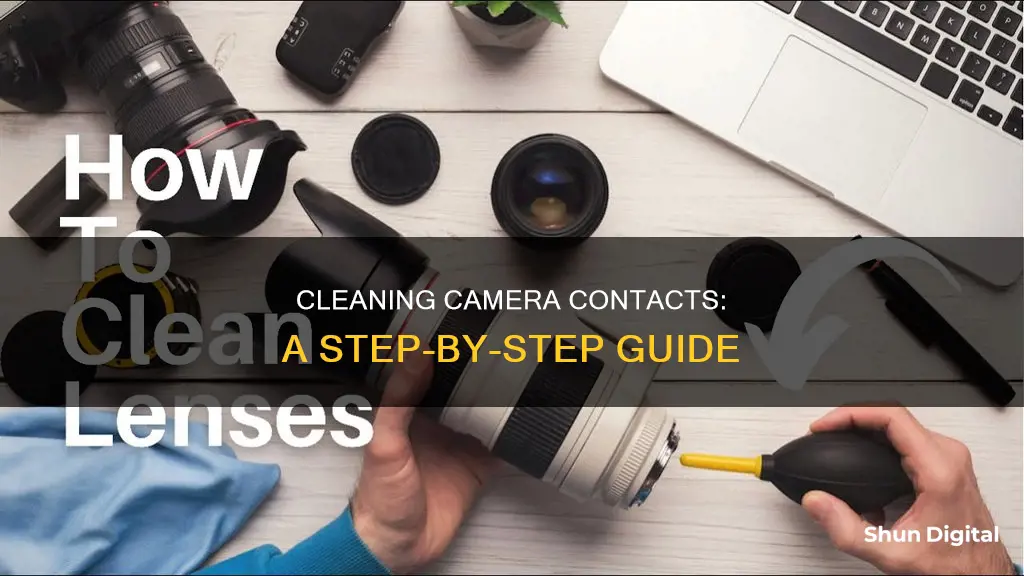
Keeping your camera lens contacts clean is essential for capturing clear, crisp images. Over time, these contacts can become dirty or corroded, leading to erratic behaviour and error messages. While it may seem daunting to clean these delicate components, it can be done safely and effectively with the right tools and techniques. In this guide, we will explore the best practices for cleaning camera lens contacts, ensuring your equipment functions optimally and produces high-quality photographs.
How to Clean Contacts on Camera Lenses
| Characteristics | Values |
|---|---|
| Removing light corrosion on contacts | Pencil eraser |
| Removing oxidation on contacts | Denatured alcohol on a cotton swab |
| Removing rubber residue | Buff lightly with a cloth |
What You'll Learn
- Use denatured alcohol on a cotton swab, ensuring the swab is tightly wound and wet
- Remove light corrosion with a pencil eraser, then blow away the dust
- Buff the lens gently with a cloth to remove any rubber residue
- Check the screws on the lens base and camera collar are snug
- If issues persist, consider a broken flex cable and bring the lens in for servicing

Use denatured alcohol on a cotton swab, ensuring the swab is tightly wound and wet
To clean the contacts on your camera lenses, one method suggests using denatured alcohol on a cotton swab. This can be effective for removing oxidisation from the contacts. It is important to wind the cotton tightly around the swab and to ensure the swab is really wet. This will help to prevent any lint being left on the contacts.
Firstly, you will need to source some denatured alcohol. This can be found in hardware stores and is a type of alcohol that has been altered to make it unfit for human consumption. It is often used as a solvent or fuel. Next, you will need to prepare your cotton swab. Take a small amount of cotton and wind it tightly around the end of a thin stick or wire. Ensure that the cotton is secure and will not come loose during the cleaning process.
Now, pour a small amount of the denatured alcohol onto the cotton swab. The swab should be wet but not dripping. Gently rub the swab on the contacts, being careful not to apply too much pressure. The alcohol will help to dissolve any oxidisation or dirt on the contacts. Go over the contacts a few times to ensure they are clean. Finally, allow the contacts to air-dry before using your camera again.
This method of cleaning camera lens contacts is relatively simple and effective. It is important to be gentle and take your time to avoid damaging the contacts. Always ensure the swab is tightly wound and wet to prevent any lint or fibres from being left behind.
GoPro Hero 6: Are Older Lenses Compatible?
You may want to see also

Remove light corrosion with a pencil eraser, then blow away the dust
To clean the contacts on camera lenses, you can start by removing light corrosion with a pencil eraser. This method is also used to remove corrosion from other metal surfaces, such as cadmium-plated hardware. The eraser will help lift away any corrosion or residue without causing further damage to the lens contacts.
Once you have a standard pencil eraser, gently rub it over the affected areas of the lens contacts. You may need to apply a bit of pressure and work the eraser back and forth to break down and lift away the corrosion effectively. This process should help remove any light corrosion or residue buildup.
After using the eraser, it is essential to blow away or brush off any remaining dust or eraser debris. You can use compressed air or a soft brush to remove any loose particles. Ensure that you do not blow or brush the dust back onto the lens contacts, as this could cause further issues.
While this method is useful for light corrosion, more extensive or stubborn corrosion may require additional steps. In such cases, you may need to use a gentle cleaning solution, such as vinegar or lemon juice, applied with a cotton swab. This will help dissolve the corrosion, making it easier to wipe away.
It is important to be gentle and careful throughout the cleaning process to avoid damaging the lens contacts or other sensitive components of the camera. Additionally, always make sure to protect your work area and wear gloves to safeguard against any potential irritants or chemicals.
Camera Lenses: Scratch-Resistant or Not?
You may want to see also

Buff the lens gently with a cloth to remove any rubber residue
When cleaning the contacts on your camera lens, it's important to take a gentle and careful approach to avoid causing any damage. After using a pencil eraser to remove light corrosion on the contacts, the next step is to buff the lens gently with a cloth. This process helps to eliminate any remaining rubber residue left behind by the eraser.
As you gently buff the lens, pay close attention to the gold contacts in the camera's mirror box. These delicate components require a soft touch to prevent any scratching or further corrosion. Use a clean, dry microfiber cloth designed for camera lens cleaning. Start by placing the cloth over the contacts and making small, circular motions. Apply light pressure to lift any remaining residue without causing abrasion.
It's crucial to use a separate cloth for buffing, ensuring it's free of any dust or particles that could scratch the lens. You can also try blowing away any loose dust particles before buffing to reduce the risk of scratching. Take your time during this process, as rushing may lead to accidental damage.
By carefully buffing the lens with a soft cloth, you can effectively remove any rubber residue left behind from the eraser. This step ensures that your camera lens is not only clean but also protected from further corrosion or damage. Remember to handle your camera equipment with care, as proper cleaning and maintenance are essential for capturing clear and crisp images.
The Myth of Camera Lenses: Curved Glasses Explained
You may want to see also

Check the screws on the lens base and camera collar are snug
To ensure your camera is in optimal condition, it is important to periodically check that the screws on the lens base and camera collar are snug. This is a crucial step in maintaining the integrity of the connection between the lens and the camera body. Over time, screws can loosen due to vibrations or frequent handling, which can lead to instability and potential damage to your equipment.
Checking the tightness of these screws is a straightforward task. First, locate the screws on the lens base and camera collar. These screws are typically found where the lens attaches to the camera body. Once located, use the appropriate screwdriver to gently tighten them. Ensure you don't overtighten the screws, as this can strip the threads or damage the screw heads.
It is recommended to perform this check regularly, especially if you frequently change lenses or use your camera in challenging environments. By keeping these screws snug, you reduce the risk of accidental loosening, which could cause your lens to become misaligned or detached from the camera body.
Additionally, when checking the screws, take the opportunity to inspect the contact points between the lens and the camera body. Ensure that these contact points are clean and free of debris, as this can also impact the stability and performance of your equipment. A gentle wipe with a soft, dry cloth can help maintain optimal connectivity.
By following these simple steps and regularly checking the screws on your lens base and camera collar, you can ensure the longevity of your camera equipment and maintain the highest image quality.
DX Lenses: Compatible with FX Cameras?
You may want to see also

If issues persist, consider a broken flex cable and bring the lens in for servicing
If you've tried cleaning your camera contacts and are still experiencing issues, it's possible that a broken flex cable is the culprit. Flex cables are flat, flexible components that connect different parts of your device, and they can be quite sensitive to damage.
Some signs that your camera's issues may be due to a broken flex cable include:
- A blurry or unfocused image on the screen
- A flickering pattern or a dim screen
- The camera is not functioning properly, especially if the damage is combined with an issue in the sliding cover
If you suspect that your camera lens has a broken flex cable, it's best to bring it to a professional for servicing. They will be able to diagnose the issue and, if necessary, replace the flex cable. This is a delicate process that requires expertise and special tools to avoid further damage to your device.
In some cases, you may be able to repair a broken flex cable yourself. This typically involves exposing the copper traces at the end of the cable and creating a new connection. However, this can be a tedious and challenging process, especially if you don't have experience with soldering or handling sensitive electronic components. Attempting to repair the cable yourself also carries the risk of further damaging your device, so it's generally recommended to seek professional help.
To prevent flex cable damage, it's important to handle your camera equipment with care and avoid applying pressure or squeezing the cables. Additionally, always use the correct tools when working on your device and store the flex cables properly when they are not in use.
Cleaning Camera Lenses and Filters: A Step-by-Step Guide
You may want to see also
Frequently asked questions
Use a pencil eraser to remove light corrosion on the contacts, then blow away the dust.
You can also use denatured alcohol on a cotton swab. Make sure the swab is tightly wound and wet to avoid leaving lint on the contacts.
Try using a pencil eraser to gently buff away any light corrosion on the contacts. If that doesn't work, the issue may be a broken flex cable inside the lens, which will need to be serviced.


