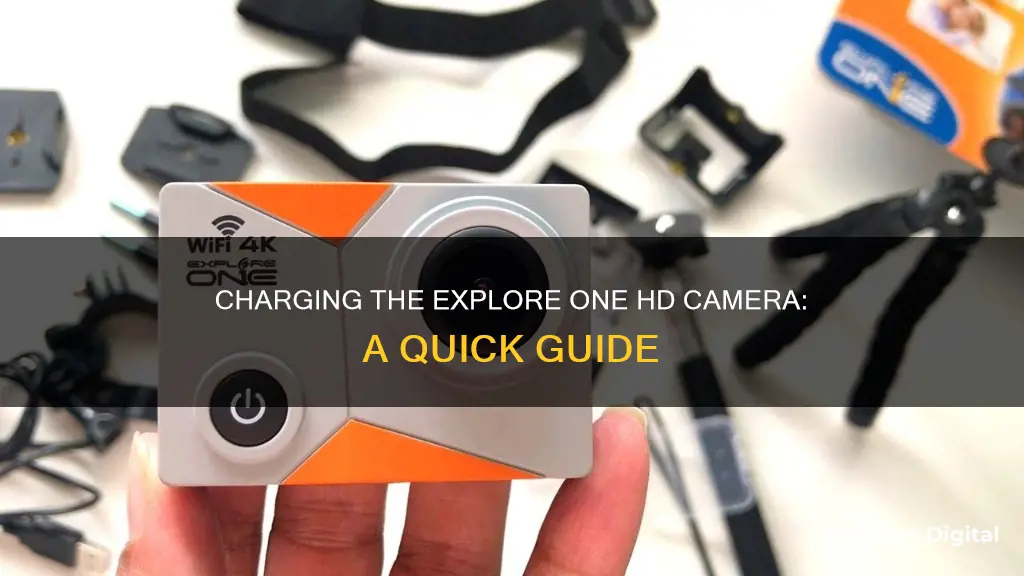
The Explore One HD camera is an affordable and compact device that allows users to capture their adventures in full HD video or stills with resolutions of up to 12MP. It comes with a range of mounting accessories and a waterproof case, making it versatile for various activities. However, some users have reported issues with battery life, Wi-Fi connectivity, and audio quality. To charge the Explore One HD camera, users can refer to the official user manual for instructions.
What You'll Learn
![]()
Charging via USB
The BRESSER ExploreOne WiFi HD Action Camera comes with a USB cable for charging. Here is a step-by-step guide on how to charge your Explore One HD camera via USB:
Locate the USB charging port on your camera. It is usually located on the side or bottom of the camera.
Using the provided USB cable, connect the camera to a power source. You can use a USB wall adapter and plug it into a power outlet, or connect it to a computer or power bank with a USB port.
Ensure that the USB cable is properly inserted into the charging port of the camera and the power source.
The camera's battery indicator should show that it is charging. If your camera has a charging light, it may turn on to indicate that charging has begun.
Leave the camera to charge until the battery is fully charged. The charging time will vary depending on the power source you are using and the capacity of your camera's battery.
Once the camera is fully charged, you can disconnect the USB cable from the camera and power source.
It is important to use only the provided USB cable or a compatible replacement to ensure safe and efficient charging. Overcharging or using an incompatible cable may damage the camera or battery. Always follow the manufacturer's instructions and guidelines for charging and maintenance to ensure optimal performance and longevity of your Explore One HD camera.
Charging Your Campark: A Step-by-Step Guide
You may want to see also
![]()
Charging with a power bank
To charge your Explore One HD camera using a power bank, you will need to follow a few simple steps to ensure safe and efficient charging. Here is a detailed guide to help you through the process:
Check Compatibility:
First, ensure that your Explore One HD camera battery is compatible with the power bank. Most power banks have standard USB ports, so confirm that your camera battery can be charged via a USB connection. Check the power bank's output specifications, usually in volts (V) and amps (A), and make sure they match or are compatible with your camera battery's input requirements.
Gather Necessary Equipment:
You will need a power bank with sufficient capacity to charge your camera battery. Additionally, you will require a USB cable and, if necessary, a USB adapter if your camera battery uses a unique connector. Ensure that you have the correct cable to connect the power bank to the camera battery securely.
Connect the Power Bank:
Take your USB cable and plug it into the power bank's USB port. If your power bank has multiple USB ports, choose the one with the highest output to facilitate faster charging.
Connect the Camera Battery:
Attach the other end of the USB cable to your camera battery. If your camera battery uses a unique connector, use the appropriate USB adapter to ensure a secure connection.
Start Charging:
Once you have made all the connections, turn on the power bank. Your camera battery should start charging immediately. Some power banks have LED indicators that will show the charging status, so you can monitor the progress.
Monitor the Charging Process:
Keep an eye on both the power bank's battery level and the camera battery's charging progress. This is important to ensure that the power bank has enough capacity to complete the charging process without running out of power itself.
Disconnect and Use:
Once your camera battery is fully charged, safely disconnect it from the power bank. Store the power bank, and you are now ready to use your fully charged camera battery!
It is important to note that charging times may vary depending on the power bank's and camera battery's capacity, as well as their supported charging speeds. Always refer to the user manuals of both devices for specific instructions and safety precautions to avoid any potential issues.
Partial Charging: Does It Damage Camera Batteries?
You may want to see also
![]()
Charging via laptop
To charge your Explore One HD camera via laptop, you will need the USB cable that came with your camera.
First, ensure that your laptop is turned on and connected to a power source. Then, locate the charging port on your camera, which is usually located on the side or bottom of the device. The charging port is typically covered by a small flap or door to protect it from dust and moisture. Gently open this flap and connect the USB cable to your camera.
Next, plug the other end of the USB cable into one of your laptop's USB ports. Your camera should begin charging immediately. Depending on your laptop model and settings, you may see a charging icon or a notification indicating that the device is charging.
It is important to note that charging times may vary depending on factors such as the age of the battery, the capacity of the battery, and the power output of the laptop's USB port. On average, it takes around 2-3 hours to fully charge an Explore One HD camera battery.
You can continue using your laptop while the camera is charging. However, to ensure optimal charging speed and performance, avoid using high-power applications or playing graphics-intensive games on your laptop during this time.
Charging Your Lumix Camera Battery: No Charger Required
You may want to see also
![]()
Charging via wall socket
To charge your Explore One HD camera via a wall socket, you will need a USB cable and a power adapter.
Make sure you have the correct USB cable for your camera. The Explore One HD Action Camera comes with a USB cable in the box, so you can use that one.
Once you have the USB cable, follow these steps:
- Connect the USB cable to the charging port on your camera. The charging port is usually located on the side or bottom of the camera, and it may be covered by a small rubber flap or door.
- Plug the other end of the USB cable into the power adapter. The power adapter is the small block that connects to the wall socket.
- Plug the power adapter into a wall socket. Make sure the socket is easily accessible and not damaged in any way.
- Leave the camera to charge. The charging time will depend on the battery capacity of your camera and the power output of the wall socket, but it usually takes a few hours to fully charge an HD action camera.
- Once the camera is fully charged, unplug the USB cable from the camera and the wall socket.
It is important to note that you should only use the power adapter and USB cable that came with your camera or one that is specifically designed for your camera model. Using incompatible or low-quality chargers can damage your camera or battery.
Additionally, always follow the manufacturer's instructions for charging your camera, and never leave it unattended while charging.
Charging the Bdpower Wi-Fi Camera: A Step-by-Step Guide
You may want to see also
![]()
Charging via solar power
Charging your Explore One HD Camera via solar power is possible and can be done in one of two ways.
The first method involves using a solar panel to charge a rechargeable battery, which then charges your camera. This means you can charge your camera even when there is no sunlight, as long as you've charged the battery during the day. The battery can be internal or removable, and the capacity of the battery will determine how many times you can recharge your camera before needing to use the solar panel again. It's important to note that the power of the solar panel will determine how quickly the internal battery is charged.
The second method involves charging your camera directly from a solar panel, usually via a 12V cigarette lighter plug adapter socket, similar to charging a device in a car. Folding and rollable solar panels are available with a cigarette lighter socket attachment, but you may need to purchase a separate adapter for your specific camera model.
When charging via solar power, it's important to remember that direct sunshine on the surface of the panel is required to produce the maximum-rated power. Conditions such as overcast skies, shadows, improper mounting angle, or short winter days will reduce the solar panel's output.
Additionally, it's worth noting that some solar chargers come with a set of connectors to fit directly into your device, but compatibility issues may arise, especially with newer models.
By following these instructions and considering the factors mentioned, you can effectively charge your Explore One HD Camera via solar power.
Charging Your Camp Snap Camera: A Quick Guide
You may want to see also
Frequently asked questions
The Explore One HD Camera can be charged using a USB cable.
The time it takes to charge the Explore One HD Camera will vary depending on various factors such as the charging current and the capacity of the battery.
It is generally not recommended to use the camera while it's charging as it may damage the battery or the device itself.
The Explore One HD Camera uses a rechargeable lithium-ion battery.