The iPad camera automatically sets the focus and exposure before you take a photo, and face detection balances the exposure across multiple faces. However, you can manually adjust the focus and exposure by tapping the screen to reveal the automatic focus area and exposure setting, then tapping where you want to move the focus area. You can also adjust the exposure by dragging up or down next to the focus area. To lock your manual focus and exposure settings for future shots, touch and hold the focus area until you see AE/AF Lock.
| Characteristics | Values |
|---|---|
| Adjust focus and exposure | Tap the screen to reveal the automatic focus area and exposure setting. Tap where you want to move the focus area. Drag up or down to adjust the exposure. |
| Lock focus and exposure settings | Touch and hold the focus area until you see AE/AF Lock. Tap the screen to unlock settings. |
| Use a grid to straighten your shot | Go to Settings > Camera, then turn on Grid. |
| Save camera settings | Go to Settings > Camera > Preserve Settings. |
| Adjust shutter volume | Use the volume buttons on the side of your iPad. Or, swipe down from the top-right corner of the screen to open Control Center, then drag. |
| Mute shutter sound | Press and hold the Volume Down button. Or, use the Ring/Silent switch if your iPad has one. |
| Turn Scene Detection off and on | Go to Settings > Camera, then turn off Scene Detection. |
| Turn Lens Correction off and on | Go to Settings > Camera, then turn off Lens Correction. |
What You'll Learn
![]()
Tap the screen to reveal the focus area
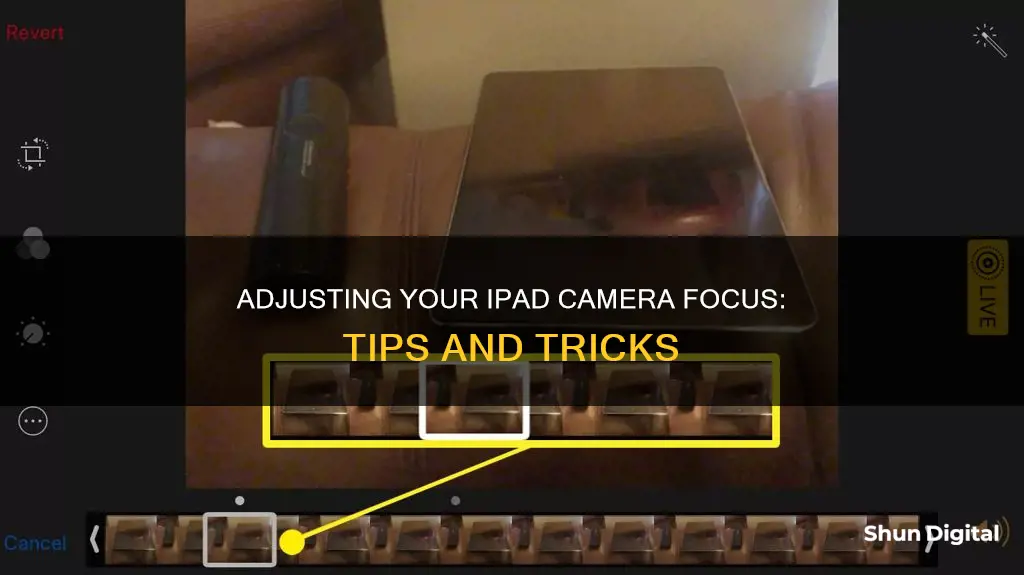
To adjust the focus on your iPad camera, you must first tap the screen. This will reveal the automatic focus area and exposure setting.
Tapping the screen is the first step in manually adjusting the focus and exposure of your iPad camera. The iPad camera will automatically set the focus and exposure, and face detection will balance the exposure across multiple faces. However, if you want to manually adjust the focus, you must start by tapping the screen.
Tapping the screen will reveal the automatic focus area, and from there, you can adjust the focus to your liking. You can tap where you want to move the focus area and drag up or down next to the focus area to adjust the exposure.
If you want to lock your manual focus and exposure settings for upcoming shots, you can touch and hold the focus area until you see AE/AF Lock. To unlock the settings, simply tap the screen again.
The Evolution of Cameras: A Historical Perspective
You may want to see also
![]()
Tap where you want to move the focus
To adjust the focus on your iPad camera, first, tap the screen to reveal the automatic focus area and exposure setting. Then, tap where you want to move the focus area.
If you want to focus on the foreground, tap on something close to the camera. If you want the background in focus, tap on a subject in the background. If the objects and people are at a similar distance from you, you can rely on the autofocus. However, if you have something very close and something else somewhat distant, you can definitely affect what's in focus.
You can also lock your manual focus and exposure settings for upcoming shots. To do this, touch and hold the focus area until you see AE/AF Lock. To unlock the settings, tap the screen again.
Charging Waterproof Double-Screen Cameras: A Step-by-Step Guide
You may want to see also
![]()
Drag up or down to adjust exposure
To adjust the focus and exposure of your iPad camera, start by tapping the screen to reveal the automatic focus area and exposure setting. Then, tap where you want to move the focus area.
Now, here comes the crucial part: drag up or down to adjust the exposure. Sliding up will make the photo lighter, while sliding down will make it darker. This simple gesture allows you to fine-tune the lighting of your image, ensuring that you capture the perfect shot.
If you want to lock in your manual focus and exposure settings for subsequent photos, simply touch and hold the focus area until you see the "AE/AF Lock" indicator. To unlock the settings, just tap the screen again.
By understanding how to adjust the exposure by dragging up or down, you can now manipulate the lighting of your photos with precision. This technique can help you create images that are either brighter or darker, depending on your artistic vision and the lighting conditions.
Charging Your Canon Camera Battery via USB: How Long?
You may want to see also
![]()
Lock manual focus and exposure settings
Locking the manual focus and exposure settings on your iPad is a useful feature when taking a series of images of the same scene. It is also helpful when taking shots in low-light conditions or in bright sunlight.
Tap the screen
Before you take a photo, the iPad camera automatically sets the focus and exposure. To manually adjust the focus and exposure, tap the screen to reveal the automatic focus area and exposure setting.
Tap the desired focus area
Tap where you want to move the focus area. This can be a close-up item or something in the background. The iPad will focus where you tap for a clearer picture or video.
Adjust the exposure
Next to the focus area, you will see a small sun icon. Tap this icon and slide your finger up or down to adjust the exposure.
Lock the manual focus and exposure settings
To lock your manual focus and exposure settings, touch and hold the focus area until you see the message "AE/AF Lock" (AE = Automatic Exposure, AF = Automatic Focus). This locks the settings for upcoming shots, allowing you to move your iPad to another location while maintaining the same exposure.
Unlock the settings
To unlock the settings and adjust for a new scene, simply tap the screen again.
How to Pay Traffic Camera Tickets in Rhode Island
You may want to see also
![]()
Turn on Grid to display a grid on the camera screen
To display a grid on your iPad camera screen, you need to adjust your settings.
First, open the Settings app on your iPad. Then, scroll down and tap "Camera". From there, you should see a "Grid" option, which you can toggle on.
Now, when you return to your Camera app, you will see a faint grid over the capture frame. This grid will help you to straighten and compose your shot, and can be used to create more balanced and professional-looking images.
The rule of thirds is a simple photography rule that can be applied using the grid. This rule suggests that important elements of the image should be placed along the lines or at their intersections. The grid is made up of nine squares of equal size, and the horizon line of your photo should line up with the top or bottom horizontal line.
Best Non-Chinese 4K Cameras for Your M1 Mac
You may want to see also
Frequently asked questions
To manually adjust the focus and exposure, follow these steps:
- Tap the screen to reveal the automatic focus area and exposure setting.
- Tap where you want to move the focus area.
- Next to the focus area, drag up or down to adjust the exposure.
To lock your manual focus and exposure settings for upcoming shots, touch and hold the focus area until you see AE/AF Lock. To unlock the settings, tap the screen.
The iPad camera is off-axis, so unless you are looking directly at the camera, your gaze will never appear to be in its direction. To minimise this effect, you can try to position the iPad's front camera so that it is more in line with your eyes' line of sight.