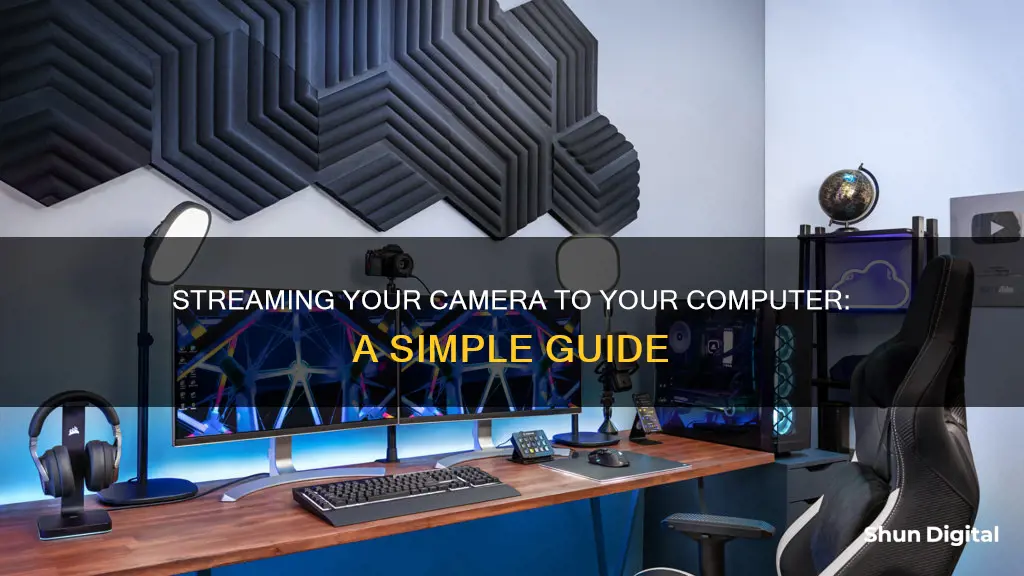
Streaming your camera to your computer can be done in a few different ways, depending on your equipment and platform. If you're streaming to YouTube, for example, you'll need to use Google Chrome and can stream directly from your webcam without an encoder. Facebook Live and YouTube Gaming are other services that don't require additional software. If you're streaming to Twitch, however, you'll need broadcasting software like OBS Studio.
To connect your camera to your computer, you can use a USB cable, a capture card, or a switcher. A USB cable is a straightforward way to transfer images from your camera to your computer through virtual camera software. However, it can only transfer images without sound. A capture card allows for higher-quality streaming and can support audio input. A switcher offers features like sound mixing and special effects, and it can record video through an HDMI interface.
| Characteristics | Values |
|---|---|
| Ways to connect camera to computer | USB Cable, Capture Card, Switcher |
| Camera manufacturers with webcam software | Sony, Canon, Nikon, Fujifilm, Panasonic |
| Streaming services | Twitch, YouTube, Facebook |
| Streaming software | OBS Studio |
| Browsers | Google Chrome |
What You'll Learn

Connect your camera to your computer with a USB cable
To connect your camera to your computer with a USB cable, you'll need to ensure you have the correct USB cable and a computer with an open USB slot. Most point-and-shoot cameras use mini-USB connectors, so be sure to check that your USB cable has the correct connector for your camera. Your camera manufacturer should have included the correct USB cable in the box. If not, you may need to purchase one.
Once you have the correct cable, follow these steps:
- Ensure your computer is powered on.
- Turn on your camera. This will usually be done with a dial near the top of the camera, but this may vary depending on your camera model.
- Plug the small end of the camera's cable into your camera. The port may be hidden under a plastic flap, which may say something like "Video Out".
- Plug the other end of the USB cable into your computer. The USB end is rectangular and should fit into a port on the side of your computer. Ensure that the hollow side of the USB end is facing up.
- Wait for your camera's drivers to install. If it's your first time connecting your camera, this may take a few minutes.
- A pop-up window should appear, asking what you want to do with the device. You can choose to import photos, open a folder, or launch a software.
Now you have successfully connected your camera to your computer and can begin transferring photos, editing videos, or using your camera as a webcam.
The Evolution of Camera Straps: Materials and More
You may want to see also

Use a capture card to connect your camera to your computer
Using a Capture Card to Connect Your Camera to Your Computer
A capture card is a device that allows you to record and stream games or other content from your video game consoles, computers, or cameras. It is a useful tool for streamers who want to share their gaming experiences with online audiences, as it can record, encode, and transmit video and audio data. This helps to ensure that your streaming setup can run smoothly without overworking your system.
There are two main types of capture cards: internal and external. Internal capture cards are installed directly into the computer, while external capture cards are small and portable, connecting to your computer via USB or other cable types.
To use a capture card to connect your camera to your computer, follow these general steps:
- Internal Capture Card Setup: Shut down your computer and disconnect any cords attached to the CPU. Open the CPU casing and locate an empty PCI slot on the motherboard. Plug the capture card into the PCI slot and secure it in place. Reattach the CPU casing and cables, then turn on your computer. Install any necessary drivers and software for the capture card.
- External Capture Card Setup: Decide on your primary device (computer or gaming console). Take an HDMI cable and connect one end to the "IN" port on the capture card, and the other end to the "OUT" port on your primary device. Take a second HDMI cable and connect one end to the "OUT" port on the capture card, and the other end to the "IN" port on a display device, such as a monitor or TV. Use the provided USB cable to connect the capture card to your computer. Install any necessary drivers and software.
Once your capture card is set up, you can use streaming software like OBS Studio to configure your streaming settings and start broadcasting your camera's footage to your computer.
Examples of Capture Cards
- Elgato HD60 S: This capture card is mobile and does not require installation on the motherboard. It supports streaming at 1080p and 60 FPS.
- AVerMedia Live Gamer Portable 2 Plus: This capture card can capture footage onto itself using a MicroSD card slot, allowing for PC-free streaming. It also supports normal streaming via a connection to a computer.
- Elgato HD60 PRO and 4K60 PRO: These capture cards require installation on the motherboard and offer higher streaming resolution and bitrate.
The Kodak Tourist2 Camera: A Vintage Snapshot
You may want to see also

Use a switcher to connect your camera to your computer
A switcher is a device that allows you to connect your camera to your computer and stream video and audio. It has several features such as sound mixing, special effects, and the ability to record video, which are essential for live streaming. When choosing a switcher, opt for one with an HDMI interface, as it will enable you to connect your camera and begin streaming easily.
To use a switcher, follow these steps:
- Connect your camera to the switcher: Use an HDMI cable to connect your camera to the HDMI interface on the switcher. This will allow you to transmit both video and audio signals through a single cable.
- Set up your audio source: Decide whether you want to connect the microphone to your camera or directly to the switcher. The switcher has a mixing function and can accept audio input through the HDMI connection.
- Obtain your live streaming address: Get the streaming address for the live room where you plan to stream. This address will be used to direct your stream to the appropriate platform.
- Start streaming: You can choose to stream directly from the switcher to the live room or connect the switcher to your computer using a USB cable. If you use a USB cable, ensure it is connected directly to the computer's port to avoid video lag and connection issues.
- Adjust your settings: To ensure the best quality, match the resolution output of the switcher to the capabilities of the live streaming service you are using. For example, if you are streaming on Zoom, set your video resolution to 720p, as Zoom's maximum output is limited to this resolution.
Understanding Time-Lapse Mode on Trail Cameras
You may want to see also

Use OBS Studio to encode your stream
OBS Studio is a free and open-source software for streaming and recording highly powerful and easy-to-use videos. It is one of the most common software for beginners in live streaming. It is an invaluable resource for anyone looking to maintain exceptional video recording quality in the content they create. OBS, or Open Broadcaster Software, makes the technical side of streaming simpler to manage.
Encoding video with OBS is an important step to have quality recording and streaming content that is successfully delivered to the viewers. OBS Studio comes with encoder presets to make recording videos in high quality simple. This preset uses the same settings as the streaming video encoder, allowing you to record the same quality as your stream.
- In the OBS Setting window, the first tab is the General settings, where you can choose the OBS application theme, such as dark mode, and enable the System Tray for better accessibility.
- In the Output tab, you can choose between Simple and Advanced for the Output Mode. In Simple Mode, you set the format of the recording files, the location to store the files, and the recording quality. In Advanced Mode, you can edit the Video Bitrate and Encoder Settings.
- The Recording Path is where you want to store the video files after recording and encoding.
- The Recording Quality option determines the size and quality of the recording. OBS provides four options: Same as stream (default setting); High Quality, Medium File Size; Indistinguishable Quality, Large File Size; and Lossless Quality, Tremendously Large File Size.
- The Recording Format dropdown offers several options, including .flv, .mp4, .mov, and .mkv. The two most common formats are .flv and .mp4.
- In the Output Mode dropdown, choose Advanced to access more specific settings.
- The Encoder dropdown defines how the bitrate is controlled. The two main options are CBR (Constant Bitrate) and VBR (Variable Bitrate). CBR is recommended when using OBS for both recording and streaming, as it keeps the bitrate stable, making it more accessible for viewers with varying internet quality. VBR is the better choice for pure recording purposes, as it prioritises video quality without sacrificing livestreaming quality.
- The Bitrate and Keyframe Interval should be set according to your bandwidth, frame rate, and video resolution. A bitrate range of 4000 Kbps to 6000 Kbps is suggested, and the Keyframe Interval should be set at 2, rendering a video frame every 2 seconds.
- The Audio Settings in the setting menu allow you to choose the right option for each audio input and output. The minimum recommended audio bitrate is 128 Kbps.
- The Video tab includes the Base (Canvas) Resolution, which is the resolution of your monitor, and the Output (Scaled) Resolution, which is the recording's resolution. These two can be set to match, or you can lower the output resolution to reduce CPU usage while maintaining decent video quality.
Leica Cameras: Where Are These Premium Devices Manufactured?
You may want to see also

Use Facebook Live Stream to stream your camera to your computer
Streaming your camera to your computer can be done in a few ways, and one of the most popular methods is by using Facebook Live Stream. This feature allows users to broadcast real-time video directly to Facebook, engaging their audience and building relationships with viewers. Here is a step-by-step guide on how to use Facebook Live Stream to stream your camera to your computer:
Step 1: Connect Your Camera to a Signal Converter
Use an HDMI or SDI cable to connect your camera to a signal converter box. This creates a bridge between your camera and your computer. Ensure you don't use a USB cable as it may cause inconsistencies in the video signal.
Step 2: Confirm the Signal Connection
After establishing the connection between your camera and the signal converter, confirm that the signal is being transmitted from your camera to your computer. Open the live streaming software on your laptop to proceed to the next step.
Step 3: Log in to Facebook and Obtain Stream Key and Server URL
Open the Facebook application on your device. Look for the Stream Key and Server URL, which you will need to input into the live streaming software. This step is crucial for connecting your stream to Facebook.
Step 4: Configure Stream Settings on Facebook
On Facebook, you will have the option to select where you want to go live, such as your profile, a Page, a group, or an event. Additionally, you can add a description, tag friends, add your location, and include feelings or activities. You can also configure various settings and features to enhance your stream, such as polls, questions, or graphics.
Step 5: Start Live Streaming
Once you have completed all the previous steps and are satisfied with your setup, it's time to go live! Click the "Start Live Video" or "Go Live" button to begin streaming your camera to your computer via Facebook Live Stream.
Additional Tips:
- Ensure you have a strong internet connection to avoid streaming failures.
- Test your setup before going live to work out any technical issues.
- Use a wired connection if possible, as it tends to be more reliable than WiFi.
- Consider using additional equipment, such as a tripod, lighting, and an external microphone, to enhance the quality of your stream.
- Facebook Live Stream also offers various interactive features like Live Polls, Featured Links, Live Comment Moderation, and more, which can enhance viewer engagement.
- Remember to monitor comments and engage with your audience during the live stream.
By following these steps, you will be able to successfully use Facebook Live Stream to stream your camera to your computer and connect with your audience in real time.
Powering Wireless Surveillance Cameras: What's the Source?
You may want to see also
Frequently asked questions
To stream your camera to your computer, you will need a compatible PC or laptop, an installed streaming software, a USB-to-HDMI video capture device (not an adapter), and a stable internet connection.
First, prepare your device and launch the streaming software. Second, connect the HDMI cable to the camcorder HDMI output, and then plug the other end into the HDMI input of the capture device. Third, connect the video capture device to your PC using a USB cable. Next, turn on the camera and open the streaming software on your computer to set the video preview. Ensure that the software recognizes the video capture device and the camcorder.
Live streaming with a video camera can improve video quality and allow you to capture a blurred background, utilize manual settings and autofocus, perform better in low-light conditions, and use additional accessories such as an external microphone or teleprompter.


