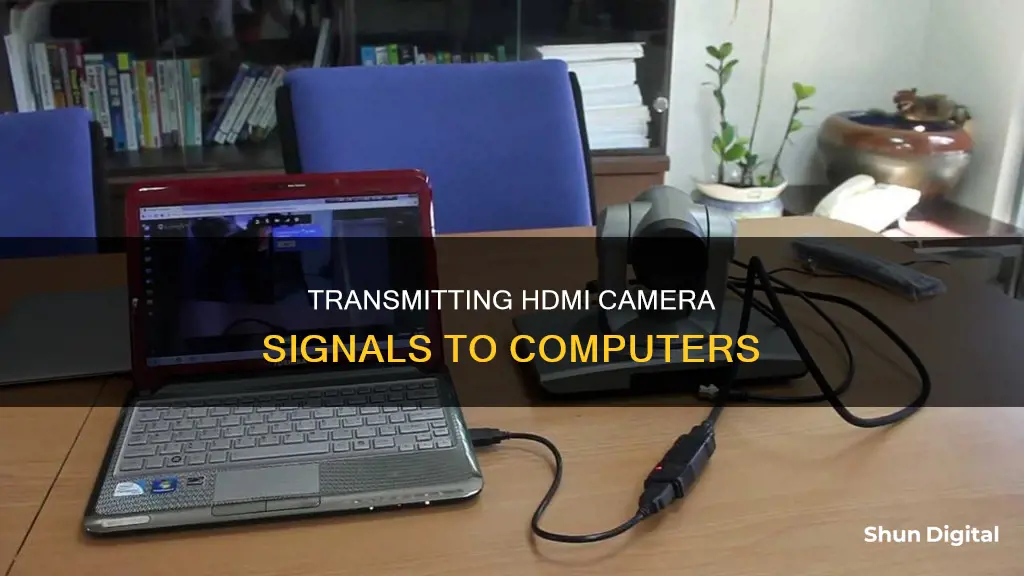
To send a signal from an HDMI camera to a computer, you will need to ensure that your camera can output a clean video signal without any UI or graphical menu elements. You will also need a video capture device, such as a dongle that attaches via USB or Thunderbolt, or a PCIe card that requires installation in a desktop or separate enclosure. Additionally, you will need the appropriate cables to connect your camera to your computer, and you may need to adjust the settings on your camera and computer to ensure compatibility.
What You'll Learn

Check your camera and computer ports
To send a signal from an HDMI camera to a computer, you'll need to ensure that your camera and computer have compatible ports. Let's take a closer look at what you need to do:
Check Your Camera Ports:
First, inspect your camera to identify its available ports. Many modern cameras are equipped with an HDMI or mini-HDMI port, which can transmit both video and audio signals. This is ideal for sending a signal to your computer. If your camera lacks an HDMI port, it may have a USB port, which can also be used for connectivity.
Check Your Computer Ports:
Next, examine your computer or laptop to determine its port configuration. For receiving the signal from your camera, you'll typically need a USB-A, USB-C, or HDMI port on your computer. If your computer only has a USB-C port, you may need an adapter to connect to your camera's HDMI port. Older computers may have USB-A ports, so ensure you have the appropriate cable or adapter.
Use an Adapter or Converter Cable:
If your camera and computer don't have matching ports, don't worry. You can use adapters or special cables to convert the signals. For example, if your camera has an HDMI output and your computer only has a USB-C port, you can purchase an HDMI-to-USB-C adapter to make the connection. These adapters are widely available online and at electronics stores.
Ensure Your Camera Supports the Right Output:
It's important to verify that your camera can output a clean video signal over HDMI without any UI or graphical menu elements. Most cameras from the past few years should support this feature, but older cameras may not. Check your camera's settings or consult its manual to confirm.
Get the Right Cable:
Once you've identified the ports on your camera and computer, you'll need the right cable to connect them. Ensure the cable is the appropriate length and that you have any necessary adapters. Longer cables can be more costly and cumbersome, while shorter cables may restrict your setup options. It's generally best to have a cable that's just the right length for your needs.
By carefully checking your camera and computer ports and using the appropriate cables or adapters, you'll be well on your way to successfully sending an HDMI signal from your camera to your computer.
Charging the Polaroid IE826: A Quick Guide
You may want to see also

Connect your camera and computer with a cable
To connect your HDMI camera to your computer with a cable, you will need to ensure your camera can output a clean video signal—one without any UI or graphical menu elements—over HDMI. You will also need to purchase a video capture device, such as a dongle that attaches via USB or Thunderbolt, or a PCIe card that requires installation in a desktop or separate enclosure.
Once you have your camera and video capture device, follow these steps:
- Gather the correct USB cable, a computer with an open USB slot, and your camera.
- Connect the USB cable to your camera. The USB connector should slide into the camera's USB slot fairly easily without needing to use a lot of force. Ensure that the connector is aligned correctly with the slot, as inserting it the wrong way can damage the cable and camera.
- Connect the opposite end of the USB cable to your computer. It should have a standard USB connector that fits into a standard USB slot.
- Power on your computer and turn on your camera. You may also need to press the photo playback button on your camera, usually marked with a play icon.
- If everything is connected correctly, your camera may display a "connecting" message on the LCD screen. On your computer screen, you should see a pop-up window with options for downloading photos.
- Follow the on-screen prompts to download or save your photos to your computer.
Note that you may need to download and install additional software for your camera to be recognised by your computer. You can usually find this software on a CD that came with your camera or on the manufacturer's website.
Traffic Cameras: Do They Issue Tickets?
You may want to see also

Use a wireless video transmission system
Wireless video transmitters have traditionally been extremely expensive, but there are now more affordable options available. One example is the Hollyland Mars 400S system, which can send and receive HDMI and SDI signals and costs just $649. The Mars 400 and 400S can send a 1080p signal at up to 60 fps with a range of up to 400 feet.
Another option is the Nyrius Aries Home+, which is a reliable performer and has a wider array of features than its competitors. It can send 1080p HDMI video and 7.1-channel audio wirelessly, through walls, up to 100 feet away. However, it is a bit more expensive than other options.
If you are looking for a budget option, the Monoprice Blackbird Pro 16049 is a good choice. It can transmit a clean 4K signal across a room but does not work through walls or other obstructions.
When choosing a wireless video transmission system, consider the range you require, the number of receivers you need to connect to, and whether you require USB power. Additionally, if you are transmitting from a computer, ensure that it has an HDMI port.
It is worth noting that a wired setup will always be more reliable than a wireless one, and wireless signals are susceptible to interference. However, wireless transmission systems offer flexibility and can save time and effort in cabling.
Pulse Remote: Focusing Camera with Precision
You may want to see also

Use a software to access your camera
Using software to access your camera can be a great way to utilise its features and functions. The software you will need depends on what you want to do with your camera. For instance, if you want to transfer photos, built-in software such as the Windows Photos app or the Mac Photos app can be used. If you want to edit videos, you can use video editing software such as Windows Movie Maker or iMovie.
If you want to use your camera as a webcam, you can use software like SparkoCam or Camera Live to turn your camera into a virtual webcam. Additionally, some camera manufacturers provide their own webcam software. For example, certain Sony cameras can be used as webcams with the Imaging Edge Webcam software. If your camera does not have manufacturer-provided webcam software, you can use third-party software such as open broadcaster software (OBS) in conjunction with an HDMI capture device.
When using software to access your camera, you may need to adjust its settings to get the best quality and performance. This may involve changing the lighting, focus, and exposure of your camera, as well as ensuring that you have the latest drivers and updates installed. It is also important to verify the compatibility of your camera and software with your computer and the platform you are using.
Olympus Cameras: High-Res Mode Options Explored
You may want to see also

Use a video capture device
To send a signal from an HDMI camera to a computer, you can use a video capture device. This is a piece of hardware that connects your camera to your computer. Normal HDMI ports on a computer are for output signals only and cannot accept an incoming signal.
There are two main types of video capture devices: USB devices and PCI Express (PCIe) devices. USB devices are external and usually connect via a USB or Thunderbolt cable. PCIe devices are internal and connect through the PCIe adapter slot inside a computer. PCIe devices are generally preferred as they are easier to use and don't require additional drivers.
- Connect the video capture device to your computer.
- Use an HDMI cable to connect the video capture device to your camera.
- Launch a screen recorder on your computer.
- Start playing the video on your camera.
- Begin screen recording on your computer.
It's important to note that you may need to adjust the settings on your camera and computer to ensure they are compatible. For example, you may need to select the correct input and output devices and adjust the resolution and frame rate.
There are various video capture devices available on the market, such as the Magewell USB Capture HDMI Plus and the BlackMagic Video Capture Cards & Devices. These devices offer different features and capabilities, so it's important to choose one that suits your specific needs.
By following these steps and choosing the right equipment, you can successfully use a video capture device to send a signal from an HDMI camera to a computer.
Browning Trail Cameras: Where Are They Manufactured?
You may want to see also
Frequently asked questions
First, check that your camera and computer have the right ports. Most digital cameras have a USB port, while some also have an HDMI or mini-HDMI port. You may need an adapter or a cable that can convert signals if your camera and computer don't have matching ports. Once you have the right ports and cables, connect your camera and computer with a cable, ensuring your camera is turned off and your computer is on. Then, turn on your camera and switch it to the appropriate mode, such as playback, PC, or webcam mode.
You may need to install Windows 10 drivers for your camera. Additionally, you can use software like SparkoCam or Camera Live to turn your camera into a virtual webcam.
Yes, wireless video transmission systems such as the Hollyland Mars 400 and 400S can send and receive HDMI signals wirelessly. These systems typically support multiple inputs and outputs, and can transmit signals over long distances without interference.
A video capture device is used to convert a video signal into a general webcam format that most apps can use. There are two basic options: dongles that attach via USB or Thunderbolt, and PCIe cards that require installation in a desktop or separate enclosure. If you're looking for a simple setup to use your camera as a webcam, a dongle is recommended.


