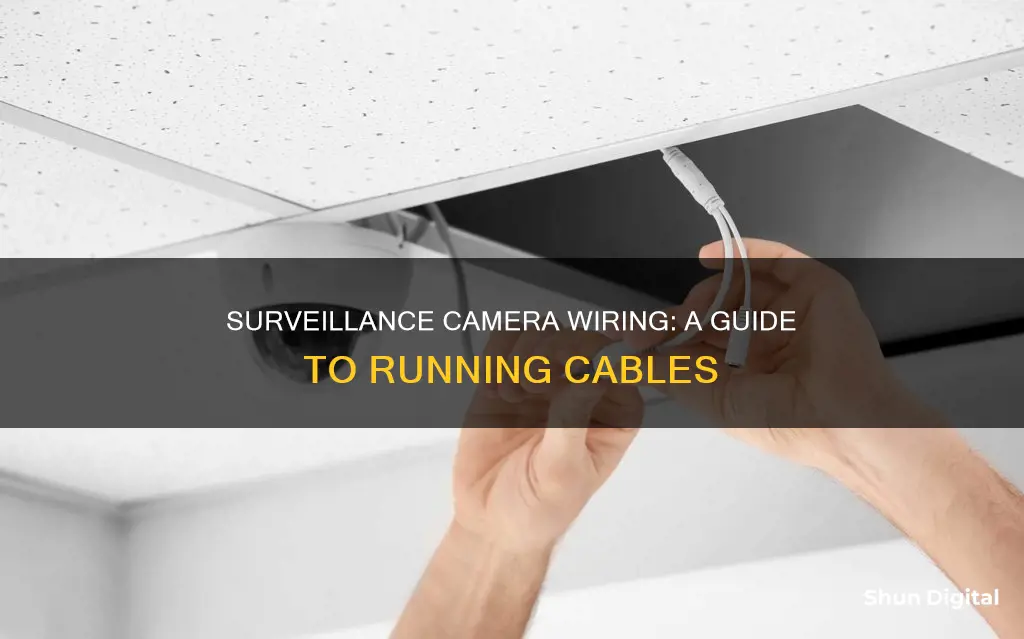
Running surveillance camera wires can be a time-consuming process, but it's important to do it properly to ensure optimal performance and longevity of your security system. The first step is to decide on the type of security camera system – common options include wired and wireless systems, as well as HD over coax and IP camera systems. Wired systems are generally recommended as they provide a more reliable connection. Once you've chosen your system, you'll need to gather the necessary tools and materials, including various types of cables, connectors, and drilling equipment.
The next step is to plan the route for your cables, taking into account the location of your cameras and the DVR or NVR box. It's important to keep cables away from heat, high voltage, and power lines to avoid interference and ensure the quality of the video signal. After measuring and cutting your cables to size, you can start drilling holes and feeding the cables through, using fish tape to guide them if needed. Finally, connect your cables to the cameras and the DVR/NVR box, taking care to label and secure the connections.
| Characteristics | Values |
|---|---|
| Types of security camera wiring | POE security camera wiring, wireless security camera wiring |
| Tools for wiring installation | Cat 5/6 security camera wires, RG-59 BNC connectors, RG-59 stripping tool, standard wire crimp tool, fish tape, power drill, spade bits, drill bits, tape, monitor, mouse, keyboard |
| Installation steps | Design central surveillance hub, turn off power, drill holes, attach wires with fish tape, run wires to destination, wire outdoor cameras, hide wires, bury wires |
| Best practices | Keep cables away from heat or high voltage, use pre-made cables, avoid exposing cables to elements, use conduit or outdoor raceway, avoid pulling cables tight around corners |
What You'll Learn

How to wire a security camera system
To wire a security camera system, you will need to identify the type of camera system you have or plan to buy. The two most common types are HD over coax and IP camera systems. The former uses RG-59 siamese coax (video/power) cables or plug-and-play two-in-one power video cables, while the latter uses CAT5/6 cables or plug-and-play CAT5 cables.
Once you have identified the type of camera system and purchased the necessary cables, you can begin the installation process. Here is a step-by-step guide:
- Figure out where you want your cameras: Consider the ease of installation and the route of the cables when deciding on camera locations.
- Prepare the camera installation: Mark the holes for the camera's cable and mounting screws. Use a power drill to drill pilot holes for the mounting screws and a bigger hole for the cable.
- Run cables to each camera location: Drill holes through walls or ceilings to feed cables to the camera locations. Use fish tape to guide the cables if needed.
- Run the cables to the DVR box: Use fish tape and a power drill to route the cables from each camera location to the DVR box. The DVR box serves as the user interface for managing the system and storing footage.
- Install the cameras: Connect the cable coming out of the hole to the camera and feed the excess back into the hole. Secure the connection with electrical tape if desired. Mount the camera using the provided screws.
- Connect everything together: Connect each cable to its port on the DVR box. Connect an external monitor, mouse, and keyboard to the DVR box.
- Set up the user interface: Follow the instructions provided with your camera system to set up the user interface, including creating a password, setting the date and time, and adjusting camera settings.
It is important to note that you should always keep security camera cables away from heat, high voltage, and power lines to avoid interference and potential damage. Additionally, when drilling holes and running cables, be mindful of the structure of your house and use appropriate tools for the type of material you are drilling through (e.g., regular power drill for wood and drywall, hammer drill for brick or masonry).
Shipping Cameras: Safe Lithium Battery Handling
You may want to see also

How to run security camera wires through walls
Running security camera wires through walls is a complicated but manageable task. Here is a step-by-step guide on how to do it:
Planning
First, you need to plan the route of your wires. Identify where you want to place your security cameras and the type of walls you will be drilling into (stucco, brick, or wood). Then, decide where you will keep your DVR or NVR (digital video recorder or network video recorder), which serves as the central surveillance hub for your camera system. The DVR/NVR should be placed in a safe area that is easily accessible for hardwiring. Attics and spaces near your internet router are ideal.
Tools
Gather the necessary tools for the job. You will need a power drill with spade and drive bits for drilling holes, and steel fish tape for feeding the wires through the walls. It is also recommended to have extra camera wires or Ethernet cables, masking tape, and an electric plastic box to act as a junction for all the camera wires.
Installation
Once you have planned the route and gathered your tools, you can begin installing the cameras. For brick walls, use the power drill to create a gutter for PVC (polyvinyl chloride) or metal conduits. Drill holes in the wall and position the conduits accordingly. These conduits will protect the camera wires and prevent water from reaching them.
For wood walls, the process is similar. Use the fish tape to pull the wires from the central hub to the camera location. It is helpful to have someone assisting you by feeding the wires through the walls while you pull them from the other end.
Connection
After installing the cameras, connect them to the DVR or NVR. Test the connections using a Tester device to ensure everything is working properly. Then, turn on the security cameras and get them connected to the DVR or NVR.
Additional Tips
- When drilling holes, make sure to leave enough space for multiple wires and future reorganisation.
- Label the ends of the cables to keep track of which camera they correspond to.
- Use security camera wire protectors, such as tubes or conduits, to protect the cables and give a neat and professional look to the installation.
- If you are running wires outdoors, use wire guards to hide and protect the cables, and conceal the wire holes with waterproof materials like silicone or duct seal.
- For long-distance wiring, consider burying the cables underground using PVC, wire guard, or metal conduit pipes.
By following these steps and taking the necessary precautions, you can successfully run security camera wires through walls and complete your surveillance system installation.
Surveillance Cameras: Can They Hear as Well as See?
You may want to see also

How to wire an outdoor camera
To wire an outdoor camera, you'll need to decide on a wired or wireless setup. Wired cameras are more stable but harder to move, while wireless cameras offer more flexibility but may have a less stable connection. Once you've chosen your camera, follow these steps:
Planning
- Map out the priority areas you want to monitor and the angles where you want to place your cameras.
- Ensure each location has a clear line of sight and is relatively protected from the elements.
- If you're using a wired camera, you'll also need to identify a power source and plan how to run the wires to the camera.
Installation
- Using a mounting template, drill pilot holes for the mounting screws and any other required components, like a larger hole for cables to exit.
- Install any mounting pins by lightly tapping them with a hammer.
- Screw the camera mount securely into the wall.
- Attach the camera to the power source, if necessary.
- Secure the camera onto the mount and adjust it to the desired angle.
- Repeat this process for each camera.
Connection
- Connect the input cable of your wired camera to a DVR box, noting which input port each camera is connected to.
- Connect the DVR output port to the input slot of a monitor.
- Ensure all components are connected to a power source and that all cables are securely connected.
Testing
- Test your camera setup to ensure it functions as intended. Check the positioning, the range of motion detection, night vision, audio, and any other features.
- Make adjustments as needed.
Charging Camera: Plugging into Computer, What's the Deal?
You may want to see also

How to hide security camera wires
There are several ways to hide security camera wires, ranging from painting the wires to match the walls to using wireless security cameras. Here are some detailed, direct, and instructive methods to help you achieve your desired outcome:
Paint the wires to match the walls
One of the easiest ways to hide security camera wires is to paint them with the same colour as your walls. You can also use cables that match the colour of your walls. This method blends the wires into the environment, making them less noticeable to intruders. Before painting, remember to clip the wires together neatly to avoid any tangles.
Use plastic tubing or casings
Plastic tubing or casings can effectively hide security camera wires. This method involves feeding the wires through a plastic tube or casing, which is then mounted on or drilled through the walls. While this option provides excellent protection from weather conditions and potential damage, it can be complex and may require professional assistance. Removing the wires in case of emergencies might also be challenging.
Hide wires in false ceilings or baseboards
If your property has a false ceiling, you can take advantage of the gap between the ceiling and the wall to hide the wires. This method ensures the wires are fully undetectable. Similarly, you can hide wires inside baseboards, which are narrow wooden boards running along the lowest part of the wall. Simply remove the baseboards, feed the wires through the gap between the wall and the floor, and then put the baseboards back in place.
Bury the wires
Burying the wires in the ground, in your porch, or in tall fences and shrubs is another effective method to hide them from view. This method provides excellent protection from intruders and the elements. However, it is labour-intensive and may require ensuring the wires are rated for underground use. Additionally, accidental cuts to the wires during future digging can be a concern.
Use a wireless security camera system
The most straightforward solution to avoid dealing with wires is to opt for a wireless security camera system. Wireless cameras are powered by batteries or solar panels, eliminating the need for messy cables and complicated installation processes. While wireless security cameras are generally more expensive, they offer a hassle-free option and are becoming more affordable.
Apeman Trail Camera Batteries: Powering Your 1080p Adventure
You may want to see also

Tools you'll need
Running security camera wires requires a variety of tools to ensure a safe and reliable installation. The specific tools you will need can vary depending on the type of camera and the layout of your property. Here is a comprehensive list of tools you may need to run security camera wires:
- Power supply box or power adapters: To provide power to the security cameras.
- Electrician's fish tape or wire snake: This tool helps guide the cables through the planned route and is especially useful for tight spaces.
- Coaxial cables (coax): These are used to transmit video and audio signals from the camera to the recording device. Ensure you have enough cable length to reach from the camera to the recording device.
- BNC connectors: These are used to connect the coaxial cable to the camera and the recording device.
- Power connectors: Used to connect the power cable to a power source, such as a power supply box or power adapter.
- Cable tester: This tool is used to test the connections and ensure that the video and power signals are transmitting correctly.
- Cable raceways or conduit: These are used to hide and protect the cables along walls or ceilings, providing a neat and professional appearance.
- Drill: A drill is necessary for creating holes in walls or ceilings through which the cables will pass.
- Cable clips: Used to secure the cables along the planned route, ensuring they are hidden and tidy.
- Silicone or duct seal: When drilling holes for cables, especially outdoors, use silicone or duct seal to fill the holes and prevent moisture or water from entering.
- CAT5/6 security camera wires: If you have an IP camera system, you will need CAT5/6 cables, also known as Ethernet cables. These cables provide both data and power transmission.
- POE injector: For longer cable runs, a POE injector is used to increase the distance of power transmission.
- RJ-45 connectors: Used to connect the ends of the Ethernet cable to the camera and the network video recorder.
- Crimping tool: This tool is used to attach the RJ-45 connectors to the ends of the Ethernet cable.
- Wire guards or conduit: When running cables outdoors, use wire guards or conduit to protect the cables from tampering and damage.
- PVC, wire guard, or metal conduit pipe: For long-distance outdoor installations, bury the cables underground using one of these materials to protect them from tampering and harsh weather conditions.
- RG-59 BNC connections: If you have an HD over coax system, you will need RG-59 BNC connections to transmit video and power signals.
- RG-59 stripping tool: Used to strip the insulation from the RG-59 cable.
- RG-59/SYV-75-5 coaxial wires: These are used to transmit video and power signals in an HD over coax system.
- Standard wire crimp tool: A necessary tool for connecting and crimping wires.
It is important to note that you may not need all of these tools, depending on the specifics of your security camera system and installation. Always refer to the instructions provided with your equipment and plan your installation carefully.
Troubleshooting Camera Focus Issues on Your G5
You may want to see also
Frequently asked questions
It is recommended to use a wire guard, PVC or metal conduits to protect the wires from tampering by both humans and animals. If you don't use conduits outside, make sure to leave drip loops to prevent water from running to the power outlets through the hole.
You will need a power drill with drive bits and spade bits, masking tape, a monitor, mouse, and keyboard. It is also highly recommended to have a friend to help out.
First, figure out where you want your cameras. Then, prepare the camera installation by marking a hole where the camera's cable will feed through, as well as holes for the mounting screws. Next, run cables to each camera location and then to the DVR box. Install the cameras and connect everything together. Finally, set up the user interface.
Always keep the cables away from heat or high voltage and never run or attach them to a hot water pipe or building power lines. Do not run camera video cables or power cables in the same conduit as power lines. Measure each cable run from the camera location to the video recorder and add 5 feet to the total to be safe.


