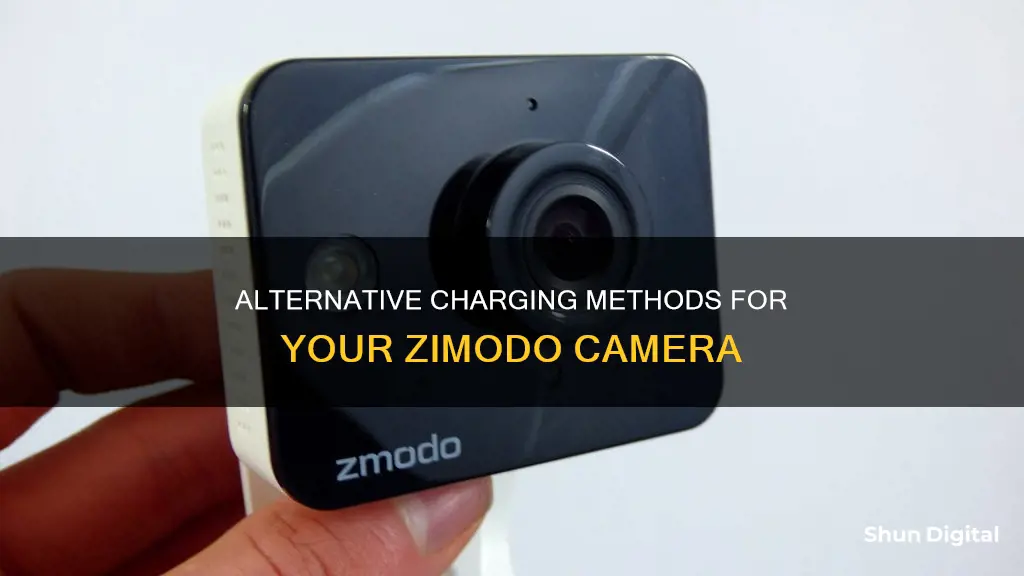
The Zmodo camera is a wireless security camera that can be set up both indoors and outdoors. The camera comes with a power adapter and cable that can be connected to any standard AC outlet. While there is no explicit mention of alternate charging methods, a user on Best Buy's Q&A forum has suggested using a 12-volt solar panel connected to a 12-volt battery and a 12-volt car charger to power the camera. It is important to note that Zmodo recommends against using extension cords or power strips without surge protection, and improper powering methods can damage the camera beyond repair.
What You'll Learn

Using a portable solar-powered charger
Yes, you can use a portable solar-powered charger to charge your Zmodo camera. This is a great option if you want to use your camera in a remote location without access to a power outlet. Here's a step-by-step guide on how to do it:
Step 1: Get the Right Equipment
First, you'll need to purchase a few items to make this setup work. Here's what you'll need:
- A 12-volt solar panel: This will convert sunlight into electricity to charge your camera.
- A 12-volt battery: The solar panel will charge this battery, which will then be used to power your camera.
- A 12-volt receptacle with pig tails: This will allow you to connect the solar panel to the battery.
- A 12-volt car charger: Look for one with a USB port, similar to the type used for charging phones.
- A USB cable: This will connect the car charger to your camera.
Step 2: Connect the Solar Panel and Battery
Once you have all the necessary equipment, you can start by connecting the solar panel to the 12-volt battery using the receptacle with pig tails. Make sure the connections are secure and that there are no loose wires.
Step 3: Set Up the Car Charger and USB Cable
Next, plug the car charger into the 12-volt receptacle. Then, take the USB cable and plug one end into the car charger, and the other end into the USB port on your Zmodo camera.
Step 4: Place the Solar Panel in Direct Sunlight
Find a spot where the solar panel will receive direct sunlight for most of the day. This could be on a windowsill, a balcony, or even mounted on a pole or tripod outdoors. Make sure the solar panel is securely positioned and won't be at risk of falling or being knocked over.
Step 5: Monitor the Battery Life
Keep in mind that the infrared night vision feature on your Zmodo camera can drain the battery quickly. If you find that the battery isn't lasting through the night, you may need to upgrade to a larger battery and a more powerful solar panel. Regularly check the battery's charge level, especially if you're using the camera in an area with limited sunlight.
Charging the Noorio Camera: A Quick Guide
You may want to see also

Powering the camera with a 12V receptacle
The Zmodo camera comes with a power adapter and cable that can be connected to any standard AC outlet. However, if you are looking for an alternative way to power the camera with a 12V receptacle, there are a few options to consider:
Firstly, it is important to note that Zmodo cameras have specific power requirements, and using incompatible power sources can damage the camera and void the warranty. Therefore, it is crucial to consult the product specifications and follow the recommended guidelines.
One option is to use a 12V DC power adapter, which can be useful for troubleshooting, manual configuration, or powering a WiFi security camera. Ensure that the output is 12V DC and center-positive. When using a 12V DC power adapter, plug the adapter into a wall socket or a surge protector. Then, connect the male 12V DC connector to the female power connector of the camera. This method is suitable when there is a power outlet near the camera, and a power adapter is more cost-effective than a PoE (Power over Ethernet) switch or injector.
Another option is to use PoE, which allows you to power the camera over an Ethernet cable. This method requires running the cable to a nearby switch or router and may need a PoE injector, depending on your setup. PoE provides a more streamlined approach by combining data and power transmission through a single cable.
Additionally, if you have a separate 12V power supply, you can consider powering the camera directly from that source. However, it is generally recommended to use PoE if available, as it simplifies the setup and reduces the number of cables required.
It is worth noting that Zmodo cameras purchased in kits come with specific power supplies and cable lengths. If you require longer cables or different power configurations, these may need to be purchased separately, following the recommended power guidelines provided by the manufacturer.
Is Your Fujifilm Camera Charging? Here's How to Know
You may want to see also

Using a battery backup
Firstly, always use a single cable to span the entire distance from your power supply to your camera. Do not connect two cables together to form a longer cable. Also, do not use extension cords or non-surge-protecting power strips. If you need to use a longer cable, it will need to be purchased separately.
If you are using a battery backup, make sure it has a built-in Automatic Voltage Regulator (AVR). This is important to ensure the correct power supply for your camera. Always connect your products to a surge protector to protect against surges, spikes, or lightning strikes. Be sure to use a surge protector that has a light to indicate that it is protecting against surges.
It is also important to note that Zmodo recommends contacting their support team by phone before powering on your product if you have any questions or concerns about powering your system. Incorrect powering of the product, even for a short time, may damage it beyond repair.
VTech Kidizoom Camera: What's in the Box?
You may want to see also

Charging via USB
The Zmodo camera comes with a power adapter and cable that can be connected to any standard AC outlet. However, if you're looking for an alternative way to charge your Zmodo camera, you can consider using a portable charger. Here's a step-by-step guide on how to charge your Zmodo camera via USB using a portable charger:
To charge your Zmodo camera via USB, you will need the following:
- A 12-volt solar panel
- A 12-volt battery
- A 12-volt receptacle with pig tails
- A 12-volt round car charger (similar to a phone charger)
- A USB cable
First, ensure you have a strong WiFi connection at the location where you intend to install the camera. The Zmodo camera requires a 2.4GHz WPA/WPA2 password-protected WiFi network, and the network name (SSID) must not contain spaces or be hidden.
Once you have the necessary equipment, follow these steps:
- Connect the 12-volt solar panel to the 12-volt battery.
- Purchase a 12-volt receptacle with pig tails and a 12-volt round car charger.
- Plug the USB cable into the charger on one end and the other end into the USB pigtail on the camera.
- If you are using infrared night vision, be aware that it can be a power drain. You may need to upsize the battery and solar panel if the camera dies during the night.
It's important to note that Zmodo recommends against using power cables longer than 165ft for their cameras. Additionally, always use a single cable to span the entire distance from your power supply to the camera, and do not connect two cables together to form a longer cable.
By following these steps, you can charge your Zmodo camera via USB using a portable charger. This provides flexibility and convenience, especially in locations without access to standard AC outlets. Remember to regularly monitor the battery status via the Zmodo app to ensure your camera is always ready for use.
Charging Camera: Plugging into Computer, What's the Deal?
You may want to see also

Using a power adapter
The Zmodo camera comes with a power adapter and cable that can be connected to any standard AC outlet to power the camera. The power adapter is included in the box.
To set up the camera, you will need a strong WiFi connection. You will also need the SSID and password for the 2.4GHz and 5GHz network bands. The internet speed should be at least 1Mbps for each camera.
Before you begin the setup process, download and install the Zmodo app on your smartphone. Launch the app and sign up for a free Zmodo account. All the devices you install will be linked to this account.
Now, power on your Zmodo security camera using the power adapter that comes with the box. Launch the app on your connected smartphone and log in to your Zmodo account. Tap on the + icon in the top right corner and select the "Add Device" option. Select the "Zink" connection method to connect your Zmodo camera to the account.
Once added, tap on the tick mark at the bottom of the screen. If you wish to add more cameras, tap the + button on the screen again to select and add them.
The Zmodo app will then walk you through some on-screen instructions to complete the setup process. Follow the prompts and select the "Tap here to begin setup" option. You will now be taken to the WiFi Settings page.
It is important to note that Zmodo provides best practices for powering your camera. These include always using a single cable to span the entire distance from the power supply to the camera and not using extension cords or non-surge-protecting power strips. Additionally, if you need to use a battery backup, ensure it has a built-in Automatic Voltage Regulator (AVR).
Charging Your Fujifilm Camera: A Step-by-Step Guide
You may want to see also
Frequently asked questions
Yes, you can power your Zmodo camera with a portable charger that is powered by a solar panel. You will need a 12-volt solar panel, a 12-volt battery, a 12-volt receptacle with pigtails, and a 12-volt car charger. Plug a USB cable into the charger on one end and the other end into the USB pigtail on the camera.
The Zmodo Snap Pro camera's battery lasts an entire season on a single charge. You can monitor the battery status via the Zmodo app.
You can monitor the battery status of your Zmodo camera via the Zmodo app.
While it is not mentioned in the Zmodo documentation, it should be possible to use a power bank to charge your Zmodo camera, as long as the power bank has the correct output voltage and current specifications.


