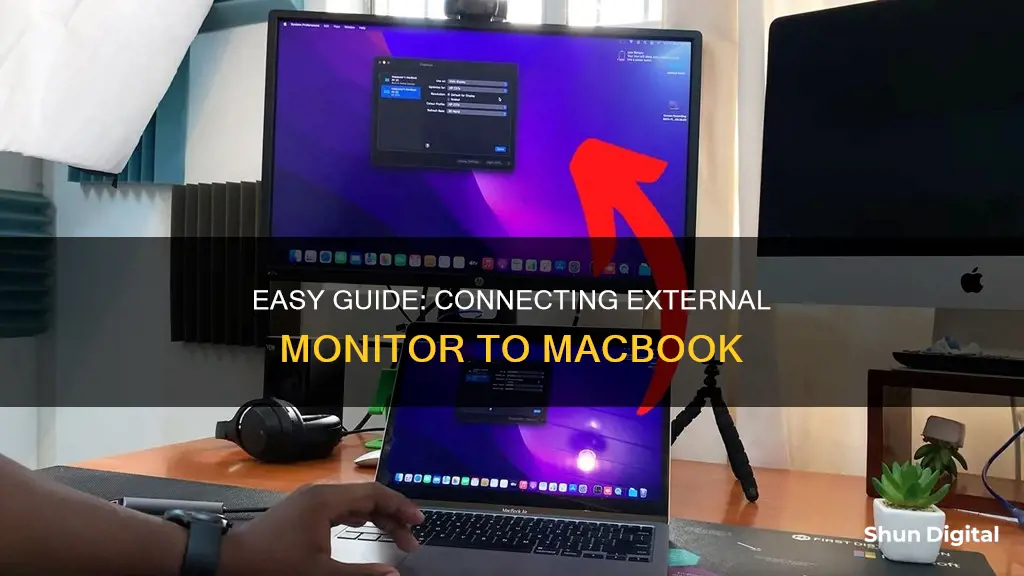
Connecting an external monitor to your Mac can be a great way to expand your screen real estate and improve your viewing experience. Whether you're a designer, photographer, or just looking for some extra screen space, an external monitor can be a valuable addition to your setup. In this guide, we'll walk you through the process of connecting an external monitor to your MacBook and provide tips on how to get the most out of your extended display. We'll also explore the different display modes available, such as mirror mode and extended mode, and help you choose the best option for your needs. So, if you're ready to take your MacBook to the next level, let's dive into the world of external monitors!
| Characteristics | Values |
|---|---|
| How to connect an external monitor to a Mac | 1. Connect the display to power and your Mac. 2. Use your display's video cable to connect the display to your Mac, such as to a Thunderbolt or HDMI port. 3. If the video cable requires a port that your Mac doesn't have, you might be able to use an adapter with the video cable or replace the video cable with one that doesn't require an adapter. |
| How to switch between external and internal screens | 1. CMD+F1. 2. Close the laptop lid. 3. Use an app such as BetterDisplay or Lunar. |
| How to set up an external monitor | 1. Choose Apple menu > System Settings, then click Displays in the sidebar (you may need to scroll down). 2. Click the name of your display on the right, then click the “Use as” pop-up menu, and choose “Extended display” or Stop Mirroring. |
What You'll Learn

Identify your Mac and monitor model ID and specs
To identify your Mac model, you can use the built-in tools provided by Apple. The simplest method is to click on the Apple menu icon in the upper-left corner of your screen and select "About This Mac". This will provide you with the serial number of your device. Additionally, you can access the "System Information" app or the "System Report" in the Apple menu to find more detailed specifications, including the model name, model identifier, and hardware overview. If your Mac doesn't start up, you can find the serial number printed on the underside of your device, near the regulatory markings, or on the original packaging next to a barcode label.
Now, to identify your external monitor's model, you'll need to follow a few simple steps. First, locate the model number of your monitor, which is typically printed along the top or bottom edge of the monitor or on a sticker at the back. Next, open a web browser and perform a search by entering the manufacturer's name and the model number. If this doesn't yield the desired results, navigate directly to the manufacturer's website and use their search function or browse their product categories to find your specific monitor model. Once you've found the correct model, you'll be able to access its specifications.
Connecting an Xbox to a Monitor: Using a VGA Cable
You may want to see also

Use the right cables to connect your Mac and monitor
To connect your Mac to an external monitor, you'll need to use the right cables. Here are the steps you can follow:
First, identify the ports available on your Mac and your monitor. On your Mac, go to Apple menu > About This Mac > Overview. Then, check the "Charging and Expansion" section on the "Support" page of Apple's website to identify the available ports for your specific Mac model. For your monitor, simply look at the back of the monitor to find its model ID and available ports.
Once you've identified the ports, you can choose the right cable to connect the two. Here are some common cable connections:
- Thunderbolt/USB-C: Connect the display to a Thunderbolt/USB-C port on your MacBook Pro, MacBook Air, iMac, Mac Mini, Mac Pro, or Mac Studio.
- DisplayPort (DP): Use a USB-C to Display Port 1.4 cable to connect to a Thunderbolt port on your Mac.
- HDMI: Plug an HDMI cable from your monitor's HDMI input port directly into the HDMI output port on your Mac. You may need to use an adapter if your Mac doesn't have an HDMI port.
- VGA: Use a USB-C VGA Multiport Adapter to connect the display to a Thunderbolt port on your MacBook Pro or iMac.
Note that monitors with Thunderbolt 3/USB-C are also compatible with Mac devices featuring Thunderbolt 4. Also, MacBook Air and MacBook Pro USB-C cables may only support power delivery, so you may need to use the specific USB-C/Thunderbolt cables offered by the monitor manufacturer or purchase an Apple Thunderbolt cable.
After connecting the display to power and your Mac with the appropriate cable, your Mac should automatically detect the external monitor. You can then configure the display settings by going to System Settings or System Preferences and clicking on Displays.
Is Your Email Being Watched? Here's How to Tell
You may want to see also

Enable a signal on the monitor
If you see a "no signal detected" or "no cable connected" message, try the following steps to enable a signal on your monitor:
- Turn your monitor off and on again.
- Change the input source: Open your monitor's on-screen display (OSD) by using its physical controls (either a joystick or a series of buttons), then navigate to Input Settings and select the correct input source option.
- Check that your cables are connected properly. Ensure the display cable is plugged into the correct port on your Mac and is securely seated in the port.
- If possible, try using a different type of cable. For example, if you've been using DisplayPort, try using an HDMI cable instead.
- Use the cable provided by BenQ in the monitor box, rather than third-party cables or a docking station.
- If none of the above steps resolve the issue, the monitor needs to be serviced. Please contact the BenQ customer service team for additional assistance.
The Ultimate Guide to Studio Monitor Speakers
You may want to see also

Mirror or extend your Mac display
To mirror or extend your Mac display, you will need to connect an external display to your Mac. This can be done by using a display's power cable and video cable to connect the display to a power source and your Mac.
If your Mac does not have the correct ports to connect to the display, you may be able to use an adapter with the video cable or replace the video cable with one that does not require an adapter. Once your display is connected and powered on, your Mac should automatically detect the display.
To mirror your display, go to the Apple menu, click System Preferences, then click Displays. From here, you can click the Arrangement tab and select the Mirror Displays checkbox. This will show the same image on both your Mac and the external display.
To extend your display, follow the same steps as above but ensure that the Mirror Displays checkbox is not selected. This will allow you to use the external display as an extension of your Mac desktop, giving you more screen space to work with.
You can also use AirPlay to mirror or extend your Mac display to an Apple TV or HDTV. To do this, ensure that your TV is turned on and connected to the same network as your Mac. Then, click the AirPlay icon in the menu bar and select your Apple TV. If prompted, enter the AirPlay passcode on your Mac.
By following these steps, you can easily mirror or extend your Mac display to an external monitor, providing more screen space and flexibility for your setup.
Studio Monitors: FRFR or Not?
You may want to see also

Select your preferred user interface and desktop scaling
To select your preferred user interface and desktop scaling, follow these steps:
By default, your Mac will use what the operating system considers the optimal resolution for your display size. The scaling chosen will affect the size of text and icons as shown on your screen. While it is recommended to use the resolution and scaling that macOS automatically sets for you, you can manually change the resolution to increase or decrease the size of text and other visual elements.
To do this, go to the Apple menu, click System Settings, and then click Displays in the sidebar (you may need to scroll down). From here, you can select your desired user interface (UI) size.
Monitoring Home Electricity Usage: A Guide for Indian Households
You may want to see also
Frequently asked questions
First, identify your MacBook model and the available ports. Then, connect the external monitor to a power source and to your MacBook using the correct cable for the given port.
You can toggle between Mirror mode and Extended mode using CMD+F1.
Mirror mode presents the same content on both your MacBook and the external monitor.
Extended mode combines the two monitors into one large display.
You can use an app such as BetterDisplay or Lunar to disable your MacBook's built-in display. Alternatively, you can use a magnet to trick your MacBook into thinking it's closed, or you can close your MacBook and use an external keyboard and mouse.


