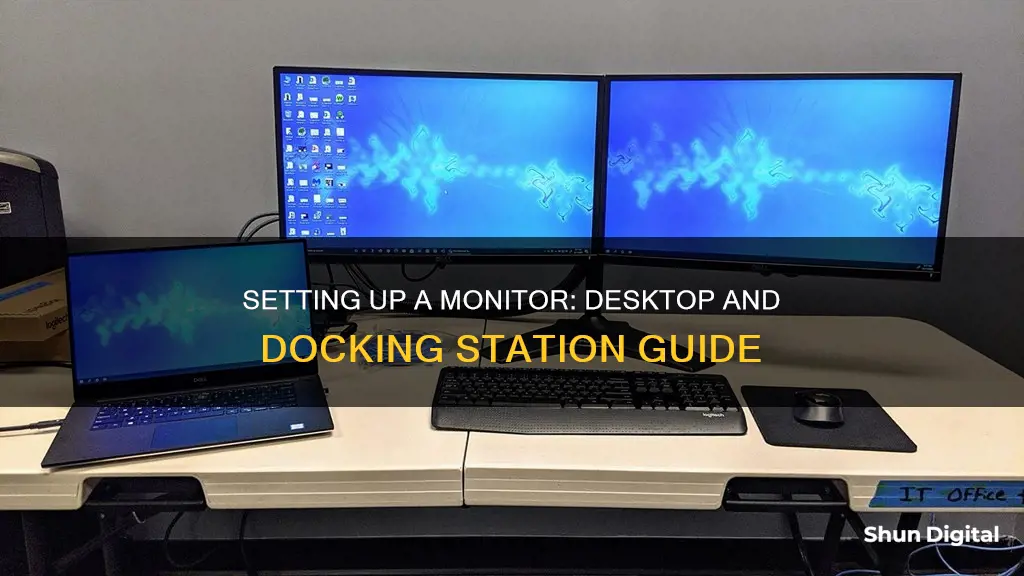
Setting up a monitor for a desktop and docking station can be a straightforward process. Docking stations are great for providing extra connectivity for your devices. They are especially useful if your laptop doesn't have enough ports for your monitor and accessories. To set up a monitor with a docking station, you'll need to identify the types of video connectors available on your devices, such as VGA, HDMI, DisplayPort, or USB-C. Once you've determined the correct connectors, follow the steps outlined in the user manual for your specific docking station to connect the monitor and adjust the display settings to your preference.
How to set up a monitor for a desktop and docking station
| Characteristics | Values |
|---|---|
| Types of video connectors | VGA, DVI, HDMI, DisplayPort (DP), USB-C, etc. |
| Video transmission methods | Digital and Analog |
| Docking station connection | USB-C, Thunderbolt 3, USB 3.0, WiGig (wireless) |
| Monitor connection | HDMI, DisplayPort, USB-C |
| Docking station power | Power adapter provided with the docking station |
| Display settings | Display style, screen resolution, color depth, display orientation, etc. |
What You'll Learn

Identify compatible docking stations and ports
When identifying compatible docking stations and ports, it is important to note the type of docking interface or port available on your computer. Different types of docking interfaces include:
- Dell E-port or D-port: This proprietary docking solution is available for Dell Latitude and Dell Precision E-series laptops. It provides efficient connectivity to all desktop devices and devices with a simple click into the docking station. Dell E-port or D-port is available mostly on Dell Latitude laptops and certain Precision mobile workstations.
- Thunderbolt 3: Thunderbolt 3 docking stations link all devices to the laptop using a single USB-C Thunderbolt cable. They extend the traditional USB capabilities with native multi-display video, audio, data, and power delivery (on select laptops) to charge the device with a single USB-C cable. The reversible connector is convenient, as there is no wrong orientation for USB-C.
- DisplayPort over USB-C: A USB-C docking station links all devices to the laptop using a single USB-C cable. This extends the traditional USB capabilities with native multi-display video, audio, data, and power delivery (on select laptops) and allows charging through a single USB-C cable. Again, the reversible connector is a convenient feature of USB-C.
- USB 3.0: Universal docking stations work with DisplayLink technology, enabling docking features over USB. This universal docking solution allows multiple monitors, audio, Ethernet, and other USB devices to be connected to laptops through USB. It works best with USB 3.0 ports on the laptop.
- WiGig (wireless): WiGig or wireless docking stations work with laptops configured with a WiGig adapter. Only select Dell laptops support WiGig technology.
When choosing a docking station, ensure that it is compatible with the ports available on your laptop. For example, a USB-C docking station may be connected to a USB-C port that supports DisplayPort over USB-C alternate mode, or a Thunderbolt 3 port on the laptop.
Removing Glass Fragments from Your Monitor Safely
You may want to see also

Connect the monitor to the docking station
To connect a monitor to a docking station, you will need to identify the type of video connector available on the monitor and the docking station. Common types of video connectors include VGA, DVI, HDMI, DisplayPort (DP), and USB-C.
Once you have identified the type of video connector on both the monitor and the docking station, you can acquire the necessary cables to connect the two. If the video connectors on the monitor and the docking station do not match, you may need to use an adapter or converter. For example, if your monitor has an HDMI connector and your docking station has a DisplayPort connector, you will need an HDMI-to-DisplayPort adapter.
After you have the correct cables or adapters, follow these steps:
Connect the monitor to the docking station:
Use the appropriate cable to connect the video connector on the monitor to the matching port on the docking station. Ensure that the cable is securely connected.
Connect the power cable:
If your monitor has a separate power cable, connect it to the monitor and to a power source, such as a wall outlet.
Connect the docking station to your laptop:
Use the cable attached to the docking station to connect it to your laptop. This is typically a USB-C cable but may also be a regular USB cable, depending on the type of docking station.
Note:
Certain types of docking stations do not supply power to the computer, so you may need to connect your laptop's power adapter as well.
Once you have completed these steps, your monitor should be successfully connected to the docking station. You may need to adjust the display settings on your laptop to ensure the monitor is functioning properly.
Monitoring Marketing Performance: Strategies for Success
You may want to see also

Connect the docking station to your laptop
Connecting a docking station to your laptop is a straightforward process, but there are a few things to keep in mind.
First, ensure that your laptop is compatible with the docking station. Docking stations come with different types of interfaces, such as USB-C, Thunderbolt 3, USB 3.0, or WiGig (wireless). Check that your laptop has the appropriate port for the docking station. For example, a Thunderbolt 3 docking station will require a Thunderbolt 3 port on your laptop.
Once you've confirmed compatibility, follow these steps:
- Install any necessary software or drivers. For example, if you have a DisplayLink docking station, install the matching DisplayLink drivers before connecting the dock.
- Physically connect the docking station to your laptop using the appropriate cable. For most laptops, this will be a USB-C connection. MacBook users can also use the Thunderbolt 3 ports.
- Plug all your peripherals, such as your mouse and keyboard, into the docking station.
- Connect the power adapter to the docking station and to a power outlet.
- If your docking station does not supply power to your laptop, you may need to connect your laptop's power adapter as well.
- Turn on the docking station.
Now your docking station should be connected to your laptop, and you can begin setting up your monitor and other devices.
Dismantling a ViewSonic LCD Monitor: Step-by-Step Guide
You may want to see also

Connect other accessories
Once you have connected your monitor, you may want to connect other accessories to your docking station. This could include peripherals such as a mouse, keyboard, and an Ethernet cable. These can be connected to the matching ports on the docking station.
If you are using a Bluetooth keyboard and mouse, you will need to pair them with your laptop. Docking stations do not have an integrated Bluetooth receiver, so if a USB dongle was provided with your wireless keyboard and mouse, connect the USB dongle to the docking station.
If you are connecting multiple monitors, you will need to acquire the correct cables to connect them to your computer. If your monitors support DisplayPort Multi-Stream Transport (MST), you can daisy-chain them using DisplayPort cables. If your monitors do not support MST, you will need to use two different kinds of video cables.
Connecting Your Switch to a Monitor Using HDMI
You may want to see also

Install DisplayLink software
To install DisplayLink software, follow these steps:
For Windows 7 to 10 operating systems, you can install DisplayLink software from Windows Update. Alternatively, you can download and install the software from the DisplayLink website. To do this, double-click on the DisplayLink executable, for example, DisplayLink_RX.X.exe. The Windows User Account Control window will open (if enabled in the OS). Click 'Yes' and the DisplayLink Core Software will install. The System Compatibility Check will then run. If this check passes, click 'Install'.
If you are installing DisplayLink's Windows 10 driver on an Arm-based SoC platform, you can use the .INF driver or install the driver from Windows Update. However, it is not currently possible to install using the .EXE or .MSI versions.
For macOS, you can download and install the software from the DisplayLink website. Select the 'DisplayLink Software Installer' to begin the installation of the DisplayLink driver on your Mac. This will run a standard Mac installer and will require a reboot once it has been completed.
For Ubuntu 20.04, the new DisplayLink driver features an improved installer that aims to perform the installation process in a single step. The installer should be started with administrative privileges:
Sudo ./displaylink-driver-5.3.0.xx.run
The installer will automatically check for dependencies and execute the apt package manager when needed. If apt update has already been called, it might ask to update the package list first or proceed directly to package installation. Permission should be granted by pressing ENTER. The packages required by the driver are dkms and libdrm-dev.
It is important to note that if permission to install the packages is not granted, the installation process will stop. In this case, you can either restart the process and allow the installation of the missing packages or install them manually by executing specific commands and agreeing to install the suggested packages.
Disassembling an ASUS Monitor: A Step-by-Step Guide
You may want to see also
Frequently asked questions
First, connect the monitor to the docking station. If your docking station has a separate power cable, connect this first, then connect your monitor via an HDMI, DisplayPort, or USB-C cable. Then, connect the power cable of the monitor. Finally, connect the docking station to your laptop.
Most laptops connect to a docking station via USB-C. For a MacBook, you can use the two Thunderbolt 3 ports. Plug the USB-C cable into your laptop, then connect your peripherals to the dock.
Identify the type of video connector available on your laptop and on the monitor. Common types include VGA, DVI, HDMI, DisplayPort, and USB-C. Use the correct type of video cable to avoid video or display issues. Then, connect the power cable to the monitor and into a wall outlet, and connect the video cable to the monitor and the computer. Finally, turn on the monitor and select the correct video source.
First, determine what video connections your computer and monitors have in common, such as VGA, HDMI, Mini DisplayPort, or DisplayPort. Then, acquire the necessary cables to connect the monitors to the computer. If your monitor supports DisplayPort Multi-Stream Transport (MST), use the correct cable to connect the DisplayPort In to the first monitor, then use another cable to connect the DisplayPort Out connection on the first monitor to the DisplayPort In connection on the second monitor. If your monitor does not support MST, simply connect a video cable from your computer to each monitor.


